Android上的测试种类
- Local Unit Test
在本机的Java VM上运行
- 优点:运行速度快,jenkins每次编译时可以运行,适合做TDD
- 缺点:不能测试android代码
2.Intrumented Test
运行的时候生成测试apk和被测应用的apk,安装到手机上运行
-优点:所有代码都能测试
-缺点:运行速度慢,不能在jenkins编译时运行

Local Unit Test##
代码位置
在src下创建test文件夹,如果测试代码是针对某个flavor和build type的,则创建testFlavorBuildType的文件夹

在gradle中设置
testCompile 'junit:junit:4.12'
生成测试代码
打开要测试类的代码,选中类的名字,ctrl+shift+T

选择要测试的方法,以及setUp和tearDown方法

生成的测试类
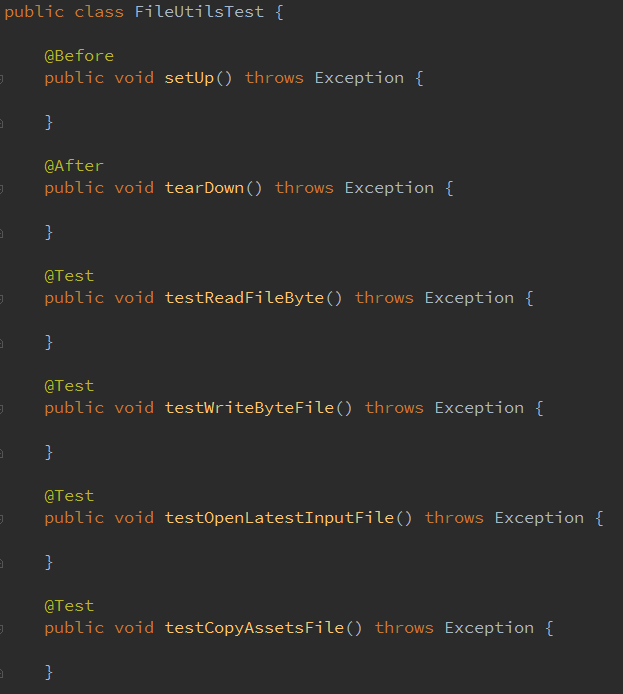
Junit 4注解
| 标注 | 说明 |
|---|---|
| @Before | 标注setup方法,每个单元测试用例方法调用之前都会调用 |
| @After | 标注teardown方法,每个单元测试用例方法调用之后都会调用 |
| @Test | 标注的每个方法都是一个测试用例 |
| @BeforeClass | 标注的静态方法,在当前测试类所有用例方法执行之前执行 |
| @AfterClass | 标注的静态方法,在当前测试类所有用例方法执行之后执行 |
| @Test(timeout=) | 为测试用例指定超时时间 |

断言
Junit提供了一系列断言来判断是pass还是fail
| 方法 | 说明 |
|---|---|
| assertTrue(condition) | condition为真pass,否则fail |
| assertFalse(condition) | condition为假pass,否则fail |
| fail() | 直接fail |
| assertEquals(expected, actual) | expected equal actual pass,否则fail |
| assertSame(expected, actual) | expected == actual pass,否则fail |
更多方法查看Assert.java的静态方法
运行测试
IDE:点击边栏的箭头可以运行整个测试类或单个方法

Command line:gradle test,运行整个unit test
测试代码覆盖率
android gradle 插件自带jacoco进行代码测试覆盖率的统计
根build.gralde配置
buildscript {
...
    dependencies {
        ....
        classpath 'com.dicedmelon.gradle:jacoco-android:0.1.1'
    }
}
模块build.gradle配置
apply plugin: 'jacoco-android'

buildTypes {
    debug {
        testCoverageEnabled = true
    }
}

//需要排除在统计之外的类
jacocoAndroidUnitTestReport {
    excludes += ['**/ApiConnectionImpl**']
}
cmd:
- gradle jacocoTestReport 生成全部flavor和buildtype的测试覆盖率报告
- gradle jacocoTestFlavorBuildTypeUnitTestReport 指定flavor和buildtype的测试覆盖率报告
生成的报告放在
module\build\reports\jacoco\jacocoTestFlavorBuildTypeUnitTestReport\html

Local unit test help libary
Hamcrest
testCompile 'org.hamcrest:hamcrest-library:1.3'
为断言提供更好的可读性(更接近与自然语言)
可读性
Junit:
assertEquals(expected, actual);
Hamcrest:
assertThat(actual, is(equalTo(expected)));
Junit:
assertFalse(expected.equals(actual));
Hamcrest:
assertThat(actual, is(not(equalTo(expected))));
失败信息更加详细
Junit
//AssertionError里没有expected和actual的信息
assertTrue(expected.contains(actual));
java.lang.AssertionError at ...
Hamcrest
assertThat(actual, containsString(expected));
java.lang.AssertionError:
Expected: a string containing "abc"
got: "def"
Assert 条件更加灵活
可以将多个assert条件通过anyOf() (或), allOf()(与)组合在一起
assertThat("test", anyOf(is("test2"), containsString("te")));
More Info
http://www.vogella.com/tutorials/Hamcrest/article.html
Mockito
testCompile "org.mockito:mockito-core:2.2.0"
Mock所需要测试的类,可以指定方法的返回值
两种方式创建mock
1.注解,这种方式必须添加MockitoRule
public class MockitoTest  {

        @Mock
        MyDatabase databaseMock;

        @Rule public MockitoRule mockitoRule = MockitoJUnit.rule();

        @Test
        public void testQuery()  {
                ClassToTest t  = new ClassToTest(databaseMock);
                boolean check = t.query("* from t");
                assertTrue(check);
                verify(databaseMock).query("* from t");
        }
}
2.代码创建mock
@Test
public void test1()  {
        //  create mock
        MyClass test = Mockito.mock(MyClass.class);

        // define return value for method getUniqueId()
        when(test.getUniqueId()).thenReturn(43);

        // use mock in test....
        assertEquals(test.getUniqueId(), 43);
}
验证方法的调用
@Test
public void testVerify()  {
        // create and configure mock
        MyClass test = Mockito.mock(MyClass.class);
        when(test.getUniqueId()).thenReturn(43);

        // call method testing on the mock with parameter 12
        test.testing(12);
        test.getUniqueId();
        test.getUniqueId();

        // now check if method testing was called with the parameter 12
        verify(test).testing(Matchers.eq(12));

        // was the method called twice?
        verify(test, times(2)).getUniqueId();

        // other alternatives for verifiying the number of method calls for a method
        verify(mock, never()).someMethod("never called");
        verify(mock, atLeastOnce()).someMethod("called at least once");
        verify(mock, atLeast(2)).someMethod("called at least twice");
        verify(mock, times(5)).someMethod("called five times");
        verify(mock, atMost(3)).someMethod("called at most 3 times");
}
Spy vs Mock
对真正对象的包装,所有调用会调用真正对象的方法,但是会记录方法调用的信息
调用方法:@Spy or Mockito.spy()
@Test
public void whenSpyingOnList_thenCorrect() {
    List list = new ArrayList();
    List spyList = Mockito.spy(list);

    spyList.add("one");
    spyList.add("two");

    Mockito.verify(spyList).add("one");
    Mockito.verify(spyList).add("two");

    assertEquals(2, spyList.size());
}
Spy也可以覆盖真正对象的方法:
@Test
public void whenStubASpy_thenStubbed() {
    List list = new ArrayList();
    List spyList = Mockito.spy(list);

    assertEquals(0, spyList.size());

    Mockito.doReturn(100).when(spyList).size();
    assertEquals(100, spyList.size());
}
The mock simply creates a bare-bones shell instance of the Class, entirely instrumented to track interactions
with it.
On the other hand, the spy will wrap an existing instance. It will still behave in the same way as the normal
instance – the only difference is that it will also be instrumented to track all the interactions with it.
依赖注入
为了方便测试,一个类对外部类的依赖需要通过某种方式传入,而不是在类的内部创建依赖
public class MyClass {
    Foo foo;
    Boo boo;

    public MyClass() {
        foo = new Foo(); //依赖在内部创建,无法mock
        boo = new Boo();
    }
}
public class MyClass {
    Foo foo;
    Boo boo;

    public MyClass(Foo foo, Boo boo) {
        this.foo = foo; //依赖注入,测试MyClass时可以传入Mock的foo和boo
        this.boo = boo;
    }
}
More Info
http://www.baeldung.com/mockito-spy
http://www.vogella.com/tutorials/Mockito/article.html
Robolectric
testCompile "org.robolectric:robolectric:3.1.1"
Robolectric is designed to allow you to test Android applications on the JVM based on the JUnit 4 framework. Robolectric is a framework that allows you to write unit tests and run them on a desktop JVM while still using Android API. Robolectric mocks part of the Android framework contained in the android.jar file. Robolectric provides also implementations for the methods while the standard Android unit testing support throws exceptions for all Android methods.
This enables you to run your Android tests in your continuous integration environment without any additional setup. Robolectric supports resource handling, e.g., inflation of views. You can also use the findViewById() to search in a view
如何使用
在test之前使用RunWith注解
@RunWith(RobolectricGradleTestRunner.class)
在@Config中配置测试参数
@Config(sdk = Build.VERSION_CODES.JELLY_BEAN(default 16),
    application = CustomApplication.class,
    manifest = "some/build/path/AndroidManifest.xml")
在测试运行时,robolectric根据你要测试的api level从maven仓库中拉取对应android api实现jar包,如果你的机器上网络不太好,可以将这些jar先下载到本地,然后启用offline模式
android {
  testOptions {
    unitTests.all {
      systemProperty 'robolectric.offline', 'true'
      systemProperty 'robolectric.dependency.dir', "somewhere you place your jar"
    }
  }
}

示例代码:
@RunWith(RobolectricGradleTestRunner.class)
@Config(constants = BuildConfig.class)
public class MyActivityTest {

        private MainActivity activity;

        @Test
        public void shouldHaveHappySmiles() throws Exception {
                String hello = new MainActivity().getResources().getString(
                                R.string.hello_world);
                assertThat(hello, equalTo("Hello world!"));
        }

        @Before
        public void setup()  {
                activity = Robolectric.buildActivity(MainActivity.class)
                                .create().get();
        }
        @Test
        public void checkActivityNotNull() throws Exception {
                assertNotNull(activity);
        }

        @Test
        public void buttonClickShouldStartNewActivity() throws Exception
        {
            Button button = (Button) activity.findViewById( R.id.button2 );
            button.performClick();
            Intent intent = Shadows.shadowOf(activity).peekNextStartedActivity();
            assertEquals(SecondActivity.class.getCanonicalName(), intent.getComponent().getClassName());
        }

        @Test
        public void testButtonClick() throws Exception {
                MainActivity activity = Robolectric.buildActivity(MainActivity.class)
                                .create().get();
                Button view = (Button) activity.findViewById(R.id.button1);
                assertNotNull(view);
                view.performClick();
                assertThat(ShadowToast.getTextOfLatestToast(), equalTo("Lala") );
        }

}
More Info
http://robolectric.org/
http://www.vogella.com/tutorials/Robolectric/article.html