友盟 push SDK 提供了基于 Objective-c 的集成方案,但是没有提供详细的和 swift 的集成方案,下面是详细的集成过程。
1. 注册友盟账户,根据guide进行就可以了。
2. 注册app develop center 账户,免费的账户应该也可以,但是没有关于密钥文件的菜单项。最好注册一个99美元的开发者账户,可以完全使用开发功能。
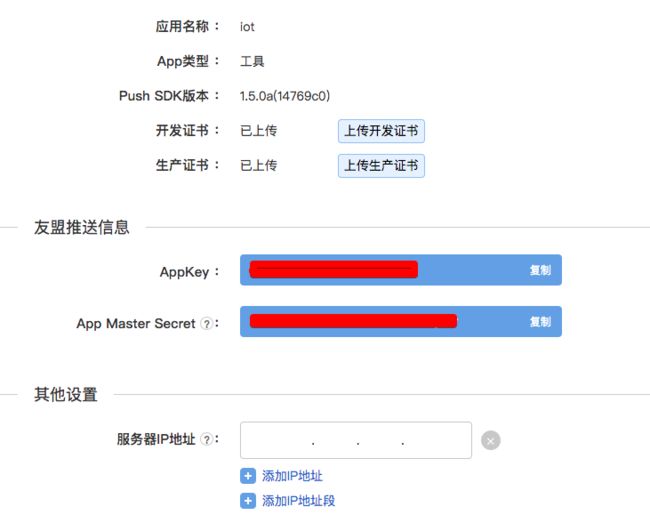
3. 根据http://dev.umeng.com/push/ios/license-configuration-guide#4 获取开发调试 push notification 需要的证书,在友盟新建 ios 应用的时候需要用到。下图是我创建的应用,开始创建的时候一直报证书错误,后来根据文档又下载了一次就好了。
4. 新建 swift 工程,根据http://dev.umeng.com/push/ios/integration 下载以及导入 sdk 。
5. 创建XXXXXX-Bridging-Header.h用来从 swift 代码中调用 Ojbective-c 的库,里面只有一行代码:
#include"UMessage.h"
6. 修改AppDelegate.swift,完整代码在最后
7. 根据友盟的集成文档测试消息接收。
importUserNotifications
importUIKit
@UIApplicationMain
classAppDelegate:UIResponder,UIApplicationDelegate{
varwindow:UIWindow?
funcapplication(_application:UIApplication, didFinishLaunchingWithOptions launchOptions: [UIApplicationLaunchOptionsKey:Any]?) ->Bool{
// Override point for customization after application launch.
//设置AppKey及LaunchOptions
let appKey ="你在友盟上创建 ios 应用分配的 appkey"
var uMsg:UMessage=UMessage()
UMessage.start(withAppkey: appKey, launchOptions: launchOptions, httpsEnable:true)
UMessage.openDebugMode(true)
varboard =UIStoryboard(name:"Main", bundle:nil)
//UMessage.addLaunch(with: window!, finish: board.instantiateInitialViewController()!)
//UMessage.addLaunch(with: self.window!, finish: board.instantiateInitialViewController()!)
//注册通知
UMessage.registerForRemoteNotifications()
UMessage.setLogEnabled(true)
varcenter =UNUserNotificationCenter.current()
center.delegate=selfas!UNUserNotificationCenterDelegate
//var types10: UNAuthorizationOptions = UNAuthorizationOptions()
center.requestAuthorization(options: [.alert, .sound, .badge], completionHandler: {(_granted:Bool,_error:Error?) ->Voidin
ifgranted {
//点击允许
}
else{
//点击不允许
}
})
returntrue
}
func applicationWillResignActive(_application:UIApplication) {
// Sent when the application is about to move from active to inactive state. This can occur for certain types of temporary interruptions (such as an incoming phone call or SMS message) or when the user quits the application and it begins the transition to the background state.
// Use this method to pause ongoing tasks, disable timers, and invalidate graphics rendering callbacks. Games should use this method to pause the game.
}
func applicationDidEnterBackground(_application:UIApplication) {
// Use this method to release shared resources, save user data, invalidate timers, and store enough application state information to restore your application to its current state in case it is terminated later.
// If your application supports background execution, this method is called instead of applicationWillTerminate: when the user quits.
}
func applicationWillEnterForeground(_application:UIApplication) {
// Called as part of the transition from the background to the active state; here you can undo many of the changes made on entering the background.
}
funcapplicationDidBecomeActive(_application:UIApplication) {
// Restart any tasks that were paused (or not yet started) while the application was inactive. If the application was previously in the background, optionally refresh the user interface.
}
funcapplicationWillTerminate(_application:UIApplication) {
// Called when the application is about to terminate. Save data if appropriate. See also applicationDidEnterBackground:.
}
funcapplication(_application:UIApplication, didReceiveRemoteNotification userInfo: [AnyHashable:Any]) {
UMessage.didReceiveRemoteNotification(userInfo)
}
}
@available(iOS10, *)
extensionAppDelegate:UNUserNotificationCenterDelegate{
// Receive displayed notifications for iOS 10 devices.
funcuserNotificationCenter(_center:UNUserNotificationCenter, willPresent notification:UNNotification, withCompletionHandler completionHandler:@escaping(UNNotificationPresentationOptions) ->Void) {
print("Userinfo\(notification.request.content.userInfo)")
varuserInfo: [AnyHashable:Any]? = notification.request.content.userInfo
if(notification.request.triggerisUNPushNotificationTrigger) {
//应用处于前台时的远程推送接受
//关闭U-Push自带的弹出框
UMessage.setAutoAlert(false)
//必须加这句代码
UMessage.didReceiveRemoteNotification(userInfo)
}
else{
//应用处于前台时的本地推送接受
}
//当应用处于前台时提示设置,需要哪个可以设置哪一个
completionHandler([.alert, .sound, .badge])
}
//iOS10新增:处理后台点击通知的代理方法
funcuserNotificationCenter(_center:UNUserNotificationCenter, didReceive response:UNNotificationResponse, withCompletionHandler completionHandler:@escaping() ->Void) {
print("Userinfo\(response.notification.request.content.userInfo)")
varuserInfo: [AnyHashable:Any]? = response.notification.request.content.userInfo
if(response.notification.request.triggerisUNPushNotificationTrigger) {
//应用处于后台时的远程推送接受
//必须加这句代码
UMessage.didReceiveRemoteNotification(userInfo)
}
else{
//应用处于后台时的本地推送接受
}
}
}
