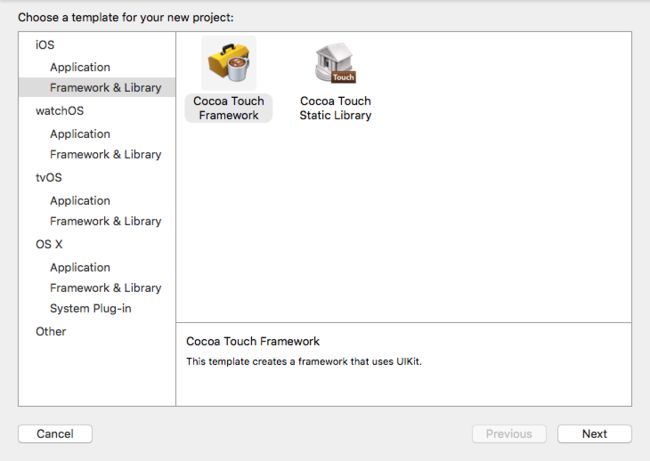
1.创建动态库
2.新建一个类 Person
#import@interface Person : NSObject
-(void)run;
@end
#import "Person.h"#import@implementation Person
-(void)run{
NSLog(@"let's run.");
UIAlertView *alert = [[UIAlertView alloc] initWithTitle:@"动态库调用成功了.." message:@"" delegate:nil cancelButtonTitle:nil otherButtonTitles:@"done", nil];
[alert show];
}
@end
头文件设置为Public
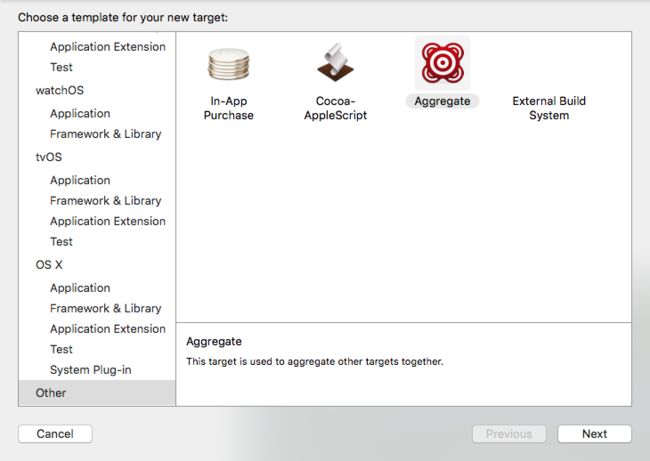
3.添加Target Aggregate 插入shell脚本保证可以在真机和模拟器可以使用
# Sets the target folders and the final framework product.
FMK_NAME=${PROJECT_NAME}
# Install dir will be the final output to the framework.
# The following line create it in the root folder of the current project.
INSTALL_DIR=${SRCROOT}/Products/${FMK_NAME}.framework
# Working dir will be deleted after the framework creation.
WRK_DIR=build
DEVICE_DIR=${WRK_DIR}/Release-iphoneos/$ {FMK_NAME}.framework
SIMULATOR_DIR=${WRK_DIR}/Release-iphonesimulator/${FMK_NAME}.framework
# -configuration ${CONFIGURATION}
# Clean and Building both architectures.
# 分别编译生成真机和模拟器使用的framework
xcodebuild -configuration "Release" -target "${FMK_NAME}" -sdk iphoneos clean build
xcodebuild -configuration "Release" -target "${FMK_NAME}" -sdk iphonesimulator clean build
# Cleaning the oldest.
if [ -d "${INSTALL_DIR}" ]
then
rm -rf "${INSTALL_DIR}"
fi
mkdir -p "${INSTALL_DIR}"
cp -R "${DEVICE_DIR}/" "${INSTALL_DIR}/"
# Uses the Lipo Tool to merge both binary files (i386 + armv6/armv7) into one Universal final product.
# 使用lipo命令将其合并成一个通用framework
# 最后将生成的通用framework放置在工程根目录下新建的Products目录下
lipo -create "${DEVICE_DIR}/${FMK_NAME}" "${SIMULATOR_DIR}/${FMK_NAME}" -output "${INSTALL_DIR}/${FMK_NAME}"
rm -r "${WRK_DIR}"
run后就show finder 找到就可以用了
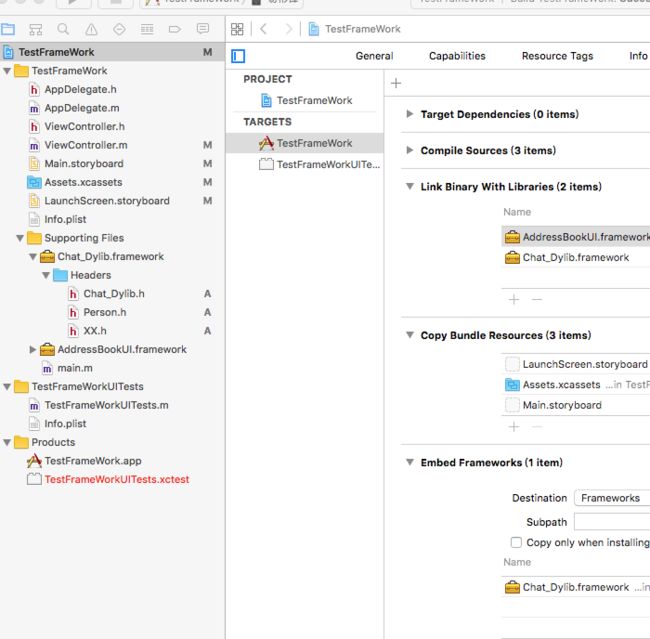
测试导入FrameWork 导入头文件 调用成功OK


