因为公司app的需求,需要加个自定义消息推送通知声音,因为不懂安卓的原生,所以之前被卡了很久,查了很多资料,终于搞定了,下面分享iOS和Android环境下的如何根据后台传过来的参数来指定播放app端的消息通知声音。
开始之前,需要先安装三方库jpush-react-native,这里我就不详细说了,按照文档做就可以了。
iOS端
由于自定义通知声音还是由 iOS 系统来播放的,所以对音频数据格式有限制,可以是如下四种之一:
Linear PCM
MA4 (IMA/ADPCM)
µLaw
aLaw
对应音频文件格式是 aiff,wav,caf 文件,文件也必须放到 app 的 mainBundle 目录中。
自定义通知声音的播放时间必须在 30s 内,如果超过这个限制,则将用系统默认通知声音替代。
可以使用 afconvert 工具来处理音频文件格式,在终端中敲入如下命令就可以将一个 mp3 文件转换成 caf 文件:
$ afconvert test.mp3 test.caf -d ima4 -f caff -v
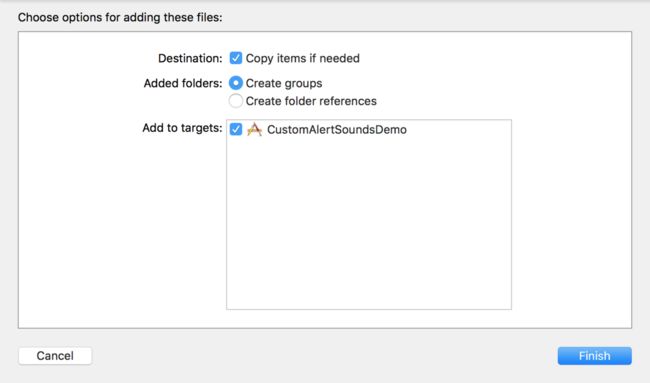
转换完成后就可以将 test.caf 这个文件拖入 Xcode 工程中,编译运行项目在真机上。
发送推送通知时,只需后台配置 sound 字段的值为导入到工程中的音频文件名,这里即就是 test.caf。
如果要用系统自带的声音,必须传'default',不然app端就没有声音了。
iOS的就搞定了,是不是很简单。这里其实用不着jpush-react-native库,只要还是为了下面的安卓使用的。
Android端
安卓端的就稍微有点复杂了,因为不懂原生安卓的原因,花了我不少时间。
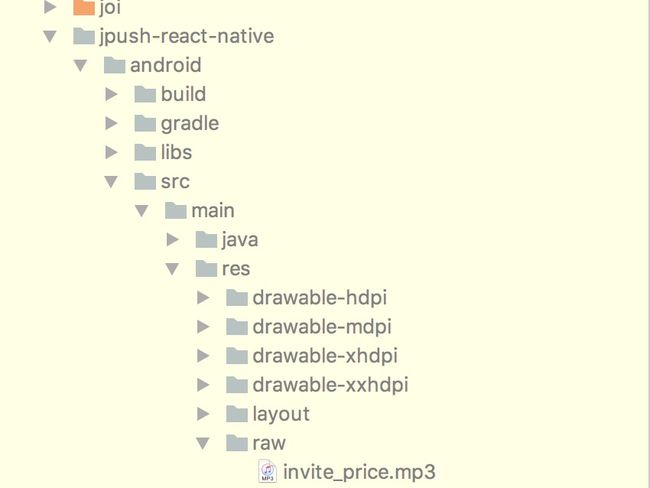
首先将声音文件放在raw目录下,没有此目录自己创建一个
注意,此时就用到了jpush-react-native库了,文件要放在库里,还有一点就是安卓自定义声音只支持发送自定义消息,发送普通通知是不可以的。
然后到jpush-react-native里的android/src/main/java/cn/jpush/reactnativejpush下找到JPushModule.java修改里面的代码
找到接收自定义消息函数JPushReceiver,将里面的接收自定义函数代码
public static class JPushReceiver extends BroadcastReceiver {

        public JPushReceiver() {
        }

        @Override
        public void onReceive(Context context, Intent data) {
            mCachedBundle = data.getExtras();
            if (JPushInterface.ACTION_MESSAGE_RECEIVED.equals(data.getAction())) {
                try {
                    String message = data.getStringExtra(JPushInterface.EXTRA_MESSAGE);
                    Logger.i(TAG, "收到自定义消息: " + message);
                    if (mRAC != null) {
                        WritableMap map = Arguments.createMap();
                        map.putString("message", message);
                        map.putString("extras", data.getExtras().getString(JPushInterface.EXTRA_EXTRA));
                        mRAC.getJSModule(DeviceEventManagerModule.RCTDeviceEventEmitter.class)
                                .emit(RECEIVE_CUSTOM_MESSAGE, map);
                    } else {
                        mEvent = RECEIVE_CUSTOM_MESSAGE;
                    }
                } catch (Exception e) {
                    e.printStackTrace();
                }
            } else if (JPushInterface.ACTION_NOTIFICATION_RECEIVED.equals(data.getAction())) {
改成
public static class JPushReceiver extends BroadcastReceiver {

        public JPushReceiver() {
        }

        @Override
        public void onReceive(Context context, Intent data) {
            mCachedBundle = data.getExtras();
            if (JPushInterface.ACTION_MESSAGE_RECEIVED.equals(data.getAction())) {
               processCustomMessage(context, mCachedBundle);
                try {
                    String message = data.getStringExtra(JPushInterface.EXTRA_MESSAGE);
                    Logger.i(TAG, "收到自定义消息: " + message);
                    if (mRAC != null) {
                        WritableMap map = Arguments.createMap();
                        map.putString("message", message);
                        map.putString("extras", data.getExtras().getString(JPushInterface.EXTRA_EXTRA));
                        mRAC.getJSModule(DeviceEventManagerModule.RCTDeviceEventEmitter.class)
                                .emit(RECEIVE_CUSTOM_MESSAGE, map);
                    } else {
                        mEvent = RECEIVE_CUSTOM_MESSAGE;
                    }
                } catch (Exception e) {
                    e.printStackTrace();
                }
            } else if (JPushInterface.ACTION_NOTIFICATION_RECEIVED.equals(data.getAction())) {
其实就是多加了一行processCustomMessage(context, mCachedBundle);
然后在写processCustomMessage函数
private void processCustomMessage(Context context, Bundle bundle) {

            NotificationManager notificationManager = (NotificationManager) context.getSystemService(Context.NOTIFICATION_SERVICE);

            NotificationCompat.Builder notification = new NotificationCompat.Builder(context);

             String message = bundle.getString(JPushInterface.EXTRA_MESSAGE);
            String title = bundle.getString(JPushInterface.EXTRA_TITLE);
            notification.setAutoCancel(true)
                    .setContentText(message)
                    .setContentTitle(title)
                    .setSmallIcon(R.mipmap.ic_launcher);
            String extras = bundle.getString(JPushInterface.EXTRA_EXTRA);
            if (!TextUtils.isEmpty(extras)) {
                try {
                    JSONObject extraJson = new JSONObject(extras);
                    if (null != extraJson && extraJson.length() > 0) {

                        String sound = extraJson.getString("sound");
                        if("invite_price.mp3".equals(sound)){
                            notification.setSound(Uri.parse("android.resource://" + context.getPackageName() + "/" +R.raw.invite_price));
                        }else if("test.mp3".equals(sound)){
                            notification.setSound(Uri.parse("android.resource://" + context.getPackageName() + "/" +R.raw.test));
                        }else{
                            notification.setDefaults(1);
                        }

                    }
                } catch (JSONException e) {

                }

            }
            int timecurrentTimeMillis =(int)System.currentTimeMillis()/1000 ;
            Intent intent = new Intent();
            intent.setClass(context, JPushReceiver.class);
            intent.setAction(JPushInterface.ACTION_NOTIFICATION_OPENED);
            intent.putExtras(bundle);
            PendingIntent pendingIntent = PendingIntent.getBroadcast(context, timecurrentTimeMillis, intent, PendingIntent.FLAG_ONE_SHOT);
            notification.setContentIntent(pendingIntent);
            notificationManager.notify(timecurrentTimeMillis, notification.build());
}
注意后台传给你的参数是在extras里的,里面的sound字段就对应你本地的文件名,比如我这里的invite_price.mp3文件,sound即为'invite_price.mp3',如果想要使用系统默认的,那就传个不存在的文件名,统一最好就用'default'吧。timecurrentTimeMillis是通知唯一标识符,如果不设置的话,相当于id一直没变,这样会导致新的通知会覆盖旧的通知,通知列表永远只有1个。最后如果提示有红色的未定义的函数名,引入一下就好了。
      int timecurrentTimeMillis =(int)System.currentTimeMillis()/1000 ;
      Intent intent = new Intent();
      intent.setClass(context, JPushReceiver.class);
      intent.setAction(JPushInterface.ACTION_NOTIFICATION_OPENED);
      intent.putExtras(bundle);
      PendingIntent pendingIntent = PendingIntent.getBroadcast(context, timecurrentTimeMillis, intent, PendingIntent.FLAG_ONE_SHOT);
      notification.setContentIntent(pendingIntent);
      notificationManager.notify(timecurrentTimeMillis, notification.build());
这块代码的意思是点击通知并且发送到广播里,这样在js里就可以通过JPushModule.addReceiveOpenNotificationListener()来监听到点击通知的事件。
至此,iOS和Android的自定义通知声音就OK啦。如果有哪里写的不好的,还望指正啊,不明白的也可以在下面留言,我看到就会回复的。或者加jpush-react-native官方群553406342