一、外部配置及优先级
SpringBoot的外部配置属性值官方给出了很多种方式,以便可以在不同的环境中使用相同的代码。
其使用了非常特别的PropertySource命令,旨在允许合理的覆盖值。当然,如果属性值不同,则这些配置方式中的属性值都会被加载;按照从高到低的排序如下:
(1)、在您的HOME目录设置的Devtools全局属性(~/.spring-boot-devtools.properties)。
(2)、单元测试中的 @TestPropertySource 注解。
(3)、单元测试中的 @SpringBootTest#properties 注解属性
(4)、命令行参数。
SPRING_APPLICATION_JSON=‘{"foo":{"bar":"spam"}}‘ java -jar myapp.jar
(6)、ServletConfig 初始化参数。
(7)、ServletContext 初始化参数。
(8)、来自 java:comp/env 的JNDI属性。
(9)、Java系统属性(System.getProperties())。
(10)、操作系统环境变量。
(11)、RandomValuePropertySource,只有随机的属性 random.* 中。
(12)、jar包外面的 Profile-specific application properties (application- {profile} .properties和YAML)
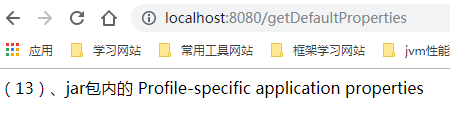
(13)、jar包内的 Profile-specific application properties (application-{profile}.properties和YAML)
(14)、jar包外的应用属性文件(application.properties和YAML)。
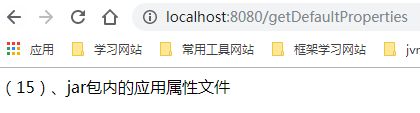
(15)、jar包内的应用属性文件(application.properties和YAML)。
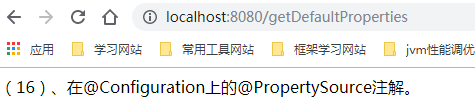
(16)、在@Configuration上的@PropertySource注解。
(17)、默认属性(使用SpringApplication.setDefaultProperties设置)。
在具体的讲解这些配置的时候我们先来做一些准备工作,
(1)、书写一个Controller
@RestController
@Slf4j
public class MyController {
    @Value("${name}")
    private String name;

    @GetMapping("/getDefaultProperties")
    public String getDefaultProperties() {
        return name;
    }
1、使用SpringApplication.setDefaultProperties设置默认属性
在应用程序主类main方法中在调用run方法之前,设置默认值
@SpringBootApplication
public class Application {

    public static void main(String[] args) {
        //SpringApplication.run(Application.class, args);
        Properties properties = new Properties();
        properties.setProperty("name", "(17)、默认属性(使用SpringApplication.setDefaultProperties设置)");
        SpringApplication application = new SpringApplication(Application.class);
        application.setDefaultProperties(properties);
        application.run(args);
        //new SpringApplicationBuilder()
        //        .sources(Application.class)
        //        .bannerMode(Banner.Mode.OFF)
        //        .properties(properties)
        //        .run(args);
    }
}
此时你访问http://localhost:8080/getDefaultProperties在页面上输出的内容为

备注:如果你想把你项目中的所有的配置放到配置中心Apollo的话,这种方式也是可以很方法的实现的。
2、在@Configuration上的@PropertySource注解
@SpringBootApplication
@PropertySource(value = {"classpath:test/propertySource.properties"}, encoding = "UTF-8")
public class Application {

    public static void main(String[] args) {
        Properties properties = new Properties();
        properties.setProperty("name", "(17)、默认属性(使用SpringApplication.setDefaultProperties设置)");
        SpringApplication application = new SpringApplication(Application.class);
        application.setDefaultProperties(properties);
        application.run(args);
    }
}
3、jar包内的应用属性文件(即默认的配置文件)

name=(15)、jar包内的应用属性文件
4、jar包外的应用属性文件
(1)、将你的应用程序打包成可运行的jar,在jar包的同级目录中放置一个application.properties文件,里面的内容如下:
name=(14)、jar包外的应用属性文件

5、jar包内的 Profile-specific application properties
新建application-test.properties文件,里面的内容如下
name=(13)、jar包内的 Profile-specific application properties
设置启动参数
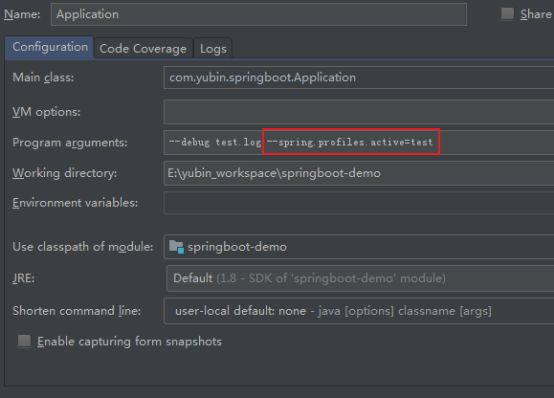
访问链接得到下图结果
6、jar包外面的 Profile-specific application properties
(1)、将你的应用程序打包成可运行的jar,在jar包的同级目录中放置一个application-test.properties文件,里面的内容如下:
name=(14)、jar包外的应用属性文件
(2)、java -jar -Dspring.profiles.active=test ***.jar

springboot读取外部和内部配置文件的方法,如下优先级:
第一种是在执行命令的目录下建config文件夹。(在jar包的同一目录下建config文件夹,执行命令需要在jar包目录下才行),然后把配置文件放到这个文件夹下。
第二种是直接把配置文件放到jar包的同级目录。
第三种在classpath下建一个config文件夹,然后把配置文件放进去。
第四种是在classpath下直接放配置文件。
springboot默认是优先读取它本身同级目录下的一个config/application.properties 文件的。
在src/main/resources 文件夹下创建的application.properties 文件的优先级是最低的
7、命令行属性
默认情况下,SpringApplication将任何命令行选项参数(以'-- '开头,例如--server.port=9000)转换为属性,并将其添加到Spring环境中。 如上所述,命令行属性始终优先于其他属性来源。

如果不希望将命令行属性添加到环境中,可以使用SpringApplication.setAddCommandLineProperties(false)禁用它们。
二、properties文件中的占位符
application.properties中的值在使用时通过已有的环境进行过滤,以便可以引用之前已经定义好的值
app.name=MyApp
app.description=${app.name} is a Spring Boot application
三、使用YAML替代 Properties
YAML是JSON的超集,因此这是分层配置数据一种非常方便的格式,。 每当您的类路径中都有SnakeYAML库时,SpringApplication类将自动支持YAML作为 properties 的替代方法。
如果您使用“Starters”,SnakeYAML将通过spring-boot-starter自动提供。
1、加载yaml
Spring Framework提供了两个方便的类,可用于加载YAML文档。 YamlPropertiesFactoryBean将YAML作为Properties加载,YamlMapFactoryBean将YAML作为Map加载。
例如下面这个YAML文档
environments:
    dev:
        url: http://dev.bar.com
        name: Developer Setup
    prod:
        url: http://foo.bar.com
        name: My Cool App
将转换为属性
environments.dev.url=http://dev.bar.com
environments.dev.name=Developer Setup
environments.prod.url=http://foo.bar.com
environments.prod.name=My Cool App
YAML列表表示为具有[index] dereferencers的属性键,例如YAML:
my:
   servers:
       - dev.bar.com
       - foo.bar.com
将转化为属性:
my.servers[0]=dev.bar.com
my.servers[1]=foo.bar.com
2、通过@ConfigurationProperties将配置绑定到Bean
(1)、配置bean的书写
@Getter
@Setter
@Component
@ConfigurationProperties(prefix = "my")
public class MyServerProperties {

    private String name;

    private List servers = new ArrayList<>();
}
(2)、application.yaml文件书写
my:
  servers:
    - dev.bar.com
    - foo.bar.com
  name: myName
3、YAML的缺点
YAML文件无法通过@PropertySource注解加载。 因此,在需要以这种方式加载值的情况下,需要使用properties文件。
四、类型安全的配置属性
使用@Value(“${property}”)注释来注入配置属性有时可能很麻烦(类型常规配置),特别是如果您正在使用多个层次结构的属性或数据时。 Spring Boot提供了一种处理属性的替代方法,允许强类型Bean管理并验证应用程序的配置。
(1)、Bean的定义
/**
 * 类型安全的配置属性
 *
 * @Author YUBIN
 * @create 2019-06-16
 */
@ConfigurationProperties("foo")
public class FooProperties {
    private boolean enabled;

    private InetAddress remoteAddress;

    private final Security security = new Security();

    public boolean isEnabled() {
        return enabled;
    }

    public void setEnabled(boolean enabled) {
        this.enabled = enabled;
    }

    public InetAddress getRemoteAddress() {
        return remoteAddress;
    }

    public void setRemoteAddress(InetAddress remoteAddress) {
        this.remoteAddress = remoteAddress;
    }

    public Security getSecurity() {
        return security;
    }

    public static class Security {

        private String username;

        private String password;

        private List roles = new ArrayList<>(Collections.singleton("USER"));

        public String getUsername() {
            return username;
        }

        public void setUsername(String username) {
            this.username = username;
        }

        public String getPassword() {
            return password;
        }

        public void setPassword(String password) {
            this.password = password;
        }

        public List getRoles() {
            return roles;
        }

        public void setRoles(List roles) {
            this.roles = roles;
        }
    }
}
(2)、YAML文件中的配置
foo:
    remote-address: 192.168.1.1
    security:
        username: foo
        roles:
          - USER
          - ADMIN
(3)、应用程序主类上加上必要的注解
@EnableConfigurationProperties({FooProperties.class})
public class Application {
这样在程序中就可以使用@Autowired的形式注入配置类了
@RestController
@Slf4j
public class MyController {
    @Autowired
    private FooProperties fooProperties;

    @GetMapping("/getFooProperties")
    public String getFooProperties() {
        return JSON.toJSONString(fooProperties);
    }
五、第三方配置
现在我们在构建一个名为"yubin-common",类型为jar的maven项目
1、书写一个配置类
@ConfigurationProperties(prefix = "bar")
public class BarComponent {

    private String name;

    public String getName() {
        return name;
    }

    public void setName(String name) {
        this.name = name;
    }
}
在之前的项目中引入此项目的依赖;这时如果在之前的项目中需要使用BarComponent这个属性类的话,则需要通过@EnableConfigurationProperties(BarComponent.class)这个注解来引入类,但是这样做是否合理呢?一个项目这么做,当有其它的项目也需要这个类的话是不是也要这么做呢?
public class BarComponent {

    private String name;

    public String getName() {
        return name;
    }

    public void setName(String name) {
        this.name = name;
    }
}
@Configuration
public class ConfigurationBean {

    @Bean
    @ConfigurationProperties(prefix = "bar")
    public BarComponent barComponent() {
        return new BarComponent();
    }
}
2、小结
@ConfigurationProperties导入外部属性填充到这个Bean的实例,有三种方式:
(1)、@ConfigurationProperties + @Component 注解到bean定义类上
(2)、@ConfigurationProperties + @Bean注解在配置类的bean定义方法上
(3)、@ConfigurationProperties注解到普通类然后通过@EnableConfigurationProperties定义为bean
六、宽松的绑定
Spring Boot使用一些宽松的规则将环境属性绑定到@ConfigurationProperties bean,因此不需要在Environment属性名称和bean属性名称之间进行完全匹配。 常用的例子是这样有用的:虚分离(例如上下文路径绑定到contextPath)和大写(例如PORT绑定到端口)环境属性。
配置bean
/**
 * 属性bean宽松绑定演示
 *
 * @Author YUBIN
 * @create 2019-06-16
 */
@Component
@ConfigurationProperties(prefix = "person")
@Getter
@Setter
public class OwnerProperties {
    private String firstName; //person.firstName 标准骆峰命名法。

    private String secondName; // person.second-name 虚线符号,推荐用于.properties和.yml文件。

    private String thirdName; // person.third_name 下划线符号,用于.properties和.yml文件的替代格式。

    private String fourName; // PERSON_FOUR_NAME 大写格式 推荐使用系统环境变量时。
}
测试类
@RestController
@Slf4j
public class MyController {
    @Autowired
    private OwnerProperties ownerProperties;

    @GetMapping("/getOwnerProperties")
    public String getOwnerProperties() {
        return JSON.toJSONString(ownerProperties);
    }
}

七、@ConfigurationProperties验证
如果你需要验证@ConfigurationProperties类。 您可以直接在配置类上使用JSR-303 javax.validation约束注解 @Validated。 只需确保您的类路径中符合JSR-303实现,然后在您的字段中添加约束注释:
@ConfigurationProperties("foo")
@Validated
public class FooProperties {

    private boolean enabled;
    @NotNull
    private InetAddress remoteAddress;
// ... getters and setters
为了验证嵌套属性的值,您必须将关联字段注释为@Valid以触发其验证。 例如,基于上述FooProperties示例:
@ConfigurationProperties(prefix="connection")
@Validated
public class FooProperties {

    @NotNull
    private InetAddress remoteAddress;

    @Valid
    private final Security security = new Security();

    // ... getters and setters

    public static class Security {

        @NotEmpty
        public String username;

        // ... getters and setters

    }
}
@ConfigurationProperties 对比 @Value
@Value是核心容器功能,它不提供与类型安全配置属性相同的功能。 下表总结了@ConfigurationProperties和@Value支持的功能:
| 功能 | @ConfigurationProperties | @Value |
|---|---|---|
| 宽松绑定 | 支持 | 不支持 |
| JSR303数据校验 | 支持 | 不支持 |
| SpEL(Spring 表达式) | 不支持 | 支持 |
| 注解功能 | 将配置文件中的属性值批量注入类的各个属性 | 为类中的各个属性逐个赋值 |
| 复杂类型封装 | 支持 | 不支持 |
八、配置文件Profiles
1、代码层面区分环境
Spring 配置文件提供了将应用程序配置隔离的方法,使其仅在某些环境中可用。 任何@Component或@Configuration都可以使用@Profile进行标记,以限制其在什么时候加载:
(1)、测试环境
@Service
@Profile({"test"})
public class TestProfileServiceImpl implements ProfileService {

    @Override
    public String getEnvironment() {
        return "test环境";
    }
}
(2)、dev环境
@Service
@Profile({"dev"})
public class DevProfileServiceImpl implements ProfileService {

    @Value("${spring.profiles.active}")
    private String profileActive;

    @Override
    public String getEnvironment() {
        return "dev环境";
    }
}
(3)、测试类
@RestController
@Slf4j
public class MyController {
    @Autowired
    private ProfileService profileService;

    @GetMapping("/getProfileService")
    public String getProfileService() {
        return profileService.getEnvironment();
    }
}
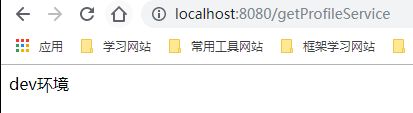
当设置启动参数为 spring.profiles.active=dev时,页面展示效果:
当设置启动参数为 spring.profiles.active=test时,页面展示效果:
