使用PXE和Kickstart批量部署ESXi4.1
摘要
参考文章:
http://communities.vmware.com/blogs/vmwareinsmb/2010/07/13/esxi-41-scripted-installation-via-pxe-and-kickstart
配置DHCP
配置TFTP
配置Kickstart
需要的环境
Redhat 5.2--[红帽企业.Linux.5].TLF-SOFT-RedHat.Enterprise.Linux.5.Update.2-XiSO.iso
DHCP Server--Rhel5.2自带
TFTP Server--Rhel5.2自带
Web Server--Rhel5.2自带
Syslinux/pxeboot.0--Rhel5.2自带
ESXi_4.1.iso--官网下载
环境准备
yum install dhcp.i386 tftp-server.i386 syslinux.i386 httpd.i386
配置DHCP服务器
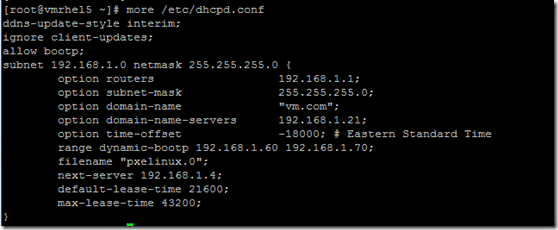
[root@vmrhel5 ~]# more /etc/dhcpd.conf
ddns-update-style interim;
ignore client-updates;
allow bootp;
subnet 192.168.1.0 netmask 255.255.255.0 {
option routers 192.168.1.1;
option subnet-mask 255.255.255.0;
option domain-name "vm.com";
option domain-name-servers 192.168.1.21;
option time-offset -18000; # Eastern Standard Time
range dynamic-bootp 192.168.1.60 192.168.1.70;
filename "pxelinux.0";
next-server 192.168.1.4;
default-lease-time 21600;
max-lease-time 43200;
}
配置TFTP服务器
[root@vmrhel5 ~]# more /etc/xinetd.d/tftp
# default: off
# description: The tftp server serves files using the trivial file transfer \
# protocol. The tftp protocol is often used to boot diskless \
# workstations, download configuration files to network-aware printers, \
# and to start the installation process for some operating systems.
service tftp
{
disable = no
socket_type = dgram
protocol = udp
wait = yes
user = root
server = /usr/sbin/in.tftpd
server_args = -s /tftpboot
per_source = 11
cps = 100 2
flags = IPv4
}
Tftp Server 的根目录是/tftpboot
[root@vmlinux /]# cp /usr/lib/syslinux/pxelinux.0 /tftpboot/
[root@vmlinux tftpboot]# mkdir pxelinux.cfg
[root@vmlinux tftpboot]# mkdir -p vmware/esxi4.1
挂载Esxi4.1安装光盘到/mnt/cdrom目录
[root@vmlinux tftpboot]# cp -r /mnt/cdrom/* /tftpboot/vmware/esxi4.1/
[root@vmlinux tftpboot]# cd pxelinux.cfg/
[root@vmlinux pxelinux.cfg]# touch default
[root@vmrhel5 pxelinux.cfg]# more /tftpboot/pxelinux.cfg/default
Default vmware/esxi4.1/menu.c32
menu title VMware Boot Menu
timeout 600
Label ESXi_4.1_Install
menu title VMware Boot Menu
kernel vmware/esxi4.1/mboot.c32
append vmware/esxi4.1/vmkboot.gz ks=http://192.168.1.4/ks-esxi4.1.cfg --- vmware/esxi4.1/vmkernel.gz --- vmware/esxi4.1/sys.vgz --- vmware/esxi4.1/cim.vgz --- vmware/esxi4.1/ienviron.vgz --- vmware/esxi4.1/install.vgz
配置kickstart和apache
将ks.cfg文件放在网站目录下
[root@vmrhel5 ~]# cd /var/www/html
目录下有配置好的文件
[root@vmrhel5 html]# ls
ks-esxi4.1.cfg vmware
[root@vmrhel5 html]# ls -la
total 12
drwxr-xr-x 2 root root 4096 Oct 10 20:06 .
drwxr-xr-x 6 root root 4096 Oct 10 20:06 ..
-rw-r--r-- 1 root root 127 Oct 10 19:52 ks-esxi4.1.cfg
lrwxrwxrwx 1 root root 24 Oct 10 20:06 vmware -> /tftpboot/vmware/esxi4.1
软链接vmware已经创建
ln -s /tftpboot/vmware/esxi4.1 vmware
[root@vmrhel5 html]# more ks-esxi4.1.cfg
accepteula
rootpw password
autopart --firstdisk --overwritevmfs
install url http://192.168.1.4/vmware
network --bootproto=dhcp
启动相关服务
DHCP服务器
service dhcpd start 或者 service dhcpd restart
TFTP服务器
Service xinetd restart
Apache服务器
Service httpd restart
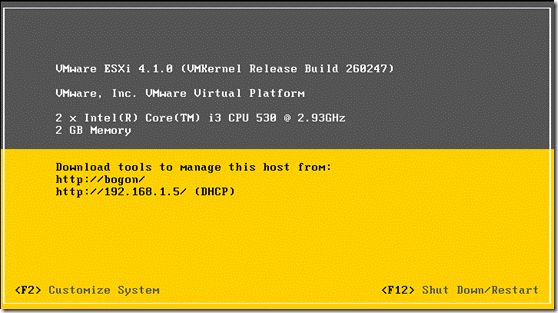
安装ESXi4.1测试
安装过程无需人工干预只需数分钟就可完成安装


