UI 优化系列专题,来聊一聊 Android 渲染相关知识,主要涉及 UI 渲染背景知识、如何优化 UI 渲染两部分内容。
UI 优化系列专题
- UI 渲染背景知识
- View 绘制流程之 setContentView() 到底做了什么?
- View 绘制流程之 DecorView 添加至窗口的过程
- 深入 Activity 三部曲(3)View 绘制流程
- Android 之 LayoutInflater 全面解析
- 关于渲染,你需要了解什么?
- Android 之 Choreographer 详细分析
- 如何优化 UI 渲染
- Android 之如何优化 UI 渲染(上)
- Android 之如何优化 UI 渲染(下)
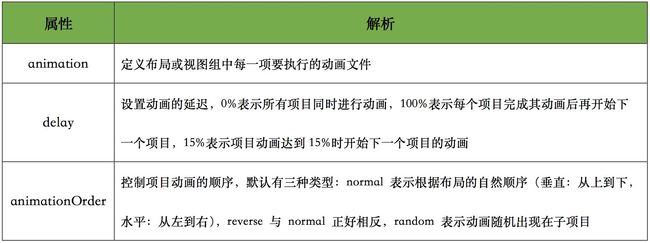
在 Android API 1.0 时,LayoutAnimation 就已经存在,利用 LayoutAnimation 我们可以快速实现布局的动画效果,提升产品的视觉体验。下面我们先通过它的自我介绍来了解下什么 LayoutAnimation:
- LayoutAnimation 用于对布局或视图组的子项进行动画处理。每个子项都使用相同的动画,但是对于每个子项的动画在不同的时间开始。布局动画控制器,用于计算每个子项的动画开始执行的偏移时间。
这里引入一个新的名词:布局动画控制器,实际上 LayoutAnimation 只是为我们提供了一个 XML 标签,它的实现要依赖布局动画控制器来完成, Android 系统默认为我们提供了两种 LayoutAnimation 控制器:
LayoutAnimationController
GridLayoutAnimationController
接下来,我先通过几个动画案例介绍下 LayoutAnimation 的应用效果以及扩展内容,最后再通过源码分析 LayoutAnimation 的实现原理。
布局动画的使用
和其他动画一样,LayoutAnimation 既可以定义 XML 动画文件,也可以直接通过代码的方式创建,下面我们分别通过示例来了解下他们的应用效果。
创建布局动画文件
1. LayoutAnimationController
LayoutAnimation 参数说明如下:
应用到 ViewGroup:
2. GridLayoutAnimationController
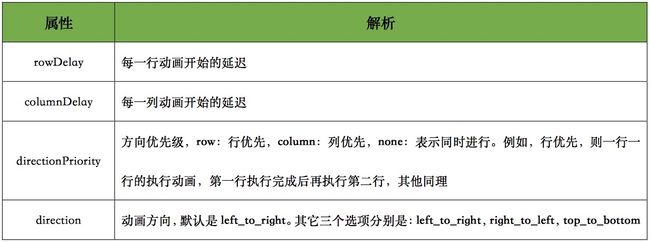
GridLayoutAnimationController 继承自 LayoutAnimationController,相比 LayoutAnimationController 只是增加了几个功能参数之外,几乎没有任何使用上的差异,它更多是针对 GridView 而设计的。
GridLayoutAnimation 参数使用说明如下:
通过代码创建
除了上述通过定义 XML 文件方式之外,我们也可以直接通过代码创建布局动画,这里仅以 LayoutAnimationController 为例:
public void createLayoutAnimation(RecyclerView view) {
    final Animation animation = AnimationUtils.loadAnimation(this, R.anim.item_animation_drop_down);
    // 直接创建 LayoutAnimationController
    LayoutAnimationController layoutAnimation = new LayoutAnimationController(animation);
    layoutAnimation.setDelay(0.15f);
    layoutAnimation.setOrder(LayoutAnimationController.ORDER_NORMAL);
    // 为 RecycleView 应用布局动画
    view.setLayoutAnimation(layoutAnimation);
}
也可以直接通过 AnimationUtils 加载 layoutAnimation 文件:
public void setLayoutAnimation(RecyclerView view) {
    LayoutAnimationController controller = AnimationUtils.loadLayoutAnimation(this, R.anim.layout_animation_fall_down);
    // 为 RecycleView 应用布局动画
    view.setLayoutAnimation(controller);
}
其实,使用 XML 方式最终还是会通过 AnimationUtils 完成动画文件加载任务,关于这部分我们将在后面的原理部分进行分析。
动画示例
下面我通过几个动画案例,来欣赏下利用 LayoutAnimation 实现列表内容的过渡展示效果。
LayoutAnimation
1. 从顶部掉入
动画效果
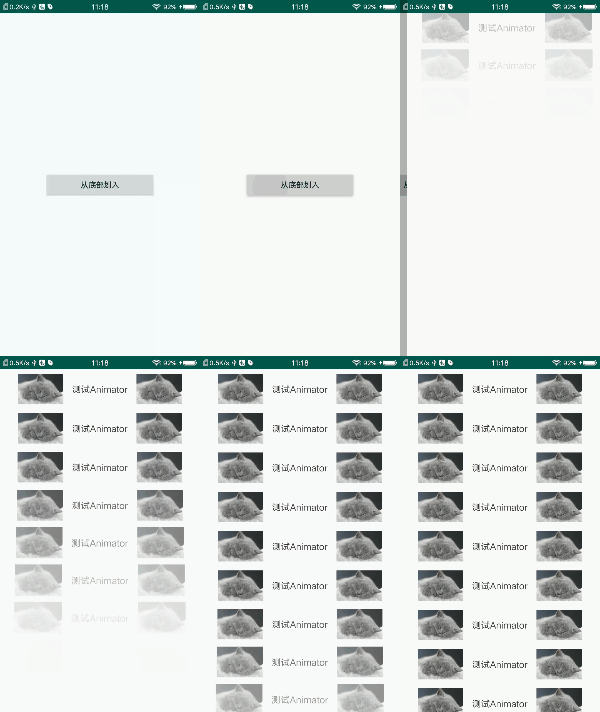
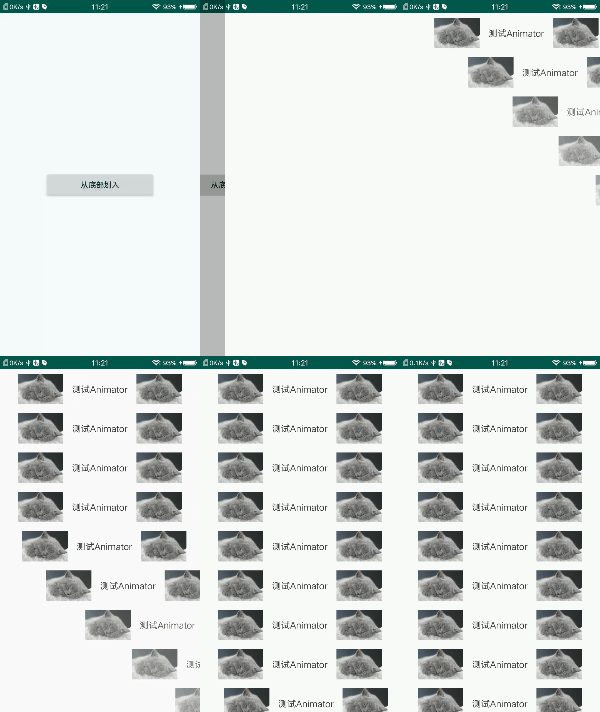
2. 从底部划入
动画效果
3. 从右侧进入
动画效果
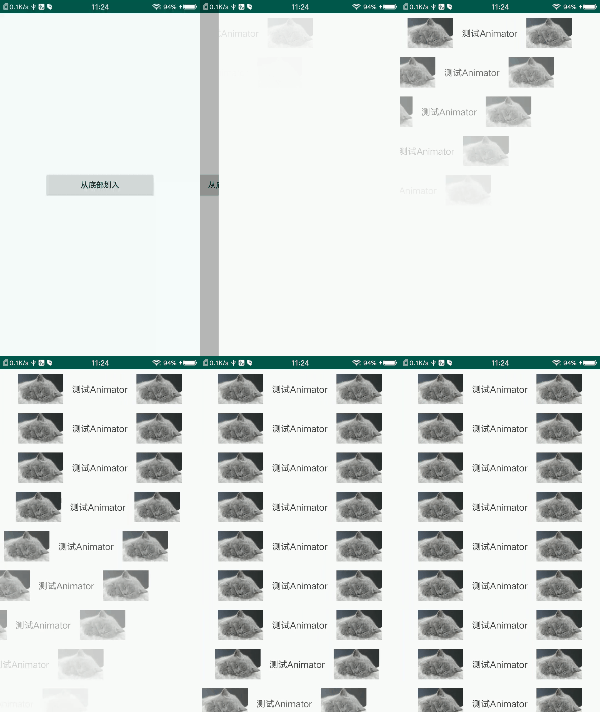
4. 从左侧进入
动画效果
GridLayoutAnimation
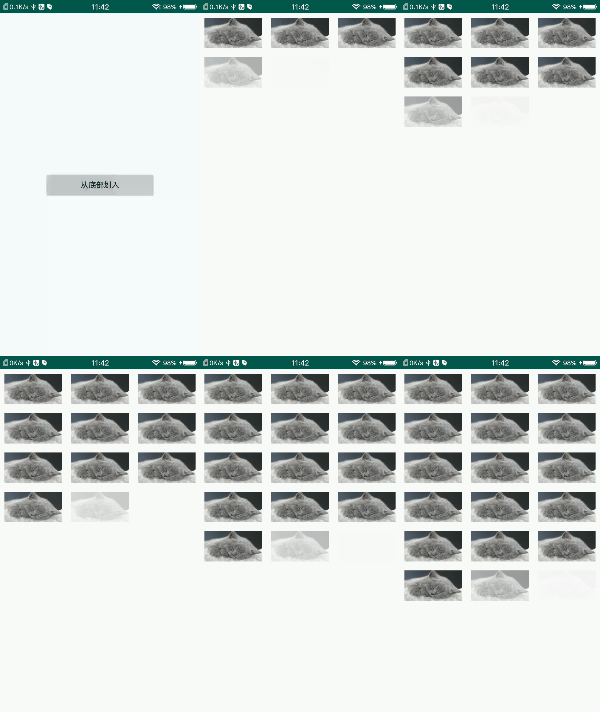
1. 按行顺序
渐变效果
动画效果
2. 按列顺序
从左侧划入
动画效果
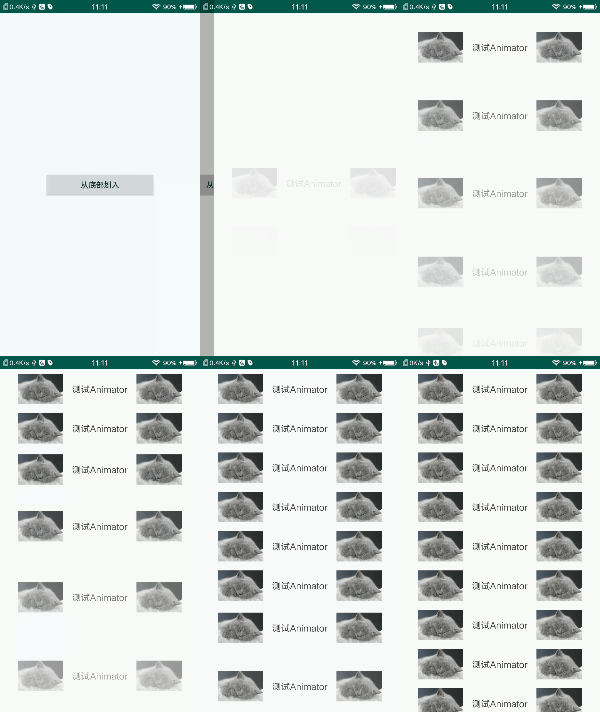
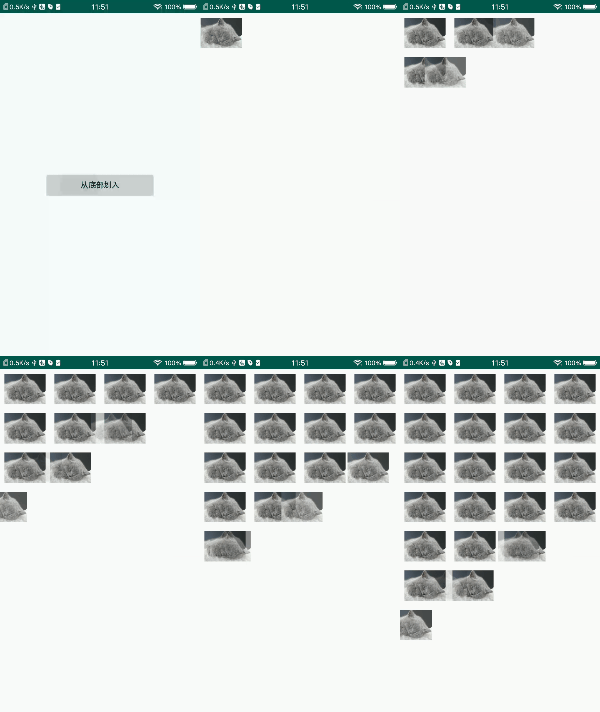
2. 多行平行
动画效果
扩展
1. RecyclerView 与 GridLayoutAnimation
我们知道 RecyclerView 通过布局管理器也可以实现 Grid (网格布局)效果 ,那它能否也可以使用 GridLayoutAnimation 为其添加网格布局动画呢?尝试过的朋友肯定会遇到下面的报错信息:
java.lang.ClassCastException:
      android.view.animation.LayoutAnimationController$AnimationParameters
      cannot be cast to android.view.animation.GridLayoutAnimationController$AnimationParameters
从报错信息来看是说 “LayoutAnimationController.AnimationParameters” 不能转换为 “GridLayoutAnimationController.AnimationParameters”,这是怎么回事呢?它的报错位置发生 GridLayoutAnimationController 的 getDelayForView 方法,如下:
/**
 * 重写自 LayoutAnimationController
 * */
@Override
protected long getDelayForView(View view) {
    ViewGroup.LayoutParams lp = view.getLayoutParams();
     // 重点在这里
     // 该 AnimatonParameters 是继承自 LayoutAnimationController内的 AnimationParameters。
     // 由于在 ViewGroup 内默认为其子项添加的是LayoutAnimationController.AnimationParameters,
     // 故此时 ClassCastException
    AnimationParameters params = (AnimationParameters) lp.layoutAnimationParameters;

    if (params == null) {
        return 0;
    }

    // ... 省略
}
实际上,在 ViewGroup 内会通过遍历,为每个(直接)子项(View)添加一个布局动画参数 AnimationParameters ,该对象保存在 View 的 LayoutParams 内。而该动画参数默认是 LayoutAnimatonController.AnimationParameters,所以此时会抛出 ClassCastException。关于该部分在后面的原理探索部分会详细分析。
那 GridView 为什么可以呢?此时大家肯定也能够猜到,没错它通过重写相关方法实现 Grid 类型布局动画效果,如下我们只需要重写 attachLayoutAnimationParameters 方法判断当前是 GridLayoutManager 时返回 GridLayoutAnimationController.AnimationParameters 即可。
/**
 * 在 RecyclerView 中重写
 */
@Override
protected void attachLayoutAnimationParameters(View child, ViewGroup.LayoutParams params, int index, int count) {
    // 判断是 GridLayoutManger,也就是网格布局
    if (getLayoutManager() != null && getLayoutManager() instanceof GridLayoutManager) {
        // 创建网格类型动画参数
        GridLayoutAnimationController.AnimationParameters animationParams =
                    (GridLayoutAnimationController.AnimationParameters) params.layoutAnimationParameters;
        if (animationParams == null) {
            animationParams = new GridLayoutAnimationController.AnimationParameters();
            params.layoutAnimationParameters = animationParams;
        }
        // 列数
        final int numColumns = ((GridLayoutManager) getLayoutManager()).getSpanCount();
        animationParams.count = count;
        animationParams.index = index;
        animationParams.columnsCount = numColumns;
        // 行数 总数除以列
        animationParams.rowsCount = count / numColumns;
        final int invertedIndex = count - 1 - index;
        // 第几列
        animationParams.column = numColumns - 1 - (invertedIndex % numColumns);
        // 第几行
        animationParams.row = animationParams.rowsCount - 1 - invertedIndex / numColumns;
    } else {
        // 否则默认为 LayoutAnimationController.AnimationParameters
        // 该过程在 ViewGroup 中已默认实现
        super.attachLayoutAnimationParameters(child, params, index, count);
    }
}
2. animateLayoutChanges
不知大家是否有注意过,Android 系统默认为 ViewGroup 已经实现了一个布局过渡(LayoutTransition)效果,我们只需在相应的 ViewGroup 下开启该配置即可。
示例效果如下:
animateLayoutChanges 与今天分析的 LayoutAnimation 在使用上完全不同,不过它们的目标确是相同的,让布局改变变得更加平滑。
3. 扩展布局动画
布局动画在设计之初,提供了很好的扩展性,以满足更多定制化需求场景。
LayoutAnimationController 的 getTransformedIndex(),返回值表示子项(View)播放动画的顺序,该方法被设计成 protected,通过重写该方法实现自定义播放顺序。下面来看下该如何使用它:
public final class CustomLayoutAnimation extends LayoutAnimationController {

    /**
     * LayoutAnimation 默认只有三种顺序,分别对应
     * ORDER_NORMAL  = 0 顺序
     * ORDER_REVERSE = 1 逆序
     * ORDER_RANDOM  = 2 随机
     */
    public static final int ORDER_CUSTOM = -1000;

    private CustomIndexListener mIndexCallback;

    public interface CustomIndexListener {

        int onIndex(CustomLayoutAnimation controller, int count, int index);
    }

    public CustomLayoutAnimation(Animation animation) {
        super(animation);
    }

    public CustomLayoutAnimation(Animation anim, float delay) {
        super(anim, delay);
    }

    public CustomLayoutAnimation(Context context, AttributeSet attrs) {
        super(context, attrs);
    }

    public void setCustomIndexListener(CustomIndexListener indexCallback) {
        this.mIndexCallback = indexCallback;
    }

    /**
     * todo 重点在该方法,自定义每项执行动画的顺序
     */
    @Override
    protected int getTransformedIndex(AnimationParameters params) {
        if (getOrder() == ORDER_CUSTOM && mIndexCallback != null) {
            return mIndexCallback.onIndex(this, params.count, params.index);
        }
        return super.getTransformedIndex(params);
    }
}
通过复写 getTransformedIndex 方法,添加自定义执行顺序 ORDER_CUSTOM,让 callback 自行控制动画的播放顺序,如此便可以达到任何想要的效果。
原理探索
LayoutAnimation 只能应用到 ViewGroup,原因是布局动画属性标签(layoutAnimation/gridLayoutAnimation)只在 ViewGroup 的构造方法中被解析。
布局动画的创建过程
下面是 ViewGroup 的构造方法关于布局动画的解析过程:
private void initFromAttributes(
            Context context, AttributeSet attrs, int defStyleAttr, int defStyleRes) {
    final TypedArray a = context.obtainStyledAttributes(attrs, R.styleable.ViewGroup, defStyleAttr,
                defStyleRes);

    final int N = a.getIndexCount();
    for (int i = 0; i < N; i++) {
        int attr = a.getIndex(i);
        switch (attr) {

            // ... 省略

            // 通过布局设置 LayoutAnimation
            case R.styleable.ViewGroup_layoutAnimation:
                int id = a.getResourceId(attr, -1);
                if (id > 0) {
                    // 内部调用了 setLayoutAnimation
                    // 也是通过 AnimationUtils.loadLayoutAnimation方法加载
                       setLayoutAnimation(AnimationUtils.loadLayoutAnimation(mContext, id));
                }
                break;
             //...
            case R.styleable.ViewGroup_animateLayoutChanges:
                boolean animateLayoutChanges = a.getBoolean(attr, false);
                if (animateLayoutChanges) {
                    // 每个ViewGroup都有一个默认的LayoutAnimation
                    setLayoutTransition(new LayoutTransition());
                }
                break;
             // ...
        }
    }
    a.recycle();
}
当解析属性名为 layoutAnimation 时,此时通过 AnimationUtils 加载并创建对应的布局动画,loadLayoutAnimation 方法如下:
另外我们还可以看到 animateLayoutChanges 属性,如果我们在布局资源中开启,此时 ViewGroup 会默认关联一个 LayoutTransition。
public static LayoutAnimationController loadLayoutAnimation(Context context, @AnimRes int id)
            throws NotFoundException {

    XmlResourceParser parser = null;
    try {
        // 获取资源解析器
        parser = context.getResources().getAnimation(id);
        // 创建布局动画控制器
        return createLayoutAnimationFromXml(context, parser);
    } catch (XmlPullParserException ex) {
        // ... 省略
    } finally {
        if (parser != null) parser.close();
    }
}
获取动画资源解析器,通过 createLayoutAnimationFromXml 方法解析并创建布局动画控制器:
private static LayoutAnimationController createLayoutAnimationFromXml(Context c,
                                                                          XmlPullParser parser, AttributeSet attrs) throws XmlPullParserException, IOException {
    LayoutAnimationController controller = null;

    int type;
    int depth = parser.getDepth();

    while (((type = parser.next()) != XmlPullParser.END_TAG || parser.getDepth() > depth)
                && type != XmlPullParser.END_DOCUMENT) {
        if (type != XmlPullParser.START_TAG) {
            continue;
        }
        // 获取节点名称
        String name = parser.getName();
        if ("layoutAnimation".equals(name)) {
            // 创建 LayoutAnimationController
            controller = new LayoutAnimationController(c, attrs);
        } else if ("gridLayoutAnimation".equals(name)) {
            // 创建 GridLaoutAnimationController
            controller = new GridLayoutAnimationController(c, attrs);
        } else {
            // 抛出异常
            throw new RuntimeException("Unknown layout animation name: " + name);
        }
    }
   return controller;
}
从这里我们可以看出,布局动画主要包含两种:layoutAnimation 和 gridLayoutAnimation,它们分别对应的控制器为:
LayoutAnimationController
GridLayoutAnimationController
控制器有什么作用呢?其实在文章开篇 LayoutAnimation 的自我介绍中:布局动画控制器用于计算每个子项的动画开始执行的偏移时间,下面我以 LayoutAnimationController 为例,从它的构造方法入手分析其实现原理,如下:
public LayoutAnimationController(Context context, AttributeSet attrs) {
    TypedArray a = context.obtainStyledAttributes(attrs, com.android.internal.R.styleable.LayoutAnimation);

    Animation.Description d = Animation.Description.parseValue(
                a.peekValue(com.android.internal.R.styleable.LayoutAnimation_delay));
    // 下一个动画的执行时机,如15%,duration=1000ms, 15% * 1000 = 150ms
    mDelay = d.value;

    // 执行顺序
    mOrder = a.getInt(com.android.internal.R.styleable.LayoutAnimation_animationOrder, ORDER_NORMAL);

    // 拿到动画资源
    int resource = a.getResourceId(com.android.internal.R.styleable.LayoutAnimation_animation, 0);
    if (resource > 0) {
        // 解析动画资源
        setAnimation(context, resource);
    }
    // 获取 Interpolator
    resource = a.getResourceId(com.android.internal.R.styleable.LayoutAnimation_interpolator, 0);
    if (resource > 0) {
        setInterpolator(context, resource);
    }
    a.recycle();
}
这里我们重点看下布局动画的解析过程 setAnimation 方法,仍然通过 AnimationUtils 完成动画文件的解析。
public void setAnimation(Context context, @AnimRes int resourceID) {
    // 真正动画资源,还是通过AnimationUtils完成解析
    setAnimation(AnimationUtils.loadAnimation(context, resourceID));
}
createAnimationFromXml() 将完成动画文件的解析以及创建,具体解析过程如下:
public static Animation loadAnimation(Context context, @AnimRes int id)
            throws NotFoundException {

    XmlResourceParser parser = null;
    try {
        // 获取动画资源解析器
        parser = context.getResources().getAnimation(id);
        // 解析动画资源
        return createAnimationFromXml(context, parser);
    } catch (XmlPullParserException ex) {
        // ... 省略
    } finally {
        if (parser != null) parser.close();
    }
}
如下,我们可以看到很多熟悉的动画节点名称:set、alpha、scale、rotate 和 translate 等。
private static Animation createAnimationFromXml(Context c, XmlPullParser parser,
                                                    AnimationSet parent, AttributeSet attrs) throws XmlPullParserException, IOException {
        Animation anim = null;

    // Make sure we are on a start tag.
    int type;
    int depth = parser.getDepth();

    while (((type = parser.next()) != XmlPullParser.END_TAG || parser.getDepth() > depth)
                && type != XmlPullParser.END_DOCUMENT) {
        if (type != XmlPullParser.START_TAG) {
            continue;
        }
        // 获取节点名称
        String name = parser.getName();
        // set节点
        if (name.equals("set")) {
            anim = new AnimationSet(c, attrs);
            // 递归调用解析
            createAnimationFromXml(c, parser, (AnimationSet) anim, attrs);
        } else if (name.equals("alpha")) {
            // Alpha 动画
            anim = new AlphaAnimation(c, attrs);
        } else if (name.equals("scale")) {
            // Scale 动画
            anim = new ScaleAnimation(c, attrs);
        } else if (name.equals("rotate")) {
            // Rotate 动画
            anim = new RotateAnimation(c, attrs);
        } else if (name.equals("translate")) {
            // Translate 动画
            anim = new TranslateAnimation(c, attrs);
        } else if (name.equals("cliprect")) {
            // clip rect 动画
            anim = new ClipRectAnimation(c, attrs);
        } else {
            // 不支持的标签类型
            throw new RuntimeException("Unknown animation name: " + parser.getName());
        }

        if (parent != null) {
            // 将其添加到AnimationSet
            parent.addAnimation(anim);
        }
    }
    return anim;
}
至此,布局动画的解析和创建过程我们就已经清楚了。我们知道动画一般只能针对某个 View 操作的。而 LayoutAnimation 可以针对 ViewGroup 的所有(直接)子 View 进行动画操作,既同组 View 的每个 View 按照一定的规则展示动画。那么它是如何实现的呢?下面我们就一起来跟踪下这一过程。
组动画实现原理
其实在 ViewGroup 内,系统将动画在绘制阶段先分别设置给了每个子项(View)以实现同组 View 的动画效果。有关 View 的绘制流程你可以参考这里,下面我们来看下这一过程:
protected void dispatchDraw(Canvas canvas) {
    // ... 省略

    if ((flags & FLAG_RUN_ANIMATION) != 0 && canAnimate()) {
        final boolean buildCache = !isHardwareAccelerated();
        for (int i = 0; i < childrenCount; i++) {
            final View child = children[i];
            if ((child.mViewFlags & VISIBILITY_MASK) == VISIBLE) {
                final LayoutParams params = child.getLayoutParams();
                // 为Child设置动画Params
                attachLayoutAnimationParameters(child, params, i, childrenCount);
                // 为每个子View绑定LayoutAnimation
                bindLayoutAnimation(child);
            }
        }

        final LayoutAnimationController controller = mLayoutAnimationController;
        if (controller.willOverlap()) {
            mGroupFlags |= FLAG_OPTIMIZE_INVALIDATE;
        }

        controller.start();

      // ... 省略
}
可以看到在分发绘制阶段,遍历所有的子 View,这里注意 for 循环内主要完成两项任务:
为当前 View 创建布局动画参数 AnimationParamsters
为每个子项绑定布局动画
1. 为 View 绑定动画参数
下面,先来看下布局动画参数 AnimationParameters 的创建过程。attachLayoutAnimationParamsters 方法,还记得上面扩展阶段让 RecycleView 支持 GridLayoutAnimation 吗?其原因就在这里,如下:
protected void attachLayoutAnimationParameters(View child,
                                                   LayoutParams params, int index, int count) {
    LayoutAnimationController.AnimationParameters animationParams =
                params.layoutAnimationParameters;
    if (animationParams == null) {
        // 为当前 Child LayoutParams 创建一个动画 Params
        // 注意其默认为:LayoutAnimationController.AnimationParameters
        // 当是 GridLayoutAnimation时,此时需要 GridLayoutAnimationController的AnimationParameters
        animationParams = new LayoutAnimationController.AnimationParameters();
        // 为每个子View设置动画参数,保存在 LayoutParams 内
        params.layoutAnimationParameters = animationParams;
    }

    // Child 数量
    animationParams.count = count;
    // 当前 Child的位置
    animationParams.index = index;
}
该方法主要是为当前 View 创建一个布局动画参数 AnimationParameters(保存在 LayoutParams 内)。内部包含两个参数,组内 View 数量和当前 View 下标,AnimationParameters 声明如下:
public static class AnimationParameters {
   /**
    * 组内 View 数量
    */
    public int count;

    /**
     * 当前 View 下标(位置)
     */
    public int index;
}
GrieLayoutAnimationController 继承自 LayoutAnimationController,相应的其内部也需要额外的布局动画参数,故对 LayoutAnimationController.AnimationParameters 进行了扩展,如下:
public static class AnimationParameters extends
            LayoutAnimationController.AnimationParameters {
   /**
    * 第几列
    * */
    public int column;

   /**
    * 第几行
    */
    public int row;

   /**
    * 列数
    */
    public int columnsCount;

   /**
    * 行数,总长度除以列数
    */
    public int rowsCount;
}
2. 为 View 绑定布局动画
接下来,我们再看下为每个子 View 绑定布局动画的过程。通过 LayoutAniationController 的 getAnimationForView 方法为每个 View 的动画计算其执行的便宜时间 bindLayoutAnimation 方法如下:
private void bindLayoutAnimation(View child) {
    // getAnimationForView计算动画的偏移时间
    Animation a = mLayoutAnimationController.getAnimationForView(child);
    // 为子View设置动画
    child.setAnimation(a);
}
还记得上面的扩展阶段,我们可以通过重写 getTransformedIndex() 实现动画任意顺序的执行效果,该部分内容的实现原理如下:
public final Animation getAnimationForView(View view) {
    // 根据View数量和当前View索引位置,计算View执行动画的偏移时间
    // getStartOffset 是动画首次执行的延迟时间
    final long delay = getDelayForView(view) + mAnimation.getStartOffset();
    // 最大延迟时间
    mMaxDelay = Math.max(mMaxDelay, delay);

    try {
        final Animation animation = mAnimation.clone();
        // 设置该动画的开始执行时间
        animation.setStartOffset(delay);
        return animation;
    } catch (CloneNotSupportedException e) {
        return null;
    }
}
注意 getDelayForView 方法,该方法将完成计算每个子项(View)动画开始时间的偏移量,如下:
protected long getDelayForView(View view) {
    ViewGroup.LayoutParams lp = view.getLayoutParams();
    // 获取当前View的动画参数
    AnimationParameters params = lp.layoutAnimationParameters;

    if (params == null) {
        return 0;
    }

    // 计算延迟时间,如总时间1000ms,延迟15%,则delay=150ms
    final float delay = mDelay * mAnimation.getDuration();
    // 根据View位置计算其延迟时间,如3,150ms * 2(下标为2) = 300ms
    final long viewDelay = (long) (getTransformedIndex(params) * delay);
    // 总延迟时间,例如长度为10,此时 150ms * 10 = 1500ms
    final float totalDelay = delay * params.count;

    if (mInterpolator == null) {
        // 默认线性差值器,差值器用于调整动画的执行时机
        mInterpolator = new LinearInterpolator();
    }

    // 300/1500 = 0.2
    float normalizedDelay = viewDelay / totalDelay;
    // 根据差值器重新计算延迟时间
    normalizedDelay = mInterpolator.getInterpolation(normalizedDelay);

    // 重新计算经过差值器调整后的延迟时间
    return (long) (normalizedDelay * totalDelay);
}
其中 getTransformedIndex 方法控制 View 动画的执行顺序,默认有三种类型:ORDER_REVERSE 顺序执行、ORDER_RANDOM 随机执行、ORDER_NORMAL 顺序执行(默认)。
protected int getTransformedIndex(AnimationParameters params) {
    switch (getOrder()) {
        case ORDER_REVERSE:
            // 倒序执行
            return params.count - 1 - params.index;
        case ORDER_RANDOM:
            // 随机
            if (mRandomizer == null) {
                mRandomizer = new Random();
            }
            return (int) (params.count * mRandomizer.nextFloat());
        case ORDER_NORMAL:
            // 默认顺序执行
        default:
            return params.index;
    }
}
至此,LayoutAnimation 实现组动画的原理我们就算是清楚了,正如开篇 LayoutAnimation 的自我介绍,用于对布局或视图组的子项进行动画处理。每个子项都使用相同的动画,每个子项的动画在不同的时间开始。布局动画控制器用于计算每个子项的动画开始执行的偏移时间。
最后
布局动画本质仍然要为每个子项单独绑定动画,不过这一过程完全由 ViewGroup 帮我们完成,这样能够有效减少对每个子项(View)设置动画的冗余配置。
今天所分析的内容虽然比较单一,但是在开发过程中,为快速实现“友好”的视觉效果确是非常实用的。另外一方面,即便是很小的一个功能点 Android 也为我们提供了良好的扩展性,这对我们自己的项目开发是很有指导意义的。
在 Android 中类似这样的功能点还有很多,欢迎大家分享留言或指正。
文章如果对你有帮助,请留个赞吧。如果你喜欢我的分析,还可以阅读专题的其他系列文章。
扩展阅读
UI 优化系列专题
- Android 之 LayoutInflater 全面解析
- Android 之 Choreographer 详细分析
- 关于 UI 渲染,你需要了解什么?
- Android 之 ViewTreeObserver 全面解析
- Android 之如何优化 UI 渲染(上)
- Android 之如何优化 UI 渲染(下)
- Android 之 Project Butter 详细介绍
- Why 60 fps?
存储优化系列专题
- Android 存储优化系列专题
- Android 之不要滥用 SharedPreferences(上)
- Android 之不要滥用 SharedPreferences(下)
- Android 对象序列化之你不知道的 Serializable
- Android 对象序列化之追求完美的 Serial
- Android 存储选项之 SQLite 优化那些事儿

