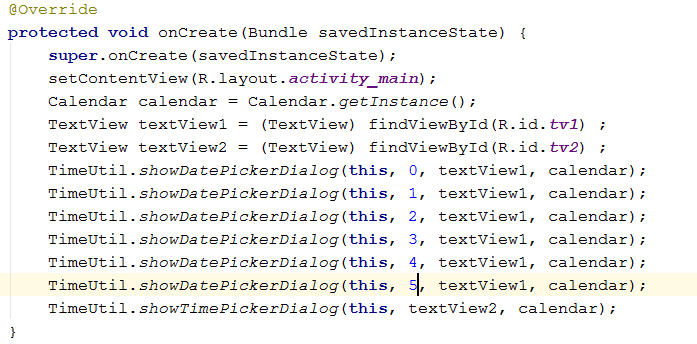
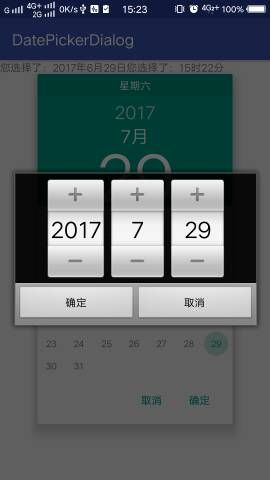
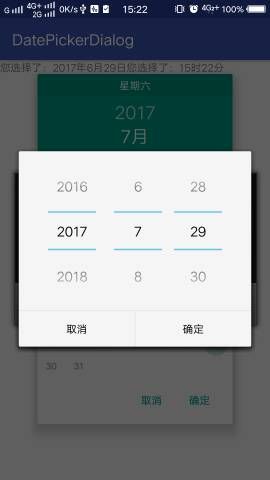
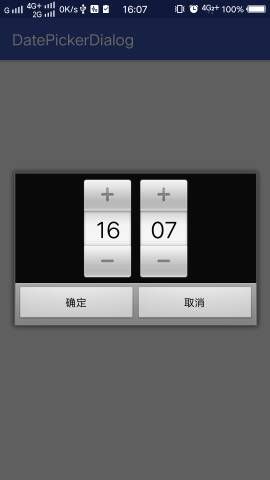
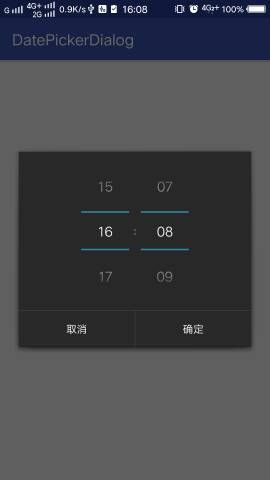
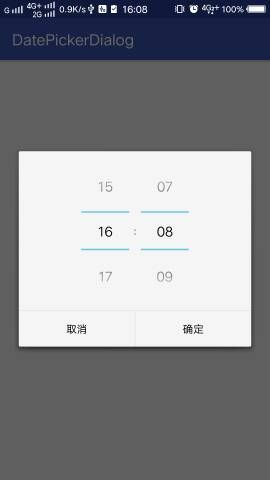
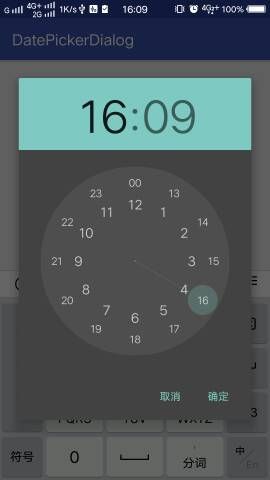
时间日期选择,对于android开发是非常常见的,如果你让用户输入,不但设计稿不会这么写,自己也觉得别扭。最近因为有时间选择的需求,所以就用系统的DatePickerDialog和TimePickerDialog再封装了一些时间选择的方法。
DatePickerDialog和TimePickerDialog,两个都是以对话框的形式出现,并在内部实现了布局(不需要添加任何的布局),最最重要的是调用方法简单易学,now,let's begin.
日期选择的基本实现
DatePickerDialog怎么用?可以在构造方法源码一探究竟
笔者在源码中数了一下,一共有五个构造方法,先介绍最简单的:
/**
 * @param context The context the dialog is to run in.
 * @param callBack How the parent is notified that the date is set.
 * @param year The initial year of the dialog.
 * @param monthOfYear The initial month of the dialog.
 * @param dayOfMonth The initial day of the dialog.
 */
public DatePickerDialog(Context context,
        OnDateSetListener callBack,
        int year,
        int monthOfYear,
        int dayOfMonth) {
    this(context, 0, callBack, year, monthOfYear, dayOfMonth);
}
通过自带的注释应该都懂是各个参数是什么了吧,现在可以写一个封装的选择时间的方法了
使用默认主题的DatePickerDialog:
public static void showDatePickerDialog(Activity activity, final TextView tv, Calendar calendar) {
      // Calendar 需要这样来得到
      // Calendar calendar = Calendar.getInstance();
        // 直接创建一个DatePickerDialog对话框实例,并将它显示出来
        new DatePickerDialog(activity,
        // 绑定监听器(How the parent is notified that the date is set.)
                new DatePickerDialog.OnDateSetListener() {
                    @Override
                    public void onDateSet(DatePicker view, int year,
                            int monthOfYear, int dayOfMonth) {
                        // 此处得到选择的时间,可以进行你想要的操作
                        tv.setText("您选择了:" + year + "年" + monthOfYear
                                    + "月" + dayOfMonth + "日");
                    }
                }
                // 设置初始日期
                , calendar.get(Calendar.YEAR)
                ,calendar.get(Calendar.MONTH)
                ,calendar.get(Calendar.DAY_OF_MONTH)).show();
}
运行结果见最下面的运行图
下面就来挨个看看他的构造方法,注释很详细,不外乎就是那几个参数,如果传入就用传入的,没有就用默认的:
第一个:
/**
 * Creates a new date picker dialog for the current date using the parent
 * context's default date picker dialog theme.
 *
 * @param context the parent context
 */
public DatePickerDialog(@NonNull Context context) {
    this(context, 0, null, Calendar.getInstance(), -1, -1, -1);
}
第二个:
/**
 * Creates a new date picker dialog for the current date.
 *
 * @param context the parent context
 * @param themeResId the resource ID of the theme against which to inflate
 *                   this dialog, or {@code 0} to use the parent
 *                   {@code context}'s default alert dialog theme
 */
public DatePickerDialog(@NonNull Context context, @StyleRes int themeResId) {
    this(context, themeResId, null, Calendar.getInstance(), -1, -1, -1);
}
第三个:
/**
 * Creates a new date picker dialog for the specified date.
 *
 * @param context the parent context
 * @param themeResId the resource ID of the theme against which to inflate
 *                   this dialog, or {@code 0} to use the parent
 *                   {@code context}'s default alert dialog theme
 * @param listener the listener to call when the user sets the date
 * @param year the initially selected year
 * @param monthOfYear the initially selected month of the year (0-11 for
 *                    compatibility with {@link Calendar#MONTH})
 * @param dayOfMonth the initially selected day of month (1-31, depending
 *                   on month)
 */
public DatePickerDialog(@NonNull Context context, @StyleRes int themeResId,
        @Nullable OnDateSetListener listener, int year, int monthOfYear, int dayOfMonth) {
    this(context, themeResId, listener, null, year, monthOfYear, dayOfMonth);
}
因为最后一个构造方法是private的,所以就补贴出来了;
现在 我们用第三个来指定主题 (敲黑板),以下常量:
而笔者亲测 >=5或者<=0时就会使用默认主题,所以上述常量是没有5的!!!!
改起来也是非常简单的,直接添加一个参数就ok,直接上代码咯
public static void showDatePickerDialog(Activity activity, int themeResId, final TextView tv, Calendar calendar) {
        // 直接创建一个DatePickerDialog对话框实例,并将它显示出来
        new DatePickerDialog(activity
                ,  themeResId
        // 绑定监听器(How the parent is notified that the date is set.)
                ,new DatePickerDialog.OnDateSetListener() {
                    @Override
                    public void onDateSet(DatePicker view, int year,
                            int monthOfYear, int dayOfMonth) {
                        // 此处得到选择的时间,可以进行你想要的操作
                        tv.setText("您选择了:" + year + "年" + monthOfYear
                                    + "月" + dayOfMonth + "日");
                    }
                }
                // 设置初始日期
                , calendar.get(Calendar.YEAR)
                ,calendar.get(Calendar.MONTH)
                ,calendar.get(Calendar.DAY_OF_MONTH)).show();
}
时间选择的基础实现
TimePickerDialog构造方法源码一探究竟
/**
 * Creates a new time picker dialog.
 *
 * @param context the parent context
 * @param listener the listener to call when the time is set
 * @param hourOfDay the initial hour
 * @param minute the initial minute
 * @param is24HourView whether this is a 24 hour view or AM/PM
 */
public TimePickerDialog(Context context, OnTimeSetListener listener, int hourOfDay, int minute,
        boolean is24HourView) {
    this(context, 0, listener, hourOfDay, minute, is24HourView);
}
动手封装一下吧
public static void showTimePickerDialog(Activity activity, final TextView tv, Calendar calendar) {
// Calendar c = Calendar.getInstance();
            // 创建一个TimePickerDialog实例,并把它显示出来
           // 解释一哈,Activity是context的子类
            new TimePickerDialog( activity,
            // 绑定监听器
                    new TimePickerDialog.OnTimeSetListener() {
                        @Override
                        public void onTimeSet(TimePicker view,
                                int hourOfDay, int minute) {
                            tv.setText("您选择了:" + hourOfDay + "时" + minute
                                    + "分");
                        }
                    }
                    // 设置初始时间
                    , calendar.get(Calendar.HOUR_OF_DAY)
                    , calendar.get(Calendar.MINUTE)
                    // true表示采用24小时制
                    ,true).show();
}
同样,日期有两个构造方法,另一个可以设置主题
/**
 * Creates a new time picker dialog with the specified theme.
 *
 * The theme is overlaid on top of the theme of the parent {@code context}.
 * If {@code themeResId} is 0, the dialog will be inflated using the theme
 * specified by the
 * {@link android.R.attr#timePickerDialogTheme android:timePickerDialogTheme}
 * attribute on the parent {@code context}'s theme.
 *
 * @param context the parent context
 * @param themeResId the resource ID of the theme to apply to this dialog
 * @param listener the listener to call when the time is set
 * @param hourOfDay the initial hour
 * @param minute the initial minute
 * @param is24HourView Whether this is a 24 hour view, or AM/PM.
 */
public TimePickerDialog(Context context, int themeResId, OnTimeSetListener listener,
        int hourOfDay, int minute, boolean is24HourView) {...}
theme :
THEME_TRADITIONAL
- The traditional (pre-Holo) alert dialog theme (int 1)
THEME_HOLO_DARK
- The holographic alert theme with a dark background (int 2)
THEME_HOLO_LIGHT
- The holographic alert theme with a light background (int 3)
THEME_DEVICE_DEFAULT_DARK
- The device's default alert theme with a dark background. (int 4)
THEME_DEVICE_DEFAULT_LIGHT
- The device's default alert theme with a light background. (int 5)
上面已经改过,这么简单就不贴代码了
而笔者亲测>=5或者<=0时就会使用默认主题,所以上述常量也是没有5的!!!!
TimePickerDialog.THEME_HOLO_DARK之类的手法可以得到对应的int值

