SpringBoot与RabbitMQ整合
一.RabbitMQ简介
在消息服务中,消息中间件都会作为一个第三方消息代理,接收发布者的消息,并推送给消息消费者。RabbitMQ是实现了高级消息队列协议(AMQP)的开源消息代理软件(亦称面向消息的中间件),Spring使用RabbitMQ通过AMQP协议进行通信;在SpringBoot中对RabbitMQ进行了集成管理。
消息中间件的作用:
- 异步处理(处理批量数据,不会造成等待,主程序继续执行)
- 应用解耦(多个系统之间,不需要直接交互,通过消息进行业务流传)
- 流量削峰(高负载/任务缓冲处理)
- 分布式事务管理
二.RabbitMQ工作模式
- Work queues(工作队列模式)
- Publish/Subscribe(发布订阅模式)
- Routing(路由模式)
- Topics(通配符模式)
- RPC
- Headers
交换机类型:
- Fanout Exchange 广播交换机(投递到所有绑定的队列,不需要规则)
- Direct Exchange 直连交换机( 根据路由键完全匹配进行)
- Topic Exchange 通配符交换机(*匹配一个单词,#匹配多个单词)
- Headers Exchange 头交换机(与消息内容中的Headers进行匹配)
三.安装RabbitMQ
在Windows环境下安装RabbitMQ还需要64位的Erlang语言包支持,找到需要下载的RabbitMQ版本对应依赖的Erlang版本进行下载。
安装Erlang语言包
下载RabbitMQ
四.启动RabbitMQ
1.打开命令行,进入RabbitMQ的安装目录
2.输入 rabbitmqctl status启动RabbitMQ

输入命令rabbitmq-plugins enable rabbitmq_management配置可视化管理界面
在web浏览器中输入地址:http://localhost:15672
输入默认账号: guest 密码: guest

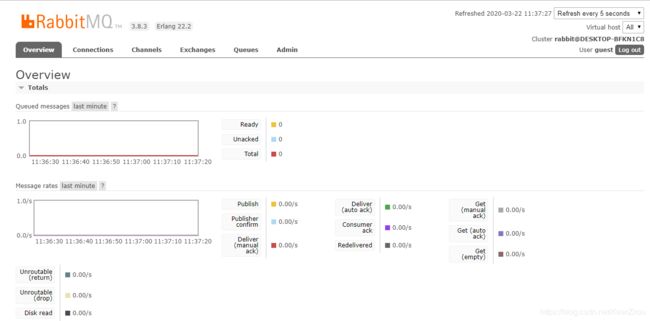
登录成功:

停止服务:rabbitmqctl stop
五.Spring Boot整合RabbitMQ
在pom文件中添加依赖:
    org.springframework.boot
    spring-boot-starter-amqp
application.properties
spring.rabbitmq.host=localhost
spring.rabbitmq.port=5672
spring.rabbitmq.username=guest
spring.rabbitmq.password=guest
spring.rabbitmq.virtual-host=/
连接RabbitMQ服务端口号为5672,默认用户和密码都为guest
Publish/Subscribe工作模式
1.基于API方式
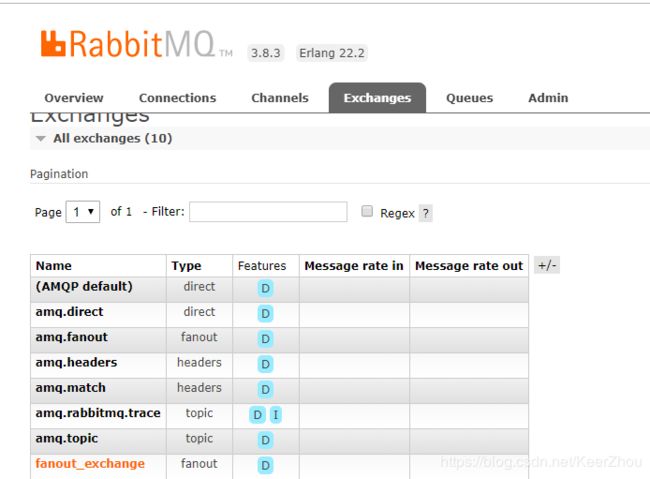
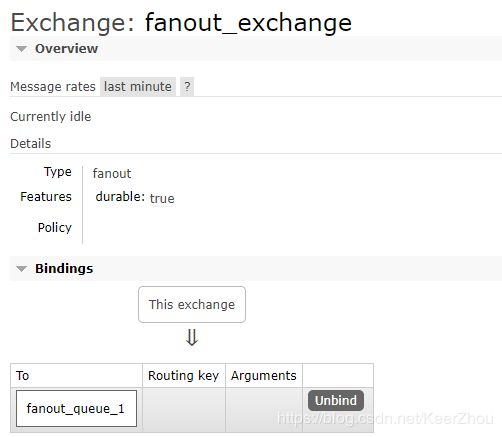
定义交换器、创建队列、将队列与交换器绑定
package com.rabbitmq;

import org.junit.jupiter.api.Test;
import org.junit.runner.RunWith;
import org.springframework.amqp.core.AmqpAdmin;
import org.springframework.amqp.core.Binding;
import org.springframework.amqp.core.FanoutExchange;
import org.springframework.amqp.core.Queue;
import org.springframework.beans.factory.annotation.Autowired;
import org.springframework.boot.test.context.SpringBootTest;
import org.springframework.test.context.junit4.SpringRunner;

@RunWith(SpringRunner.class)
@SpringBootTest
class TestApplicationTests {

    @Autowired
    private AmqpAdmin amqpAdmin;
    @Test
    public void amqpAdmin() {
        //定义fanout类型的交换器
        amqpAdmin.declareExchange(new FanoutExchange("fanout_exchange"));
        //定义默认持久化队列
        amqpAdmin.declareQueue(new Queue("fanout_queue_1"));
        //将队列与交换器进行绑定
        amqpAdmin.declareBinding(new Binding("fanout_queue_1",
                Binding.DestinationType.QUEUE,"fanout_exchange","",null));
    }

}
 @Autowired
 private RabbitTemplate rabbitTemplate;
 //发送五条消息
 @Test
 public void psubPublisher() {
     for (int i = 0; i < 5; i++) {
         rabbitTemplate.convertAndSend("fanout_exchange", "", "send message. message "+i);
     }
 }
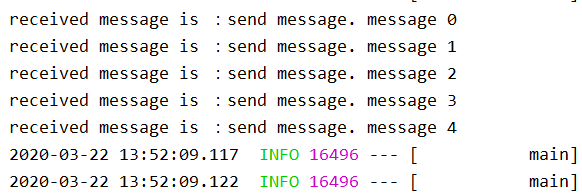
运行结果:
![]()
接收消息
RabbitMQService.java
package com.rabbitmq.service;

import org.springframework.amqp.core.Message;
import org.springframework.amqp.rabbit.annotation.RabbitHandler;
import org.springframework.amqp.rabbit.annotation.RabbitListener;
import org.springframework.stereotype.Component;
import org.springframework.stereotype.Service;

@Service
public class RabbitMQService {
    @Component
    @RabbitListener(queues = "fanout_queue_1")
    public class Consumer {

        @RabbitHandler
        private void receivedMessage(String msg) {
            System.out.println("received message is :" + msg);
        }
    }
}
package com.rabbitmq.config;

import org.springframework.amqp.core.*;
import org.springframework.amqp.support.converter.Jackson2JsonMessageConverter;
import org.springframework.amqp.support.converter.MessageConverter;
import org.springframework.context.annotation.Bean;
import org.springframework.context.annotation.Configuration;

@Configuration
public class RabbitMQConfig {
    //自定义消息转换器
    @Bean
    public MessageConverter messageConverter() {
        return new Jackson2JsonMessageConverter();
    }
    //1.定义fanout类型的交换器
    @Bean
    public Exchange fanout_exchange() {
        return ExchangeBuilder.fanoutExchange("fanout_exchange").build();
    }
    //2.定义消息队列
    @Bean
    public Queue fanout_queue_1() {
        return new Queue("fanout_queue_1");
    }
    //3.将消息队列与交换器进行绑定
    @Bean
    public Binding bindingEmail() {
        return BindingBuilder.bind(fanout_queue_1()).to(fanout_exchange()).with("").noargs();
    }

}
3.基于注解的方式
//基于注解方式实现消息服务
@RabbitListener(bindings = @QueueBinding(value =
                            @Queue("fanout_queue_1"),exchange =
                            @Exchange(value = "fanout_exchange",type = "fanout")))
public void receivedMessage(String msg) {
    System.out.println("received message is:"+msg);
}
Routing路由模式
路由模式下交换器类型type属性为direct,并且必须指定key属性。
发送消息:
@Autowired
private RabbitTemplate rabbitTemplate;

@Test
public void routingPublisher() {
    for (int i = 0; i < 5; i++) {
        rabbitTemplate.convertAndSend("routing_exchange", "routing_key", "routing send message"+i);
    }
}
接收消息:
//路由模式接收消息
@RabbitListener(bindings = @QueueBinding(value =
                            @Queue("routing_queue_1"),exchange =
                            @Exchange(value = "routing_exchange",type = "direct"),
        					key = "routing_key"))
public void receivedMessage(String msg) {
    System.out.println("received message is:"+msg);
}
通配符模式下交换器类型type属性为topic,可以使用通配符的样式指定路由键。
发送消息:
    @Autowired
    private RabbitTemplate rabbitTemplate;
    @Test
    public void topicPublisher() {
        //只发送topic1消息
        rabbitTemplate.convertAndSend("topic_exchange","info.topic1",
                "send topic1 message");
        //只发送topic2消息
        rabbitTemplate.convertAndSend("topic_exchange","info.topic2",
                "send topic2 message");
        //发送topic1和topic2消息
        rabbitTemplate.convertAndSend("topic_exchange","info.topic1.topic2",
            "send topic1 and topic2 message");
    }
接收消息:
    //通配符模式消息接收
    @RabbitListener(bindings = @QueueBinding(value =
                                @Queue("topic_queue_1"),exchange =
                                @Exchange(value = "topic_exchange",type = "topic"),
                                key = {"info.#.topic1.#"}))
    public void receivedtopic1Message(String msg) {
        System.out.println("received topic1 message is:"+msg);
    }

    @RabbitListener(bindings = @QueueBinding(value =
                                @Queue("topic_queue_2"),exchange =
                                @Exchange(value = "topic_exchange",type = "topic"),
                                key = {"info.#.topic2.#"}))
    public void receivedtopic2Message(String msg) {
        System.out.println("received topic2 message is:"+msg);
    }


