intel movidius 神经元计算棒2代 ubuntu16.04运行环境搭建教程
intel movidius 神经元计算棒2代 ubuntu16.04运行环境搭建教程
- 摘要
- 材料准备
- 注意事项
- 步骤
摘要
这篇文章记录在台式机的ubuntu16.04下搭建intel神经元计算棒2开发环境的过程。
材料准备
- ubuntu16.04电脑,可联网
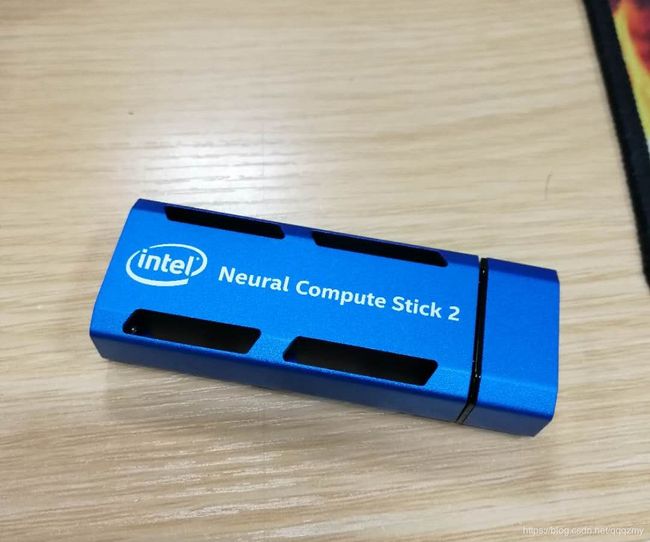
- 神经元计算棒2代
- Intel官网下载toolkit for linux 安装包
下载地址:
https://software.intel.com/en-us/openvino-toolkit/choose-download/free-download-linux
安装参考链接:
https://software.intel.com/en-us/neural-compute-stick/get-started
注意事项
注意:现在的时间是2018年12月13日,intel官网的安装教程或者toolkit软件包可能会有更新,如果你是在这个时间后较长一段时间看见的,请到官网查看安装方式是否有变化,这很重要!在最开始我是看博客搭建的,搭建了一半发现官网的安装方式已经改变,过程更加简单,而且有gui界面。所以请在开始安装前上一下官网查看一下!
步骤
- 下载toolkit(linux版)
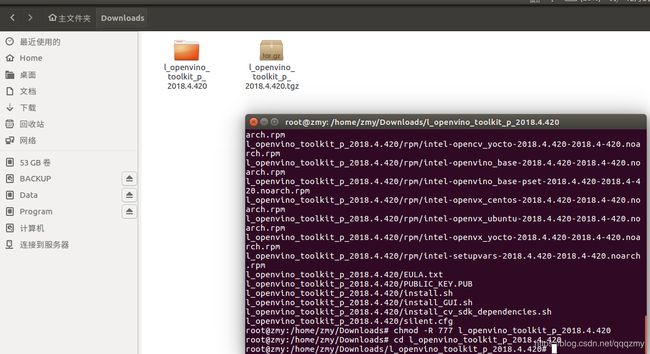
在官网可以下载到toolkit:l_openvino_toolkit_.tgz,我这里用的版本是2018.4.420 - 建立一个文件夹Downloads,把toolkit放进去,在所在目录下解压:
tar xvf l_openvino_toolkit_2018.4.420.tgz
解压后进入文件夹:
cd l_openvino_toolkit_2018.4.420
- 在root下运行安装依赖环境
./install_cv_sdk_dependencies.sh
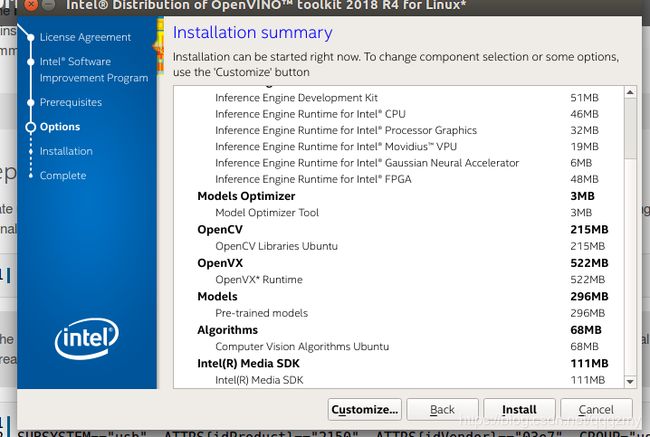
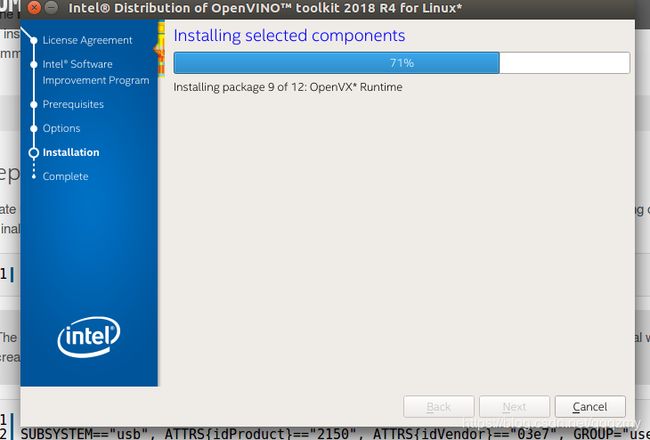
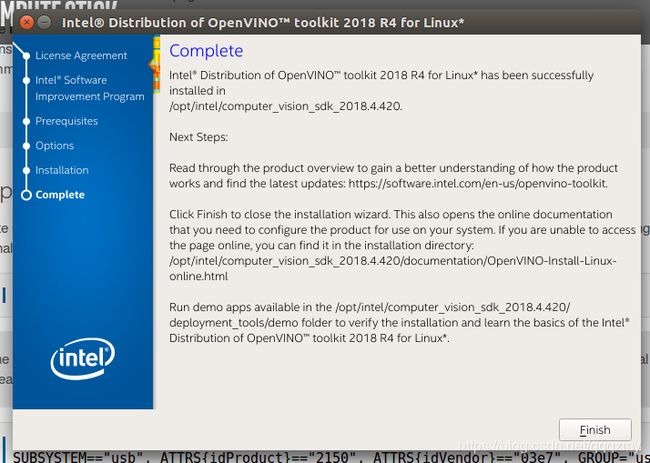
- 打开安装gui:
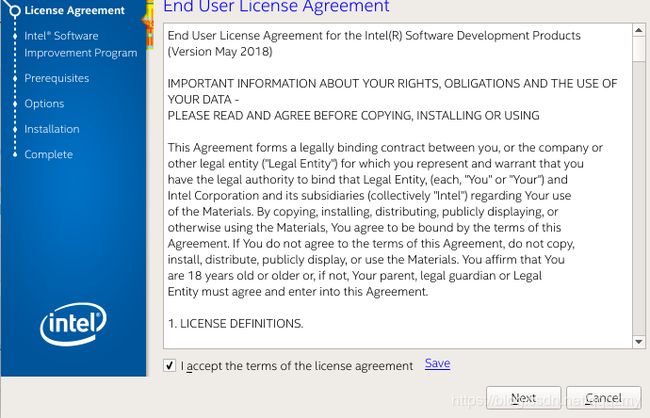
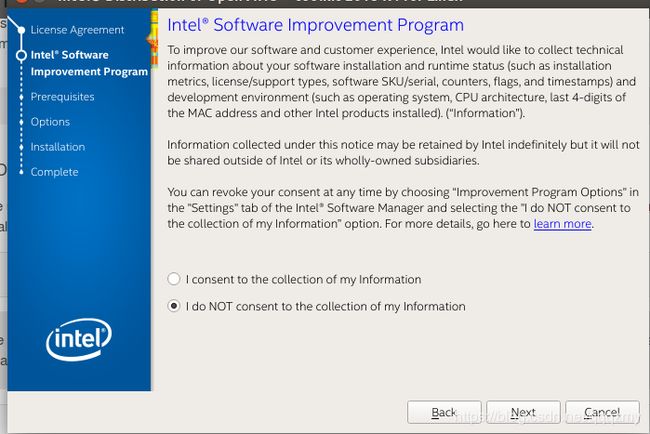
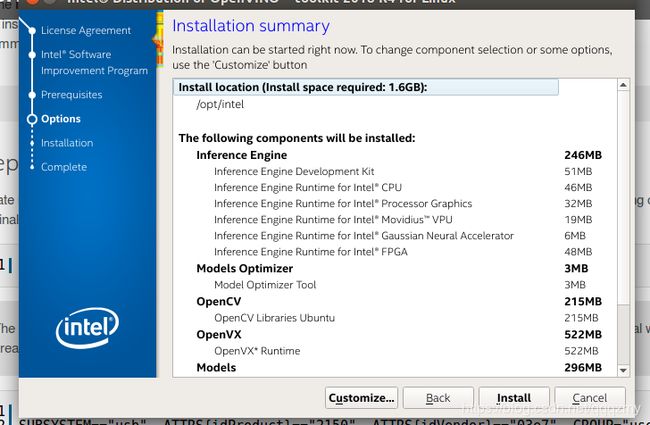
./install_GUI.sh
- 配置神经计算棒 USB 驱动程序
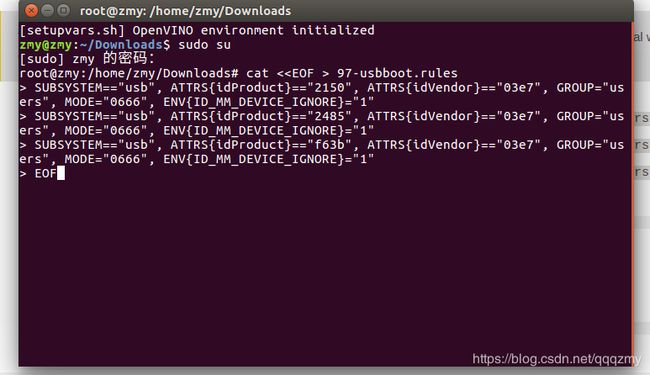
更新udev规则使工具套件能够与神经计算棒通信。 为此,在终端窗口运行以下命令:
cd ~/Downloads
然后一次性复制以下一大块代码到命令行中:
cat < 97-usbboot.rules
SUBSYSTEM=="usb", ATTRS{idProduct}=="2150", ATTRS{idVendor}=="03e7", GROUP="users", MODE="0666", ENV{ID_MM_DEVICE_IGNORE}="1"
SUBSYSTEM=="usb", ATTRS{idProduct}=="2485", ATTRS{idVendor}=="03e7", GROUP="users", MODE="0666", ENV{ID_MM_DEVICE_IGNORE}="1"
SUBSYSTEM=="usb", ATTRS{idProduct}=="f63b", ATTRS{idVendor}=="03e7", GROUP="users", MODE="0666", ENV{ID_MM_DEVICE_IGNORE}="1"
EOF
sudo cp 97-usbboot.rules /etc/udev/rules.d/
sudo udevadm control --reload-rules
sudo udevadm trigger
sudo ldconfig
rm 97-usbboot.rules
注:在运行到“sudo ldconfig”时会有以下bug:
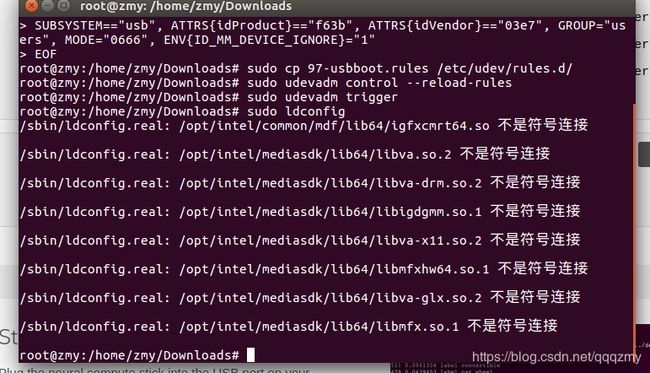
没有找到链接文件,解决方法如下:进入.so文件所在的路径,按以下命令建立链接:
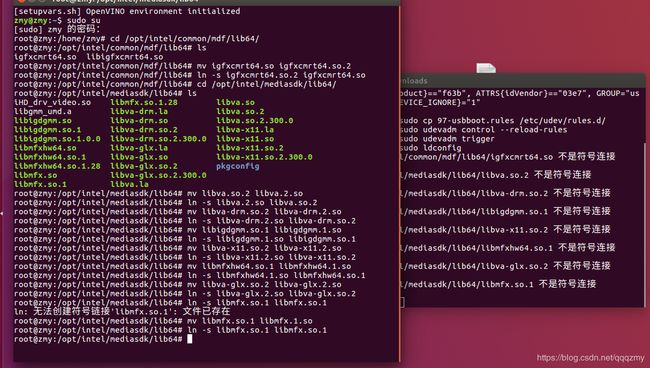
再次执行“sudo ldconfig”就不会报错了
参考链接:
https://blog.csdn.net/choice_jj/article/details/8722035
- 测试安装
将神经计算棒插入计算机的 USB 端口,第一次运行这些命令时,可能需要一些时间,因为脚本要安装软件依赖项并编译所有样本代码。
cd ~/opt/intel/computer_vision_sdk/deployment_tools/model_optimizer/install_prerequisites/
./install_prerequisites.sh
注:可能会出现以下错误:
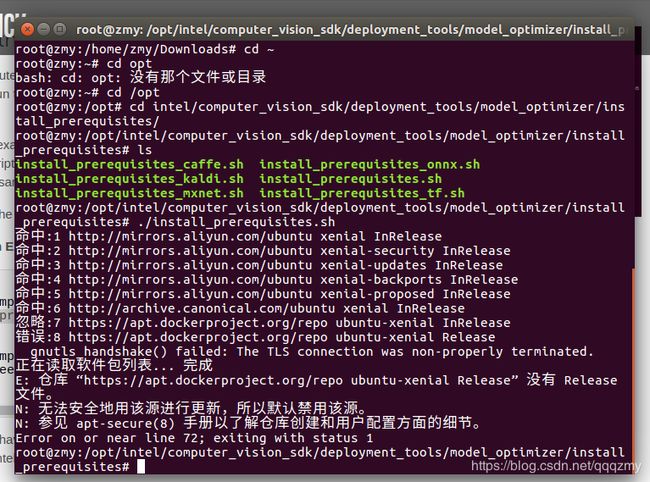
这是因为源的问题,在“系统设置”-“软件设置”-“其他软件”中把出错的源去掉
然后执行:
apt-get clean
apt-get update
如果系统的源时国外的,没法下载,可以换成国内的阿里云源或者中科大源,具体方法网上很多
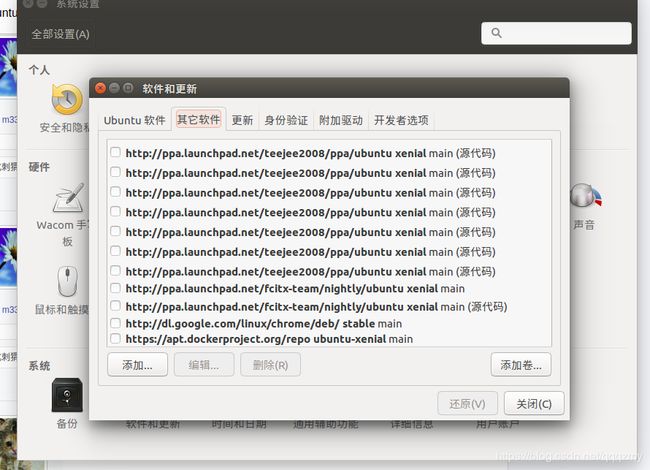
接下来进入demo文件夹:
cd ~/opt/intel/computer_vision_sdk/deployment_tools/demo
执行:
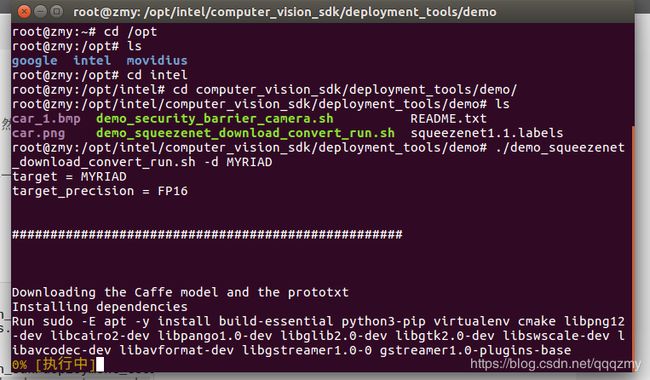
./demo_squeezenet_download_convert_run.sh -d MYRIAD
执行:
./demo_squeezenet_download_convert_run.sh -d MYRIAD
执行过程中要下载模型参数,可能会因为网络原因失败,多尝试几次即可,实在不行的话考虑更换软件源
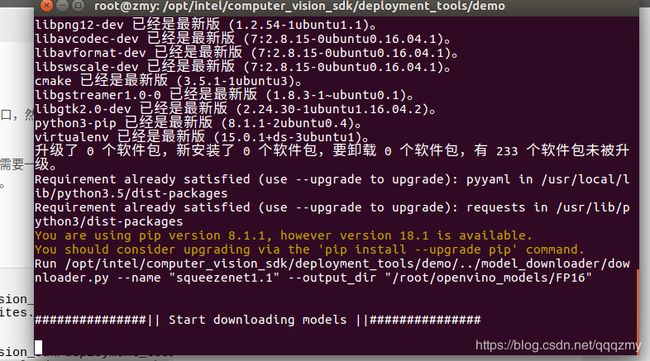
我们跑的demo是对于一幅汽车的图像进行分类检测,输出的预测类型与概率。参数文件来自caffe,模型是squeezeNet,

最后等待几分钟,下载完毕。程序自动转换caffemodel到计算棒可以执行的graph文件,输出如下:
[WARNING] All Model Optimizer dependencies are installed globally.
[WARNING] If you want to keep Model Optimizer in separate sandbox
[WARNING] run install_prerequisites.sh venv {caffe|tf|mxnet|kaldi|onnx}
###################################################
Convert a model with Model Optimizer
Run python3
/opt/intel//computer_vision_sdk_2018.4.420/deployment_tools/model_optimizer/mo.py --input_model /root/openvino_models/FP16/classification/squeezenet/1.1/caffe/squeezenet1.1.caffemodel --output_dir /root/openvino_models/ir/squeezenet1.1/FP16 --data_type FP16
Model Optimizer arguments:
Common parameters:
	- Path to the Input Model:
	/root/openvino_models/FP16/classification/squeezenet/1.1/caffe/squeezenet1.1.caffemodel
	- Path for generated IR: 	/root/openvino_models/ir/squeezenet1.1/FP16
	- IR output name: 	squeezenet1.1
	- Log level: 	ERROR
	- Batch: 	Not specified, inherited from the model
	- Input layers: 	Not specified, inherited from the model
	- Output layers: 	Not specified, inherited from the model
	- Input shapes: 	Not specified, inherited from the model
	- Mean values: 	Not specified
	- Scale values: 	Not specified
	- Scale factor: 	Not specified
	- Precision of IR: 	FP16
	- Enable fusing: 	True
	- Enable grouped convolutions fusing: 	True
	- Move mean values to preprocess section: 	False
	- Reverse input channels: 	False
Caffe specific parameters:
	- Enable resnet optimization: 	True
	- Path to the Input prototxt:
	/root/openvino_models/FP16/classification/squeezenet/1.1/caffe/squeezenet1.1.prototxt
	- Path to CustomLayersMapping.xml: 	Default
	- Path to a mean file: 	Not specified
	- Offsets for a mean file: 	Not specified
Model Optimizer version: 	1.4.292.6ef7232d
[ SUCCESS ] Generated IR model.
[ SUCCESS ] XML file: /root/openvino_models/ir/squeezenet1.1/FP16/squeezenet1.1.xml
[ SUCCESS ] BIN file: /root/openvino_models/ir/squeezenet1.1/FP16/squeezenet1.1.bin
[ SUCCESS ] Total execution time: 1.06 seconds.
###################################################
接下来程序开始运行推断了,输出如下:
Build Inference Engine samples
Target folder /root/inference_engine_samples already exists. Skipping samples building.If you want to rebuild samples, remove the entire /root/inference_engine_samples folder. Then run the script again
###################################################
Run Inference Engine classification sample
Run ./classification_sample -d MYRIAD -i /opt/intel/computer_vision_sdk/deployment_tools/demo/../demo/car.png -m /root/openvino_models/ir/squeezenet1.1/FP16/squeezenet1.1.xml
[ INFO ] InferenceEngine:
	API version ............ 1.4
	Build .................. 17328
[ INFO ] Parsing input parameters
[ INFO ] Files were added: 1
[ INFO ]     /opt/intel/computer_vision_sdk/deployment_tools/demo/../demo/car.png
[ INFO ] Loading plugin
	API version ............ 1.4
	Build .................. 17328
	Description ....... myriadPlugin
[ INFO ] Loading network files:
	/root/openvino_models/ir/squeezenet1.1/FP16/squeezenet1.1.xml
	/root/openvino_models/ir/squeezenet1.1/FP16/squeezenet1.1.bin
[ INFO ] Preparing input blobs
[ WARNING ] Image is resized from (787, 259) to (227, 227)
[ INFO ] Batch size is 1
[ INFO ] Preparing output blobs
[ INFO ] Loading model to the plugin
[ INFO ] Starting inference (1 iterations)
[ INFO ] Processing output blobs
Top 10 results:

Image /opt/intel/computer_vision_sdk/deployment_tools/demo/../demo/car.png
817 0.8295898 label sports car, sport car
511 0.0961304 label convertible
479 0.0439453 label car wheel
751 0.0101318 label racer, race car, racing car
436 0.0074234 label beach wagon, station wagon, wagon, estate car, beach waggon, station waggon, waggon
656 0.0042267 label minivan
586 0.0029869 label half track
717 0.0018148 label pickup, pickup truck
864 0.0013924 label tow truck, tow car, wrecker
581 0.0006595 label grille, radiator grille
total inference time: 9.7110895
Average running time of one iteration: 9.7110895 ms
Throughput: 102.9750571 FPS
[ INFO ] Execution successful
###################################################
Demo completed successfully.
至此,我们的的demo成功再计算棒上运行了,验证了我们的安装是没问题的。
具体的性能参数如下:
| 模型 | squzeenet分类 |
|---|---|
| 输入图片大小 | (787, 259) resize to (227, 227) |
| 预测结果 | 0.8295898 label:sports car, sport car |
| 模型转换时间 | 1.06s |
| 推理时间 | 9.7110895 ms |
| 帧率 | 102.9750571 FPS |
可见这个性能还是可以的,用在实时检测上完全没有问题
运行其他例子结果:
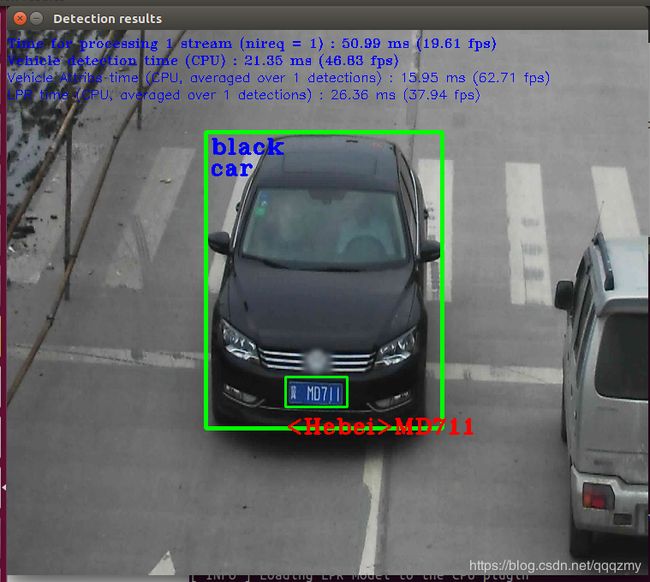
此外还运行了车辆检测以及车牌检测的demo,结果如下:
CPU推理的结果:
计算棒推理的结果:
| 项目 | CPU结果 | 计算棒结果 |
|---|---|---|
| Time for peocessing 1 stream(nireq = 1): | 50.99ms (19.61fps) | 98.91ms (10.11fps) |
| Vehicle detection time | 21.35ms(46.63fps) | 82.16s(12.17fps) |
| Vehicle Attribs time(averaged over 1detection): | 15.95ms(62.71fps) | 3.83ms(261.39fps) |
| LPR time (averaged over 1dections): | 26.36 ms(37.94 fps) | 12.84ms(77.88fps) |
前面两项CPU速度超过了计算棒,原因不明,有待后续查证
