http://www.cnblogs.com/jinmu190/archive/2011/03/21/1990698.html
1. 编译uboot
- 从uboot的git仓库下载uboot
git clone git://git.denx.de/u-boot.git - 执行编译
export ARCH=arm
export CROSS_COMPILE=arm-linux-gnueabihf-
make clean
make vexpress_ca9x4_defconfig
提示bison: not found
sudo apt-get install bison
提示flex: not found
sudo apt-get install flex
make vexpress_ca9x4_defconfig
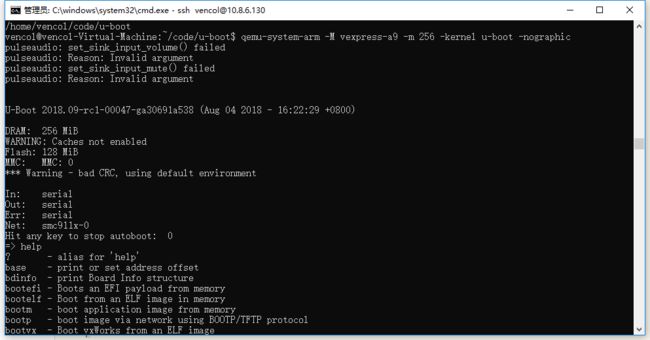
make -j8 - 执行仿真u-boot
qemu-system-arm -M vexpress-a9 -m 256 -kernel u-boot -nographic
2. 编译kernel
- 从kernel的git仓库下载kernel
git clone git://git.kernel.org/pub/scm/linux/kernel/git/stable/linux-stable.git kernel - 执行编译
export ARCH=arm
export CROSS_COMPILE=arm-linux-gnueabihf-
make clean
make vexpress_defconfig
make menuconfig
去掉System Type 把 Enable the L2x0 outer cache controller 取消,否则qemu起不来
make -j8 - 执行仿真kernel,这里必须加入dtb不然仿真失败
qemu-system-arm -M vexpress-a9 -m 512M -kernel arch/arm/boot/zImage -dtb arch/arm/boot/dts/vexpress-v2p-ca9.dtb -nographic -append "console=ttyAMA0"
-M vexpress-a9 模拟vexpress-a9单板,你能够使用-M ?參数来获取该qemu版本号支持的全部单板
-m 512M 单板执行物理内存512M
-kernel arch/arm/boot/zImage   告诉qemu单板执行内核镜像路径
-dtb arch/arm/boot/dts/vexpress-v2p-ca9.dtb  告诉qemu单板的设备树(必须加入)
-nographic 不使用图形化界面,仅仅使用串口
-append "console=ttyAMA0" 内核启动參数。这里告诉内核vexpress单板执行。串口设备是哪个tty。
3. 编译busybox,制作rootfs
- 从busybox的git仓库下载busybox
git clone git://busybox.net/busybox.git - 执行编译
make defconfig
make menuconfig
makeCROSS_COMPILE=arm-none-linux-gnueabihf- -j8
make install - 制作rootfs
#!/bin/bash
sudo rm -rf rootfs
sudo rm -rf tmpfs
sudo rm -f a9rootfs.ext3
sudo mkdir rootfs
sudo cp _install/*  rootfs/ -raf
mkdir -p rootfs/{lib,proc,sys,tmp,root,var,mnt}
sudo cp -arf /usr/local/gcc-arm-none-eabi/arm-none-linux-gnueabi/lib rootfs/
sudo cp etc rootfs/ -arf
sudo rm rootfs/lib/*.a
sudo mkdir -p rootfs/dev/
sudo mknod rootfs/dev/tty1 c 4 1
sudo mknod rootfs/dev/tty2 c 4 2pro
sudo mknod rootfs/dev/tty3 c 4 3
sudo mknod rootfs/dev/tty4 c 4 4
sudo mknod rootfs/dev/console c 5 1
sudo mknod rootfs/dev/null c 1 3
sudo dd if=/dev/zero of=a9rootfs.ext3 bs=1M count=32
sudo mkfs.ext3 a9rootfs.ext3
sudo mkdir -p tmpfs
sudo mount -t ext3 a9rootfs.ext3 tmpfs/ -o loop
sudo cp -r rootfs/*  tmpfs/
sudo umount tmpfs
- 获取etc配置文件
wget http://files.cnblogs.com/files/pengdonglin137/etc.tar.gz - 执行仿真,这里必须加入dtb不然仿真失败
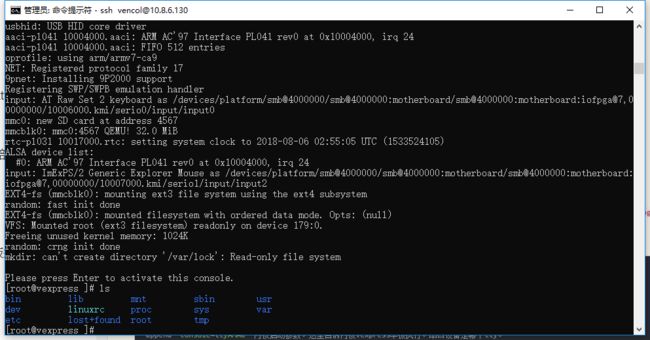
qemu-system-arm -M vexpress-a9 -m 512M -kernel arch/arm/boot/zImage -dtb arch/arm/boot/dts/vexpress-v2p-ca9.dtb -nographic -append "root=/dev/mmcblk0 rw console=ttyAMA0" -sd a9rootfs.ext3
-M vexpress-a9 模拟vexpress-a9单板,你能够使用-M ?參数来获取该qemu版本号支持的全部单板
-m 512M 单板执行物理内存512M
-kernel arch/arm/boot/zImage   告诉qemu单板执行内核镜像路径
-dtb arch/arm/boot/dts/vexpress-v2p-ca9.dtb  告诉qemu单板的设备树(必须加入)
-nographic 不使用图形化界面,仅仅使用串口
-append "root=/dev/mmcblk0 rw console=ttyAMA0" 内核启动參数。这里告诉内核vexpress单板执行。串口设备是哪个tty,那个文件系统。rw读写权限
-sd a9rootfs.ext3   挂载根文件系统为sk卡
4. 在主机搭建tftp服务器(把kernel放到tftp上,通过uboot引导)
- 安装必要的一下依赖软件
sudo apt-get install tftp-hpa tftpd-hpa xinetd - 查看/etc/xinetd.conf,是否如下(没有创建)
# Simple configuration file for xinetd
#
# Some defaults, and include /etc/xinetd.d/
defaults
{
# Please note that you need a log_type line to be able to use log_on_success ont-size: 12pt; "> # log_type = SYSLOG daemon info
}
includedir /etc/xinetd.d
- 配置tftp服务器如下
sudo vi /etc/default/tftpd-hpa
# /etc/default/tftpd-hpa
    TFTP_USERNAME="tftp"
    TFTP_DIRECTORY="/tftpboot"
#这是你tftp服务器的工作目录,自行修改,注意,在新建工作目录时,最好修改其权限为777,命令sudo chmod 777 /tftpboot
    TFTP_ADDRESS="0.0.0.0:69"
    TFTP_OPTIONS="-l -c -s"
- 配置xinet(没有创建),其中server_args一行是配置服务器的文件存放的位置,就是进行tftp传输的时候,都是从该文件夹中搜索文件的。
sudo vi /etc/xinetd.d/tftp
service tftp
    {
       socket_type = dgram
       wait = yes
       disable = no
       user = root
       protocol = udp
       server = /usr/sbin/in.tftpd
       server_args = -s /tftpboot
       #log_on_success += PID HOST DURATION
       #log_on_failure += HOST
       per_source = 11
       cps =100 2
       flags =IPv4
    }
- 建立tftp文件夹系统
sudo mkdir /tftpboot
sudo chmod 777 /tftpboot - 重启tftp
sudo service tftpd-hpa restart
sudo /etc/init.d/xinetd reload
sudo /etc/init.d/xinetd restart - 本地测试tftp
sudo tftp localhost
如果进入tftp命令符,说明本地没有问题,远程需要注意防火墙之类的
5. uboot通过tftp加载uimage
- 修改uboot代码并编译
include/configs/vexpress_common.h   加入相应的宏定义
 #define CONFIG_IPADDR   10.8.6.152
 #define CONFIG_NETMASK  255.255.254.0
 #define CONFIG_SERVERIP 10.8.6.142
修改启动文件为uImage
#define CONFIG_BOOTFILE                "uImage"
修改启动命令为
 #define CONFIG_BOOTCOMMAND  "tftp 0x60003000 uImage; setenv bootargs'root=/dev/mmcblk0 console=ttyAMA0'; bootm 0x60003000"
make ARCH=arm CROSS_COMPILE=arm-linux-gnueabihf- -j4
- kernel编译(LOADADDR和uboot的启动加载位置一致)
make uImage LOADADDR=0x60003000 –j4 - 进行仿真(把uImage放到tftp目录下)
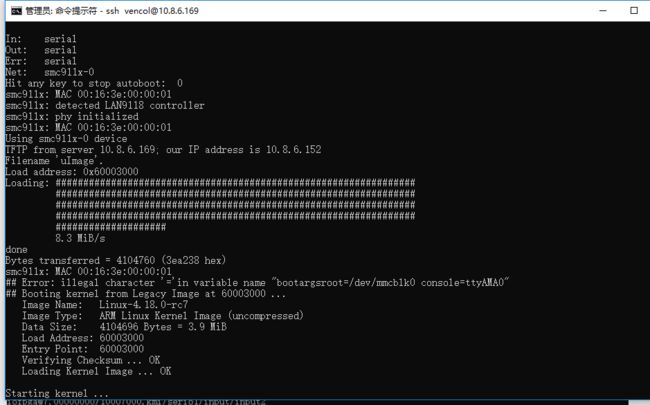
sudo qemu-system-arm -M vexpress-a9 -m 256 -kernel u-boot -nographic -net nic,macaddr=00:16:3e:00:00:01 -net tap -
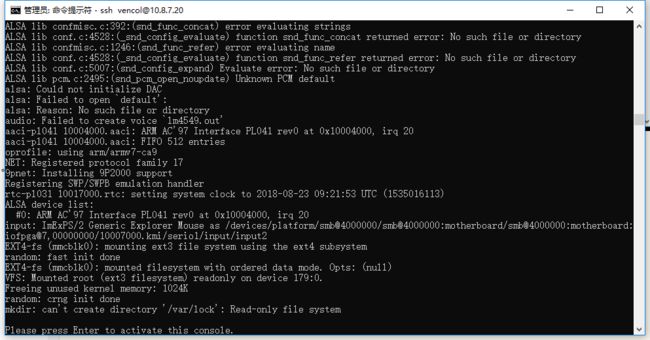
出现下图类似情况,表示成功
6. uboot通过tftp加载uimage,并加入dtb,使内核开始运行
- 进入内核目录并编译生成dtb
make -j4 ARCH=arm CROSS_COMPILE=arm-linux-gnueabihf- dtbs - 拷贝生成的dtb文件到tftp下
cp arch/arm/boot/dts/vexpress-v2p-ca9.dtb ../tftpboot/dtb - 进入uboot所在目录并使用qemu进行仿真
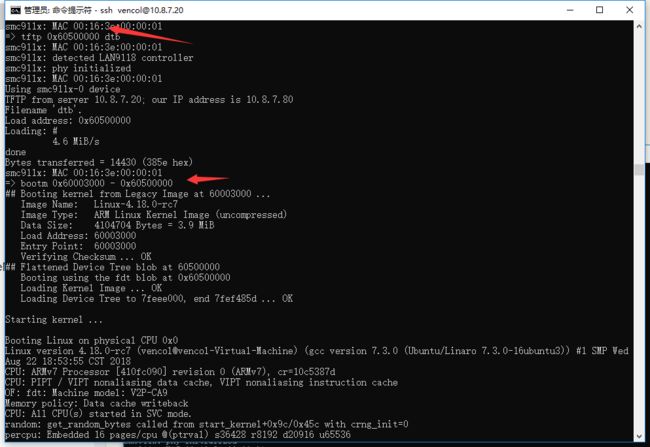
sudo qemu-system-arm -M vexpress-a9 -m 512 -kernel u-boot -nographic -net nic,macaddr=00:16:3e:00:00:01 -net tap - 分别通过下面命令加载UImage和dtb,出现如下界面表示加载成功
tftp 0x60003000 uImage
tftp 0x60500000 dtb
- 使用下面命令启动uboot并进行传参
bootm 0x60003000 - 0x60500000 -
成功出现如下界面,但是还是不能加载文件系统,后续加入
- 不能挂载文件系统的原因是因为没有设置启动命令,可以通过如下命令加载
sudo qemu-system-arm -M vexpress-a9 -m 512 -kernel u-boot -nographic -net nic,macaddr=00:16:3e:00:00:01 -net tap -sd a9rootfs.ext3 - 进入uboot后输入下面命令
setenv bootargs 'root=/dev/mmcblk0 console=ttyAMA0'
tftp 0x60003000 uImage
tftp 0x60500000 dtb
bootm 0x60003000 - 0x60500000
-
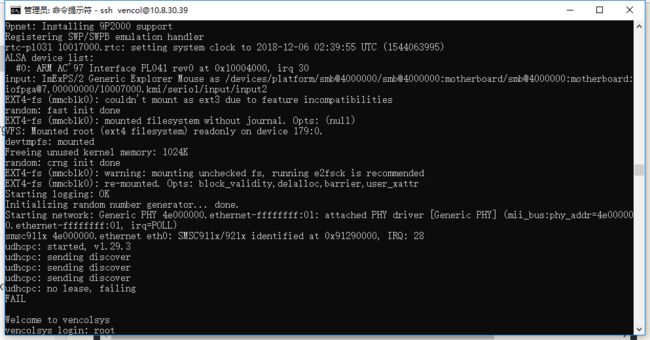
出现如下界面表示成功
7. 网络配置
lubuntu中需要加上sudo apt install ifupdown来开启ifupdowm,否则直接修改interface无效
sudo apt-get install uml-utilities bridge-utils
关于新的网络脚本,修改 /etc/network/interfaces 文件,最后需要重启计算机,使新的 /etc/network/interfaces 配置文件生效
auto lo
iface lo inet loopback

# The eth0 network interface(s)
# auto eth0
# iface eth0 inet dhcp

# The bridge network interface(s)
auto br0
iface br0 inet dhcp
# iface br0 inet static
# address 192.168.0.1
# netmask 255.255.255.0
# gateway 192.168.0.254
bridge_ports eth0
bridge_fd 9
bridge_hello 2
bridge_maxage 12
bridge_stp off

# The tap0 network interface(s)
auto tap0
iface tap0 inet manual
# iface tap0 inet static
# address 192.168.0.2
# netmask 255.255.255.0
# gateway 192.168.0.254
pre-up tunctl -t tap0 -u root
pre-up ifconfig tap0 0.0.0.0 promisc up
post-up brctl addif br0 tap0
使用qemu-ifup脚本,权限755 sudo chmod 755 qemu-ifup
#!/bin/sh
echo "net up"
switch=br0
ifconfig $1 up
#ip link set $1 up
brctl addif ${switch} $1
使用qemu-ifdown脚本,权限755 sudo chmod 755 qemu-ifdown
#!/bin/sh
echo "Close tap!"
switch=br0
brctl delif ${switch} $1
ifconfig $1 down
#ip link set $1 down
#tunctl -d $1
使用命令启动uboot,用ping测试
setenv ipaddr 10.8.30.33; setenv serverip 10.8.30.39; tftp 0x60003000 uImage; tftp 0x60500000 dtb; setenv bootargs \"root=/dev/nfs rw nfsroot=10.8.30.39:/home/vencol/code/nfs ip=10.8.30.33 console=ttyAMA0\"; bootm 0x60003000 - 0x60500000
sudo qemu-system-arm -M vexpress-a9 -m 256 -kernel u-boot -nographic -net nic -net tap,ifname=tap0,script=./qemu-ifup,downscript=./qemu-ifdown
9. uboot通过tftp加载uImage和dtb,加载文件系统
- 修改vi output/build/uboot-2018.09/include/configs/vexpress_common.h,其中bootargs 是引导内核的参数
#define CONFIG_IPADDR   10.8.30.33
#define CONFIG_NETMASK  255.255.255.0
#define CONFIG_SERVERIP 10.8.30.39
#define CONFIG_BOOTFILE                "uImage"
#define CONFIG_BOOTCOMMAND  "tftp 0x60003000 uImage; tftp 0x60500000 dtb; setenv bootargs \"root=/dev/mmcblk0 consol    e=ttyAMA0\"; bootm 0x60003000 - 0x60500000"
 20
- 修改后编译
- 使用qemu仿真,加载加载uImage和dtb,加载文件系统
sudo qemu-system-arm -M vexpress-a9 -m 256 -kernel u-boot
 -nographic -net nic -net tap,ifname=tap0,script=./qemu-ifup,downscript=./qemu-ifdown -sd rootfs.ext2
8. Ubuntu安装nfs
- sudo apt-get install nfs-kernel-server 安装nfs。
- sudo mkdir /home/share/nfs 建立nfs共享文件夹。
- sudo vi /etc/exports 配置nfs。加入/home/song/nfs *(rw,sync,no_root_squash,no_subtree_check)
- sudo /etc/init.d/rpcbind restart 重启rpcbind
- sudo /etc/init.d/nfs-kernel-server restart 重启nfs
8. 后续加入kernel通过网络使用nfs根文件系统
- 查看 /dev/net/tun 文件
如果该文件存在,这表明内核已经支持开启了 tun 支持,在 ubuntu-12.04 中,这个功能默认已经开启。
如果该文件不存在,则需要加载 tun 模块,并创建 /dev/net/tun 文件。
-net nic,macaddr=00:16:3e:00:00:01 -net tap
