1.安装必要的依赖包,关防火墙,向/etc/hosts内添加域名等
2.安装ceph
配置yum源
(如果嫌慢,可以配置cachedir=/home/yum/$basearch/$releasever和keepcache=1两个参数,在第一次安装时将安装包下载到本地做成yum源,给后面的多个服务器使用)
[root@ceph1 mycluster]# cat /etc/yum.repos.d/ceph.repo
[ceph-noarch]
name=Ceph noarch packages
baseurl=http://eu.ceph.com/rpm-luminous/el7/noarch/
enabled=1
gpgcheck=1
type=rpm-md
gpgkey=http://eu.ceph.com/keys/release.asc
priority=1

[Ceph]
name=Ceph packages for $basearch
baseurl=http://eu.ceph.com/rpm-luminous/el7/$basearch
enabled=1
gpgcheck=1
type=rpm-md
gpgkey=http://eu.ceph.com/keys/release.asc
priority=1

[ceph-source]
name=Ceph source packages
baseurl=http://eu.ceph.com/rpm-luminous/el7/SRPMS
enabled=1
gpgcheck=1
type=rpm-md
gpgkey=http://eu.ceph.com/keys/release.asc
priority=1
安装ceph
yum -y install ceph ceph-radosgw
3.手动安装配置
按照官网:http://docs.ceph.com/docs/master/install/manual-deployment/的方法,
搭建monitor是没有问题的
需要注意的是,如果搭建的是多个monitor需要自己把ceph.conf配置好,多个monitor要使用同一个ceph.mon.keyring和monmap创建,就不会出什么问题。
当使用Centos7时,启动的命令:
systemctl start ceph-mon.target
如果此时ps -ef | grep ceph-mon没有看见此进程,那么依照下面的方法查看:
[root@node1 my-cluster]# systemctl list-unit-files | grep ceph
ceph-create-[email protected]                     static
ceph-[email protected]                            static
ceph-[email protected]                             enabled
ceph-[email protected]                             enabled
ceph-[email protected]                             enabled
ceph-[email protected]                         enabled
ceph-mds.target                               enabled
ceph-mon.target                               enabled
ceph-osd.target                               enabled
ceph-radosgw.target                           enabled
ceph.target                                   enabled
如果发现[email protected] 不是enabled状态,那么需要 systemctl enable ceph-mon@hostname来开启之后重启ceph-mon。(其他模块类似)
如果还是没有启动,journalctl -f看一下打印的日志,如果显示的是什么启动太快, 可以vi /etc/systemd/system/ceph-mon.target.wants/ceph-mon\@ceph1.service类似一类的文件中的
StartLimitInterval=30min改小之后,用systemctl daemon-reload命令使生效,然后重启ceph-mon
接下来是安装ceph-osd
按官网操作,当执行到sudo ceph-disk activate /dev/hdd1的时候,发现需要一个keyring来鉴权,但是之前并没有操作来加这个keyring。这就需要自己加了
执行"ceph auth get-or-create client.bootstrap-osd mon 'allow profile bootstrap-osd' -o ceph.bootstrap-osd.keyring"(其他的key类似),当在ceph auth list命令执行结果中看见bootstrap-osd就说明把key导入进去了,然后,用生成的ceph.bootstrap-osd.keyring即可激活osd。然后再后面写个脚本:
#!/bin/bash

UUID="c0ba1324-f840-4ae0-a5dc-01816be2f57f"  #以你集群的ID为准
OSD_SECRET=$(ceph-authtool --gen-print-key)

ID=$(echo "{\"cephx_secret\": \"$OSD_SECRET\"}" | \
   ceph osd new $UUID -i - \
   -n client.bootstrap-osd -k /var/lib/ceph/bootstrap-osd/ceph.bootstrap-osd.keyring)
mkdir /var/lib/ceph/osd/ceph-$ID
执行这个脚本osd就安装成功了。如果不小心多执行了几次,创建了很多失败的osd。使用"ceph osd tree"查找到失败的osd,比如是osd.2那么再执行
ceph osd crush remove osd.2
ceph auth del osd.2
ceph osd rm 2
即可删除。安装其他osd的id也不会受此id的影响。安装其他osd和这个osd使用同一个keyring就行。
然后安装mds和mgr按官网的方法安装和配置即可。
但是安装完mgr之后用netstat -tlanp | grep ceph-mgr |grep LISTEN查看居然只监听一个端口,dashboard的端口没有被监听,说明dashboard没有被启动。
使用网上大神们的操作
ceph config-key put mgr/dashboard/server_addr 192.168.0.3
ceph config-key put mgr/dashboard/server_port 7000
依然没有成功,原来dashboard需要自己启用:ceph mgr module enable dashboard,(虽然配置文件里也可以写,显然我在配置文件里写的并没有起作用)
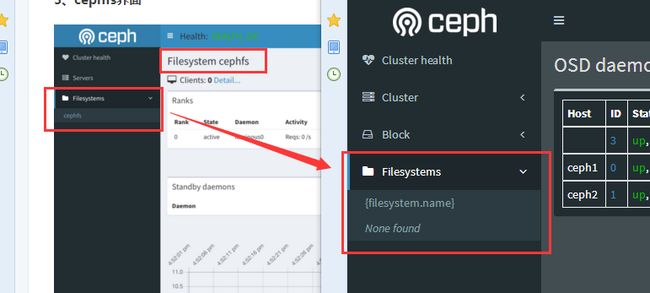
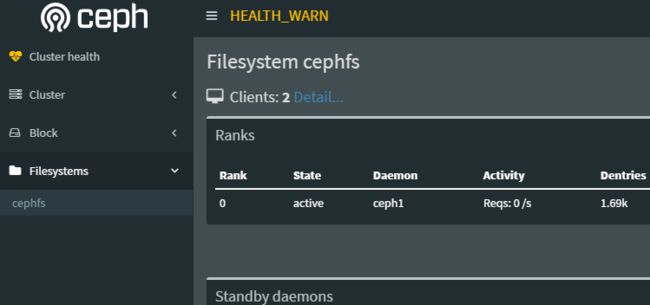
然后就是愉快地使用Luminous版的ceph了,然而,为什么我的dashboard跟别人的不一样,我也建了cephfs。
原来换Chrome浏览器就好了。

