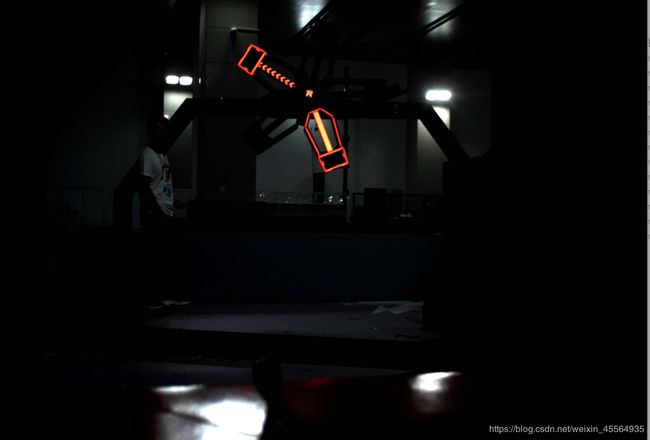
RM识别风车
个人介绍
RM视觉组新手,现在写的这个代码暂时不考虑运行效率。
环境配置
ubuntu18.04 + qt5.11 + opencv-4.2.0
思路
- 由于颜色差异较大,考虑到hsv比rgb在颜色识别上具有更加准确的特点,转到hsv色彩空间进行分离
- 利用膨胀将流水灯以及轮廓连接起来,利用继承关系轻松识别
- 做一个定位圆(直接circle可以很方便地画出,用拟合圆精确度会更高,如果将拟合效果通过gsl库中的函数处理,效果更加精确,考虑到gsl暂时没有掌握,下面直接用拟合圆)
启程前的准备
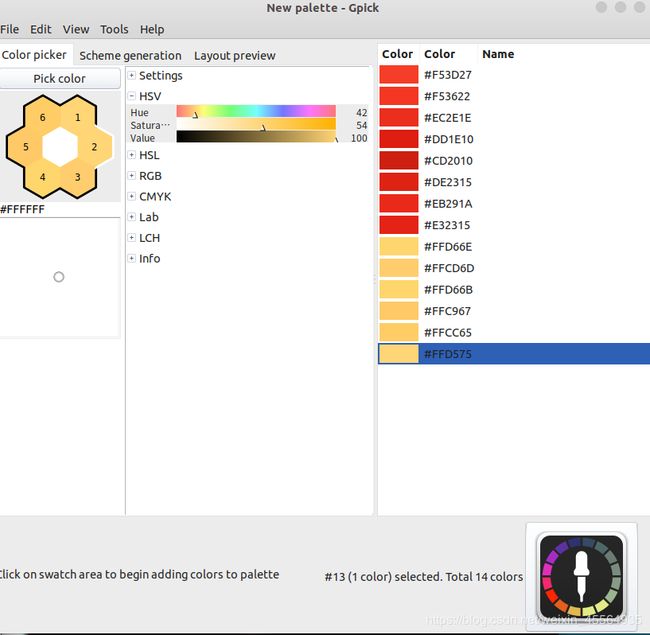
- 下载gpick,提前取色,保证h,s,v值能在准确范围内,在阈值操作处理中不必估计(对于这个颜色区别较大的情况,直接估计范围也能达到相同的效果)
sudo apt-get install gpick
- 对于有需要进一步使用gsl库的(这里暂时由于能力问题,不做涉及),事先配置qt环境,可以看一下这两篇文章
ubutnu下qt对gsl的环境配置(自己学Windows上迁移过来的)
保险起见,各位可以看一下Windows下面qt的链接,大同小异
这位大佬写的对拟合后,添加gsl库进行处理,会比拟合圆更加精确
正式开始
- 载入视频
VideoCapture cap;
    cap.open("/home/husonghui/C_plus_practice/march_partice/detect_energe/red-black.avi");
    if(!cap.isOpened()){
        cout << "fail to load!" << endl;
        return -1;
    }
    Mat frame;
    while(1){
		cap >> frame;
		if(frame.empty())
			break;
		...
		...
	}
- 由于hsv取值范围的问题,{[h∈[0,360°],s∈[0,1],v∈[0,1] },进行归一化处理,转入hsv空间
        Mat hsv = frame.clone();
        frame.convertTo(frame,CV_32FC3,1.0/255,0);
        cvtColor(frame,hsv,COLOR_BGR2HSV);
- gpick提色:对外面的灯条以及被击打后的流水灯进行提色,可以发现流水灯其实可以被分离出去(这里不分出去了,轮廓继承关系要用到)
| h(色相) | s(饱和度) | v(亮度值) | |
|---|---|---|---|
| 外灯条 | 6 | 84 | 96 |
| 6 | 86 | 96 | |
| 5 | 87 | 93 | |
| 4 | 93 | 87 | |
| 5 | 92 | 80 | |
| 4 | 91 | 87 | |
| 被击打后的流水灯 | 43 | 57 | 100 |
| 39 | 57 | 100 | |
| 43 | 58 | 100 | |
| 39 | 60 | 100 | |
| 40 | 60 | 100 | |
| 42 | 54 | 100 |
根据数据,再转换一下,得到范围内的最大最小,并进行二值化处理
        double low_H = 3;
        double low_S = 0.55;
        double low_V = 0.9;
        double high_H = 40;
        double high_S = 0.93;
        double high_V = 1;
        Mat hsv = frame.clone();
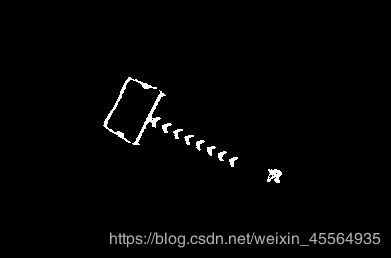
        inRange(hsv,Scalar(low_H,low_S,low_V),Scalar(high_H,high_S,high_V),frame_threshold);
看一下效果,打击前后的边缘都存在断线。
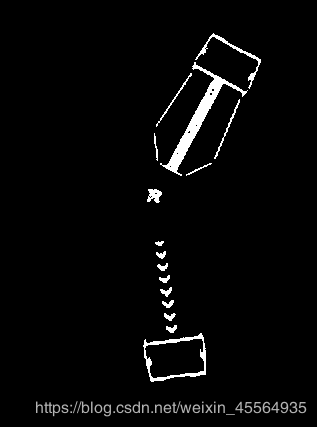
4. 目标装甲轮廓识别及定位:
- 轮廓识别:进行形态学处理,膨胀一次,闭操作迭代4次 ,防止断线
        Mat kernel = getStructuringElement(cv::MORPH_RECT,Size(3,3));
        dilate(frame_threshold,frame_threshold,kernel,Point(-1,-1),2);
        morphologyEx(frame_threshold,frame_threshold,MORPH_CLOSE,kernel,Point(-1,-1),4);
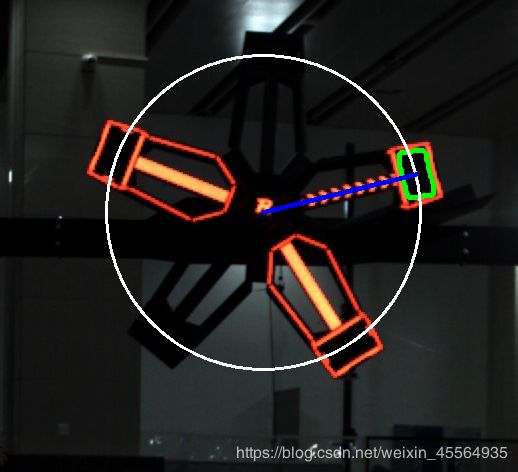
处理之后,轮廓继承关系就很明显了(存在父轮廓,无同级轮廓和子轮廓的就是目标装甲的轮廓)
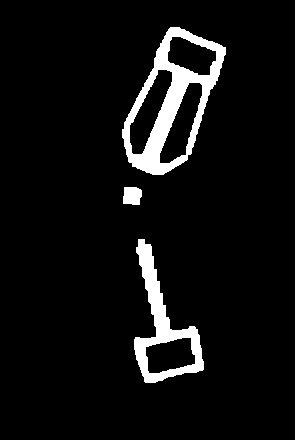
        vector<vector<Point>> contours;
        vector<Vec4i> hierarchy;
        Scalar color(0,255,0);

        Point2f point_dete_center;      //保存 RotatedRect类 返回的中心点坐标
        findContours(frame_threshold,contours,hierarchy,RETR_TREE,CHAIN_APPROX_SIMPLE);
        for(int i = 0; i != contours.size(); ++i){
            if(hierarchy[i][3] != -1 && hierarchy[i][2] == -1 && hierarchy[i][1] == -1 && hierarchy[i][0] == -1){
                drawContours(frame,contours,i,color,4,8);
- 通过外接矩形定位装甲位置
                RotatedRect rect_tmp = minAreaRect(contours[i]);
                point_dete_center = rect_tmp.center;
- 拟合圆,直接用了下面这篇文章,通过增加if()画圆,点集用装甲外接矩形的中点
这里面需要用到一个拟合圆函数
			if(LeastSquaresCircleFitting(vec_collect,centroid,radius)){
                    circle(frame,centroid,radius,Scalar(150,150,150),2,8);
                }
再通过目标装甲的位置和圆心加上一个半径
line(frame,p_1,point_dete_center,Scalar(255,0,0),4);
函数代码
int main()
{
    VideoCapture cap;
    cap.open("/home/husonghui/C_plus_practice/march_partice/detect_energe/red-black.avi");
    if(!cap.isOpened()){
        cout << "fail to load!" << endl;
        return -1;
    }

    Mat frame;
    vector<Point2d> vec_collect;
    double radius;
    Point2d centroid;

    while(1){
        cap >> frame;
        if(frame.empty())
            break;
        Mat hsv = frame.clone();
        Mat frame_threshold = frame.clone();

        frame.convertTo(frame,CV_32FC3,1.0/255,0);
        cvtColor(frame,hsv,COLOR_BGR2HSV);

        double low_H = 3;
        double low_S = 0.55;
        double low_V = 0.9;
        double high_H = 40;
        double high_S = 0.93;
        double high_V = 1;
        inRange(hsv,Scalar(low_H,low_S,low_V),Scalar(high_H,high_S,high_V),frame_threshold);

        Mat kernel = getStructuringElement(cv::MORPH_RECT,Size(3,3));
        dilate(frame_threshold,frame_threshold,kernel,Point(-1,-1),2);
        morphologyEx(frame_threshold,frame_threshold,MORPH_CLOSE,kernel,Point(-1,-1),4);

        vector<vector<Point>> contours;
        vector<Vec4i> hierarchy;
        Scalar color(0,255,0);

        Point2f point_dete_center;      //保存 RotatedRect类 返回的中心点坐标
        findContours(frame_threshold,contours,hierarchy,RETR_TREE,CHAIN_APPROX_SIMPLE);
        for(int i = 0; i != contours.size(); ++i){
            if(hierarchy[i][3] != -1 && hierarchy[i][2] == -1 && hierarchy[i][1] == -1 && hierarchy[i][0] == -1){
                drawContours(frame,contours,i,color,4,8);

                RotatedRect rect_tmp = minAreaRect(contours[i]);
                point_dete_center = rect_tmp.center;
                vec_collect.emplace_back(rect_tmp.center);
                if(LeastSquaresCircleFitting(vec_collect,centroid,radius)){
                    circle(frame,centroid,radius,Scalar(150,150,150),2,8);

                }
            }
        }
        line(frame,centroid,point_dete_center,Scalar(255,0,0),4);

        namedWindow("threshold",WINDOW_AUTOSIZE);
        imshow("threshold",frame);
        waitKey(1);
    }
    destroyAllWindows();
    return 0;
}
