基于raspberry pi 3B+的OPENVINO实践之二
实时人脸检测
准备工作
硬件:Raspberry pi 3B+ 、piCAM、 NCS2
代码
# import the necessary packages
from __future__ import print_function
from imutils.video.pivideostream import PiVideoStream
from imutils.video import FPS
import argparse
import imutils
import time
import cv2
import numpy as np
parser = argparse.ArgumentParser(
description='This sample shows how to define custom OpenCV deep learning layers in Python. '
'Holistically-Nested Edge Detection (https://arxiv.org/abs/1504.06375) neural network '
'is used as an example model. Find a pre-trained model at https://github.com/s9xie/hed.')
parser.add_argument('--input', help='Path to image or video. Skip to capture frames from camera')
parser.add_argument('--write_video', help='Do you want to write the output video', default=False)
parser.add_argument('--prototxt', help='Path to deploy.prototxt',default='deploy.prototxt', required=False)
parser.add_argument('--caffemodel', help='Path to hed_pretrained_bsds.caffemodel',default='hed_pretrained_bsds.caffemodel', required=False)
parser.add_argument('--width', help='Resize input image to a specific width', default=500, type=int)
parser.add_argument('--height', help='Resize input image to a specific height', default=500, type=int)
parser.add_argument('--savefile', help='Specifies the output video path', default='output.avi', type=str)
parser.add_argument("--display", type=int, default=-1,help="Whether or not frames should be displayed")
args = parser.parse_args()
# Load the model
net = cv2.dnn.readNet('face-detection-adas-0001.xml', 'face-detection-adas-0001.bin')
# Specify target device
net.setPreferableTarget(cv2.dnn.DNN_TARGET_MYRIAD)
## Create a display window
kWinName = 'Holistically-Nested_Edge_Detection'
cv2.namedWindow(kWinName, cv2.WINDOW_AUTOSIZE)
if args.write_video:
# Define the codec and create VideoWriter object
w = int(cap.get(cv2.CAP_PROP_FRAME_WIDTH))
h = int(cap.get(cv2.CAP_PROP_FRAME_HEIGHT))
print(w,h)
# w, h = args.width,args.height
fourcc = cv2.VideoWriter_fourcc(*'MP4V')
fourcc = cv2.VideoWriter_fourcc('X', '2', '6', '4')
fourcc = cv2.VideoWriter_fourcc('M','J','P','G')
writer = cv2.VideoWriter(args.savefile, fourcc, 10, (w, h))
# created a *threaded *video stream, allow the camera sensor to warmup,
# and start the FPS counter
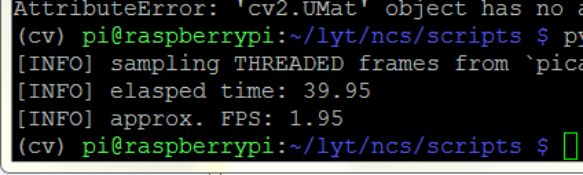
print("[INFO] sampling THREADED frames from `picamera` module...")
vs = PiVideoStream().start()
time.sleep(2.0)
fps = FPS().start()
# loop over some frames...this time using the threaded stream
while True:
# grab the frame from the threaded video stream and resize it
# to have a maximum width of 400 pixels
frame = vs.read()
image = cv2.UMat(imutils.resize(frame, width=400))
blob = cv2.dnn.blobFromImage(image, size=(672, 384), ddepth=cv2.CV_8U)
net.setInput(blob)
out = net.forward()
# Draw detected faces on the frame
for detection in out.reshape(-1, 7):
confidence = float(detection[2])
xmin = int(detection[3] * frame.shape[1])
ymin = int(detection[4] * frame.shape[0])
xmax = int(detection[5] * frame.shape[1])
ymax = int(detection[6] * frame.shape[0])
if confidence > 0.5:
cv2.rectangle(frame, (xmin, ymin), (xmax, ymax), color=(0, 255, 0))
if args.write_video:
#writer.write(np.uint8(con))
writer.write(frame)
cv2.imshow(kWinName,frame)
key = cv2.waitKey(1) & 0xFF
# if the `q` key was pressed, break from the loop
if key == ord("q"):
break
# updatop()
print("[INFO] elasped time: {:.2f}".format(fps.elapsed()))
print("[INFO] approx. FPS:{:.2f}".format(fps.fps()))
# do a bit of cleanup
cv2.destroyAllWindows()
vs.stop()
运行结果
总结
实时性较好,使用imutils模块多线程加速程序。
以上。