MYIR-ZYNQ7000系列-zturn教程(17):用axi_uart发送数据
开发板环境:vivado 2017.1 ,开发板型号xc7z020clg400-1,这个工程主要用axi_uart发送数据,IP核设置的
波特率为9600
工程的网盘下载链接:https://pan.baidu.com/s/1ID426Zd85LgtAzhQMZpzNA 密码:6irg
Step1 新建工程,调用一个zynq核并配置
配置选中这个SD卡,工程做完后会从SD卡启动
将这个SDIO设置为50M
这里选择一个DDR的型号(不同的开发板有所不同),点击OK完成配置
配置完成后的zynq核(这个看起来和配置之前一样)
Step2 调用axi_uart核并设置波特率
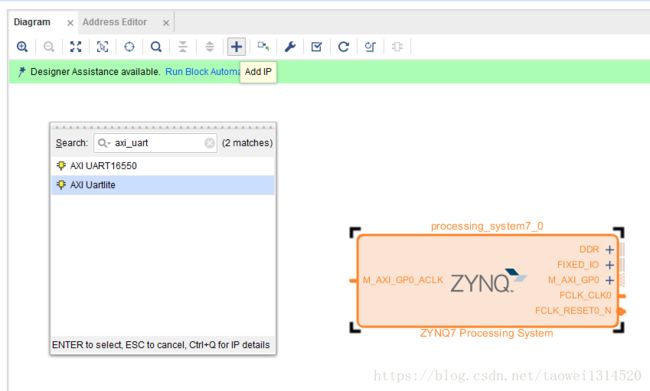
点击工具栏的Add IP按钮在弹出的搜索框中输入axi_uart,然后选择这个AXI Uartlite核双击添加进来
双击这个AXI Uartlite核,这里的Baud Rate可以选择不同的波特率,我这里选择这个默认的9600(这个波特率可以
根据自己的需求选择),其它的选项都保持默认,点击OK完成配置
Step3 axi_uart进行自动连线将IP核和zynq核连接起来
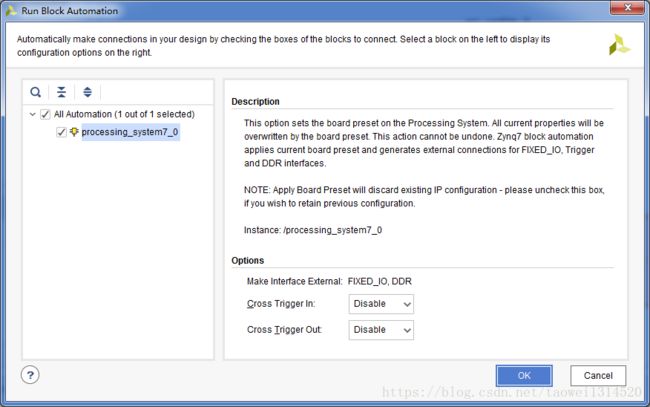
点击这个Run Block Automation 引出DDR和PS的管脚
点击OK
如下图所示
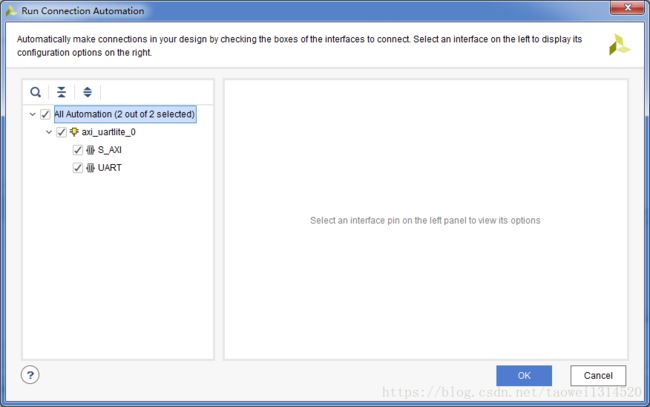
点击这个Run Connection Automation将所有的模块连接起来
在弹出的对话框中勾选全部,点击OK
连接成功后如下图所示
Step4 生成综合文件和生成顶层文件
综合
生成顶层文件
Step 5 新建xdc文件并设置管脚
set_property PACKAGE_PIN T11 [get_ports uart_rtl_rxd]
set_property PACKAGE_PIN T10 [get_ports uart_rtl_txd]
set_property IOSTANDARD LVCMOS33 [get_ports uart_rtl_rxd]
set_property IOSTANDARD LVCMOS33 [get_ports uart_rtl_txd]
Step 6 生成bit文件,导出硬件配置,打开SDK
点击Generate Bitstream生成bit文件
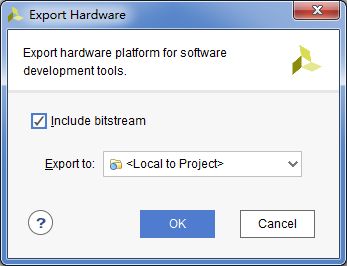
File->Export->Export Hardware 导出硬件配置
勾选,点击OK
打开SDK
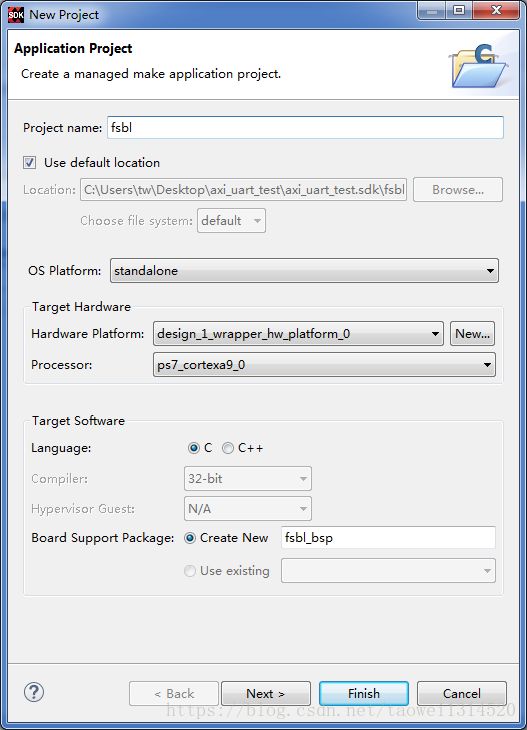
Step 7 新建一个fsbl
File -->Application Project
点击Next
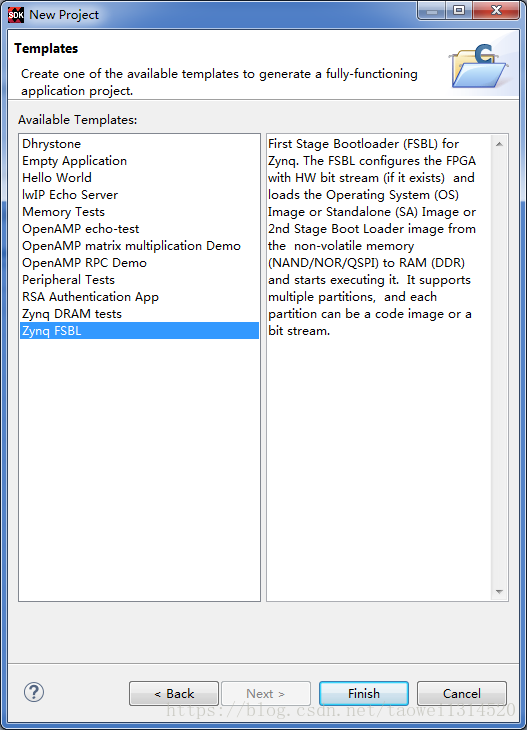
点击Finish
Step 8 新建一个axi_uart_test工程
File -->Application Project
点击Next
选择hello_world模板,点击Finish
然后将这个主程序复制到这个新建hello_world模板里
/******************************************************************************
*
* Copyright (C) 2002 - 2015 Xilinx, Inc.  All rights reserved.
*
* Permission is hereby granted, free of charge, to any person obtaining a copy
* of this software and associated documentation files (the "Software"), to deal
* in the Software without restriction, including without limitation the rights
* to use, copy, modify, merge, publish, distribute, sublicense, and/or sell
* copies of the Software, and to permit persons to whom the Software is
* furnished to do so, subject to the following conditions:
*
* The above copyright notice and this permission notice shall be included in
* all copies or substantial portions of the Software.
*
* Use of the Software is limited solely to applications:
* (a) running on a Xilinx device, or
* (b) that interact with a Xilinx device through a bus or interconnect.
*
* THE SOFTWARE IS PROVIDED "AS IS", WITHOUT WARRANTY OF ANY KIND, EXPRESS OR
* IMPLIED, INCLUDING BUT NOT LIMITED TO THE WARRANTIES OF MERCHANTABILITY,
* FITNESS FOR A PARTICULAR PURPOSE AND NONINFRINGEMENT. IN NO EVENT SHALL
* XILINX  BE LIABLE FOR ANY CLAIM, DAMAGES OR OTHER LIABILITY,
* WHETHER IN AN ACTION OF CONTRACT, TORT OR OTHERWISE, ARISING FROM, OUT OF
* OR IN CONNECTION WITH THE SOFTWARE OR THE USE OR OTHER DEALINGS IN THE
* SOFTWARE.
*
* Except as contained in this notice, the name of the Xilinx shall not be used
* in advertising or otherwise to promote the sale, use or other dealings in
* this Software without prior written authorization from Xilinx.
*
******************************************************************************/
/*****************************************************************************/
/**
*
* @file xuartlite_low_level_example.c
*
* This file contains a design example using the low-level driver functions
* and macros of the UartLite driver (XUartLite).
*
* @note
*
* The user must provide a physical loopback such that data which is
* transmitted will be received.
*
* MODIFICATION HISTORY:
*
* Ver   Who  Date	 Changes
* ----- ---- -------- ---------------------------------------------------------
* 1.00b rpm  04/25/02 First release
* 1.00b sv   06/13/05 Minor changes to comply to Doxygen and coding guidelines
* 2.00a ktn  10/20/09 Updated to use HAL processor APIs and minor changes
*		      for coding guidelines.
* 3.2   ms   01/23/17 Added xil_printf statement in main function to
*                     ensure that "Successfully ran" and "Failed" strings
*                     are available in all examples. This is a fix for
*                     CR-965028.
*
******************************************************************************/

/***************************** Include Files *********************************/

#include "xparameters.h"
#include "xstatus.h"
#include "xuartlite_l.h"
#include "xil_printf.h"

/************************** Constant Definitions *****************************/


/*
 * The following constants map to the XPAR parameters created in the
 * xparameters.h file. They are defined here such that a user can easily
 * change all the needed parameters in one place.
 */
#define UARTLITE_BASEADDR	   XPAR_UARTLITE_0_BASEADDR

/*
 * The following constant controls the length of the buffers to be sent
 * and received with the UartLite, this constant must be 16 bytes or less so the
 * entire buffer will fit into the transmit and receive FIFOs of the UartLite.
 */
#define TEST_BUFFER_SIZE sizeof(uart_data)


/**************************** Type Definitions *******************************/


/***************** Macros (Inline Functions) Definitions *********************/


/************************** Function Prototypes ******************************/

int UartLiteLowLevelExample(u32 UartliteBaseAddress);


/************************** data ******************************/
struct sensor_register {
    u8 value;
};

static const struct sensor_register uart_data[] = {

    { 0x01},
    { 0x02},
    { 0x03},
    { 0x04},
    { 0x05},
    { 0x06},
    { 0x07},
    { 0x08},
    { 0x09},
    { 0x10},
    { 0x11},
    { 0x12},
    { 0x13},
    { 0x14},
    { 0x15},
    { 0x16},
    { 0x17},

};

/*****************************************************************************/

/************************** Variable Definitions *****************************/

/*
 * The following buffers are used in this example to send and receive data
 * with the UartLite.
 */
u8 SendBuffer[sizeof(uart_data)]; /* Buffer for Transmitting Data */
u8 RecvBuffer[sizeof(uart_data)]; /* Buffer for Receiving Data */


/*****************************************************************************/

/**
*
* Main function to call the example.
*
* @param	None.
*
* @return	XST_SUCCESS if successful, XST_FAILURE if unsuccessful.
*
* @note		None.
*
******************************************************************************/


int main(void)
{
	int Status;

	/*
	 * Run the UartLite Low level example, specify the BaseAddress that is
	 * generated in xparameters.h.
	 */
	Status = UartLiteLowLevelExample(UARTLITE_BASEADDR);
	if (Status != XST_SUCCESS) {
		xil_printf("Uartlite lowlevel Example Failed\r\n");
		return XST_FAILURE;
	}

	xil_printf("Successfully ran Uartlite lowlevel Example\r\n");
	return XST_SUCCESS;
}


/*****************************************************************************/
/**
*
* This function does a minimal test on the UartLite device using the low-level
* driver macros and functions. This function sends data and expects to receive
* the data through the UartLite. A physical loopback must be done by the user
* with the transmit and receive signals of the UartLite.
*
* @param	UartliteBaseAddress is the base address of the UartLite device
*		and is the XPAR__BASEADDR value from
*		xparameters.h.
*
* @return	XST_SUCCESS if successful, XST_FAILURE if unsuccessful.
*
* @note		None.
*
******************************************************************************/
int UartLiteLowLevelExample(u32 UartliteBaseAddress)
{
	int Index;

	/*
	 * Initialize the send buffer bytes with a pattern to send and the
	 * the receive buffer bytes to zero.
	 */
	for (Index = 0; Index < TEST_BUFFER_SIZE; Index++) {
		SendBuffer[Index] = uart_data[Index].value;
		RecvBuffer[Index] = 0;
	}


	/*
	 * Send the entire transmit buffer.
	 */
	for (Index = 0; Index < TEST_BUFFER_SIZE; Index++) {
		XUartLite_SendByte(UartliteBaseAddress, SendBuffer[Index]);
	}

	/*
	 * Receive the entire buffer's worth. Note that the RecvByte function
	 * blocks waiting for a character.
	 */
	for (Index = 0; Index < TEST_BUFFER_SIZE; Index++) {
		RecvBuffer[Index] = XUartLite_RecvByte(UartliteBaseAddress);
	}

	/*
	 * Check the receive buffer data against the send buffer and verify the
	 * data was correctly received.
	 */
	for (Index = 0; Index < TEST_BUFFER_SIZE; Index++) {
		if (SendBuffer[Index] != RecvBuffer[Index]) {
			return XST_FAILURE;
		}
	}

	return XST_SUCCESS;
}
复制完成后如下图所示
这里程序做一些基本的讲解:
这里是uart发送数据部分,可以填充不同的数据
/************************** data ******************************/
struct sensor_register {
    u8 value;
};

static const struct sensor_register uart_data[] = {

    { 0x01},
    { 0x02},
    { 0x03},
    { 0x04},
    { 0x05},
    { 0x06},
    { 0x07},
    { 0x08},
    { 0x09},
    { 0x10},
    { 0x11},
    { 0x12},
    { 0x13},
    { 0x14},
    { 0x15},
    { 0x16},
    { 0x17},

};
下面这个接收和发送Buffer里都有这个sizeof(uart_data),这个函数主要计算这个定义的数组里放了多少个数据
(这样就不用每次加数据要改这个发送和接收Buffer的大小了)
u8 SendBuffer[sizeof(uart_data)]; /* Buffer for Transmitting Data */
u8 RecvBuffer[sizeof(uart_data)]; /* Buffer for Receiving Data */
这里对发送Buffer和接收Buffer进行填充
 for (Index = 0; Index < TEST_BUFFER_SIZE; Index++) {
        SendBuffer[Index] = uart_data[Index].value;
        RecvBuffer[Index] = 0;
    }
这个是发送,发送Buffer里的数据
/*
     * Send the entire transmit buffer.
     */
    for (Index = 0; Index < TEST_BUFFER_SIZE; Index++) {
        XUartLite_SendByte(UartliteBaseAddress, SendBuffer[Index]);
    }
这个是接收外面发送进来的数据
/*
     * Receive the entire buffer's worth. Note that the RecvByte function
     * blocks waiting for a character.
     */
    for (Index = 0; Index < TEST_BUFFER_SIZE; Index++) {
        RecvBuffer[Index] = XUartLite_RecvByte(UartliteBaseAddress);
    }
这里对数据进行校验看发送和接收的是不是一样,这个一般可以用rx和tx回环来进行验证
/*
     * Check the receive buffer data against the send buffer and verify the
     * data was correctly received.
     */
    for (Index = 0; Index < TEST_BUFFER_SIZE; Index++) {
        if (SendBuffer[Index] != RecvBuffer[Index]) {
            return XST_FAILURE;
        }
    }
Step 9 生成一个BOOT.bin文件放到SD卡里运行
右击工程选择Create Boot Image
点击 Create Image 生成BOOT.bin文件
将这个BOOT.bin文件拷贝到SD卡插到开发板上,然后将这个rx和tx端连接一个带有串口转换芯片的uart线,这样就可以
从串口调试助手打印uart发送的数据(因分配的管脚是fpga管脚是CMOS电平,电脑是TTL电平所以要用一个带有串口
转换芯片的uart线就可以使用了)
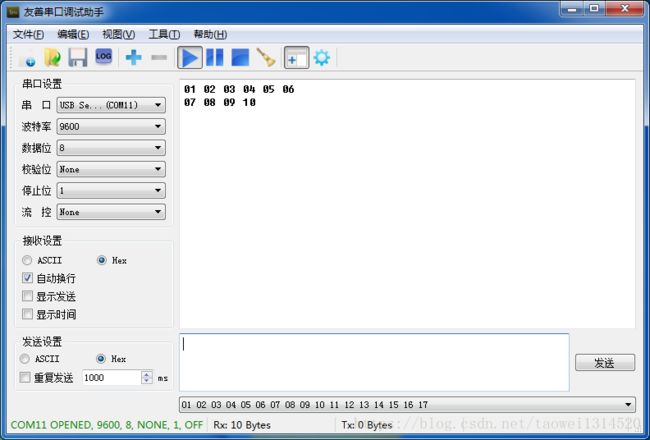
上电后串口打印的输出数据
将数据区域填充不同的数据
/************************** data ******************************/
struct sensor_register {
    u8 value;
};

static const struct sensor_register uart_data[] = {

    { 0x01},
    { 0x02},
    { 0x03},
    { 0x04},
    { 0x05},
    { 0x06},
    { 0x07},
    { 0x08},
    { 0x09},
    { 0x10},

};
此时的串口打印的输出数据


