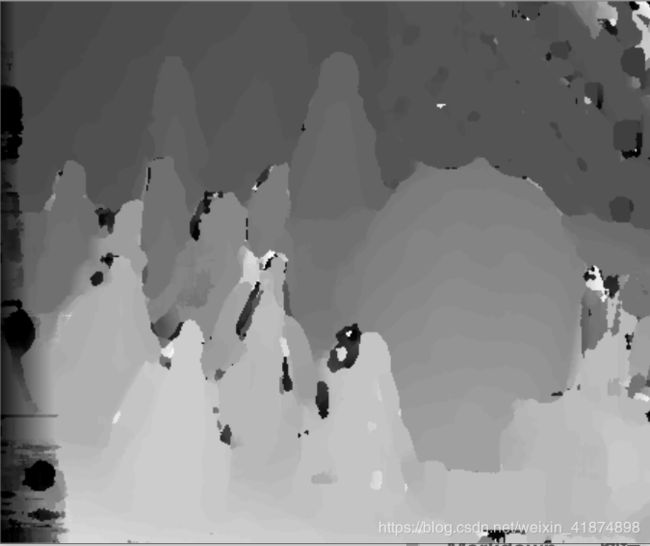
立体匹配——SAD算法
SAD算法: SAD(Sum of absolute differences)是一种图像局部匹配算法。
公式表示为:SAD(u,v) = Sum{|Left(u,v) - Right(u,v)|} 选择最小值。
此种方法就是以左目图像的源匹配点为中心,定义一个窗口D,其大小为(2m+1) (2n+1),统计其窗口的灰度值的和,然后在右目图像对应点,沿极线方向(水平方向)按照不同视差确定窗口,逐步计算其左右窗口的灰度和的差值,最后搜索到的差值最小的区域的中心像素即为匹配点。
基本流程:
1.构造一个小窗口,类似于卷积核。
2.用窗口覆盖左边的图像,选择出窗口覆盖区域内的所有像素点。
3.同样用窗口覆盖右边的图像并选择出覆盖区域的像素点。
4.左边覆盖区域减去右边覆盖区域,并求出所有像素点差的绝对值的和。
5.移动右边图像的窗口,重复3,4的动作。(这里有个搜索范围,超过这个范围跳出)
6.找到这个范围内SAD值最小的窗口,即找到了左边图像的最佳匹配的像素块。
代码实现:
#include 注意:
(1)事先在工程目录下存放:立体校正后的左图"im2.png"和立体校正后的右图"im6.png"。图片获取网址:http://vision.middlebury.edu/stereo/data/scenes2003/
(2)代码运行时间大约100s
补充:
(1)Mat类:
参考链接:https://blog.csdn.net/u012058778/article/details/90764430
- (a)cv::Mat类对象的复制
Mat类分为两个部分:矩阵头和矩阵数据。如果我们在操作一副图像的数据量时,矩阵数据的大小很大(一般约有1M的数据量),那么拷贝和赋值函数所作的操作是深拷贝的话,效率会大大的降低。所以,Opencv的做法是只复制其矩阵头信息,而矩阵数据采用引用的方式,即多个Mat对象共享同一个矩阵数据,这里使用的原理类似c++11中的共享指针。
如下示例:
cv::Mat A = cv::imread("erode.jpg");
cv::Mat B(A);
cv::Mat C = A;
printf("A.data = %p\nB.data = %p\nC.data = %p\n", A.data, B.data, C.data);
输出结果如下:
A.data = 000001F0A0BF00C0
B.data = 000001F0A0BF00C0
C.data = 000001F0A0BF00C0
三个Mat类对象的矩阵数据的地址是一样的。
imR = imread("im6.png", 0);
uchar* Limg=imR.data;
其中imR为矩阵数据;imR.data为矩阵头类似指针;Limg为char型指针,存放矩阵数据地址,Limg也可以看作是一维数组。
- (b)cv::Mat类对象的创建方法
- 使用构造函数
cv::Mat M1(3, 3, CV_8UC4, cv::Scalar(0, 0, 0, 255));
std::cout << "M1 = " << std::endl << M1 << std::endl;
这里指定矩阵的行和列,并表示为4通道的矩阵,每个点的颜色值为(0, 0, 0, 255)。输出结果如下:
M1 =
[ 0, 0, 0, 255, 0, 0, 0, 255, 0, 0, 0, 255;
0, 0, 0, 255, 0, 0, 0, 255, 0, 0, 0, 255;
0, 0, 0, 255, 0, 0, 0, 255, 0, 0, 0, 255]
- 通过create()函数来初始化
 cv::Mat M3;
 M3.create(4, 4, CV_8UC(1));
 std::cout << "M3 = " << std::endl << M3 << std::endl;
这里是4*4的二维单通道矩阵,矩阵中的数据为随机值。如下:
M3 = [205, 205, 205, 205;
205, 205, 205, 205;
205, 205, 205, 205;
205, 205, 205, 205]
(2)CV_8UC3
一般的图像文件格式使用的是 Unsigned 8bits吧,CvMat矩阵对应的参数类型就是CV_8UC1,CV_8UC2,CV_8UC3。(最后的1、2、3表示通道数,譬如RGB3通道就用V_8UC3)
float 是32位的,对应CvMat数据结构参数就是:CV_32FC1,CV_32FC2,CV_32FC3;
double是64bits,对应CvMat数据结构参数:CV_64FC1,CV_64FC2,CV_64FC3等。
C表示channel;32F-float、64F-double、8U-8bit unsigned int、8S-8bit signed int;


