【深度学习--图像分类】10分钟了解下图像识别库imageAI
ImageAI 提供4种不同的算法及模型来执行图像预测,通过以下简单几个步骤即可对任何图片执行图像预测。提供用于图像预测的4种算法包括 SqueezeNet,ResNet,InceptionV3 和 DenseNet。这些算法中的每一个都有单独的模型文件,您必须根据所选算法使用相对应的模型文件,请单击以下链接下载所选算法的模型文件:
- SqueezeNet(文件大小:4.82 MB,预测时间最短,精准度适中)
- ResNet50 by Microsoft Research (文件大小:98 MB,预测时间较快,精准度高)
- InceptionV3 by Google Brain team (文件大小:91.6 MB,预测时间慢,精度更高)
- DenseNet121 by Facebook AI Research (文件大小:31.6 MB,预测时间较慢,精度最高)
预训练模型下载地址分别是:
1、https://github.com/OlafenwaMoses/ImageAI/releases/download/1.0/squeezenet_weights_tf_dim_ordering_tf_kernels.h5
2、https://github.com/OlafenwaMoses/ImageAI/releases/download/1.0/resnet50_weights_tf_dim_ordering_tf_kernels.h5
3、https://github.com/OlafenwaMoses/ImageAI/releases/download/1.0/inception_v3_weights_tf_dim_ordering_tf_kernels.h5
4、https://github.com/OlafenwaMoses/ImageAI/releases/download/1.0/DenseNet-BC-121-32.h5
首先需要下载一个训练模型 。
废话不多说,上代码:
demo :
# -*- coding: utf-8 -*-

from imageai.Prediction import ImagePrediction
import os
import time

execution_path = 'E:/2019年/图像算法/预训练模型/'
prediction = ImagePrediction()
prediction.setModelTypeAsResNet()
prediction.setModelPath(os.path.join(execution_path, "resnet50_weights_tf_dim_ordering_tf_kernels.h5"))
prediction.loadModel(prediction_speed="fastest")


time1=time.time()
predictions, probabilities = prediction.predictImage(os.path.join(execution_path, "dog.png"), result_count=5 )
for eachPrediction, eachProbability in zip(predictions, probabilities):
    print(eachPrediction + " : " + str(eachProbability))

time2=time.time()

print('总共耗时:' + str(time2 - time1) + 's')
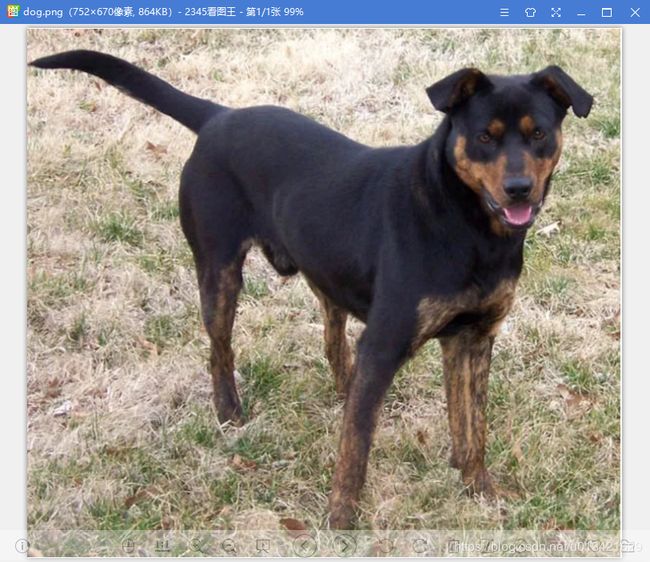
黑褐猎犬预测对了。
代码解读:
from imageai.Prediction import ImagePrediction
import os
上面的代码导入了ImageAI库和 python os 类。
prediction = ImagePrediction()
prediction.setModelTypeAsResNet()
prediction.setModelPath(os.path.join(execution_path, "resnet50_weights_tf_dim_ordering_tf_kernels.h5"))
prediction.loadModel()
在上面的代码中,我们对ImagePrediction()类进行了实例化,第二行调用了.setModelTypeAsResNet()函数将预测对象的模型类型设置为ResNet,第三行设置了模型文件(resnet50_weights_tf_dim_ordering_tf_kernels.h5)的路径,第四行载入模型。
predictions, probabilities = prediction.predictImage(os.path.join(execution_path, "dog.png"), result_count=5 )
在上面的代码中,我们定义了两个变量,他们的值将由所调用的函数predictImage()返回,其中predictImage()函数接受了两个参数,一个是指定要进行图像预测的图像文件路径,另一个参数result_count用于设置我们想要预测结果的数量(该参数的值可选1 to 100)。最后,predictImage()函数将返回预测的对象名和相应的百分比概率(percentage_probabilities)。
for eachPrediction, eachProbability in zip(predictions, probabilities):
    print(eachPrediction + " : " + str(eachProbability))
在上面的代码获取了predictions变量中的每个对象名,并从probabilities变量中获取相应的百分比概率,最后将两者的结果打印到终端。

