pacemaker+corosync搭建高可用集群
前言:由于测试需要所以开始逐渐学习HA相关部分的知识,并且总结成笔记分享。这里为什么我不直接开始从介绍说起,因为我自己觉得现在对于我而言理解pacemaker还过于肤浅,盲目的写简介不是我的初衷。在写完部署和常用资源上线之后我可能会从头考虑把介绍不上。秉着学以致用的原则这里直接开始写如何搭建pacemaker并且troubleshooting常见的搭建问题。
(ps:网上很多的博文都是用ubuntu来搭建的,但是我相信很多生产环境都会用到CentOS,所以搭建还是用CentOS的操作系统来做实验。)
架构简介
HA的功能主要是提供高可用,当某台服务器上的服务提供中断时能够在期望时间内切换到备用的节点上提供服务,保障服务的可用性。按找可用的情况来说其实两个节点就能够搭建HA集群,但是在集群的保护机制上最低还是需要三个节点才行,因为两个节点的话,你某一个节点down掉了理论上是可以发生服务切换,但是集群此时无法保障自身是正常。因为没有仲裁来判断集群中节点的状态。这个不在部署上做过多赘述。
实验环境介绍
节点
使用vmwareworkstation搭建的三台虚拟机环境如下:
node-1 10.100.109.171
node-2 10.100.109.123
node-3 10.100.109.170
操作系统
CentOS7.2 x64
网络拓扑
这里笔者为了方便所使用的网络全部使用了vmwareware桥接网络。
解决先决条件
修改主机名
hostnamectl --static --transient set-hostname node-1.example.com按着在1,2,3的节点上都来一遍
配置互信
171互信123和170(另外两台机器上也需要做该操作)
ssh-keygen -t rsa
ssh-copy-id -i .ssh/id_rsa.pub 10.100.109.170配置防火墙以selinux
防火墙
systemctl disable firewalld
systemctl stop firewalld
iptables -F
selinux
vim /etc/selinux/config修改配置项SELINUX=enforcing为disabled
SELINUX=disabled
立即生效配置
setenforce 0
getenforce(查看是否生效)
制作yum源
mv /etc/yum.repos.d/CentOS-Base.repo /etc/yum.repos.d/CentOS-Base.repo.bak
wget -O /etc/yum.repos.d/CentOS-Base.repo http://mirrors.aliyun.com/repo/Centos-7.repo

wget -O /etc/yum.repos.d/epel.repo http://mirrors.aliyun.com/repo/epel-7.repo

yum makecache
同步时间服务器
在/etc/ntp.conf文件中注释掉原来server的服务器,并加入以下ntp服务器。
server cn.pool.ntp.org iburst
perfer:表示优先级最高
burst :当一个运程NTP服务器可用时,向它发送一系列的并发包进行检测。
iburst :当一个运程NTP服务器不可用时,向它发送一系列的并发包进行检测。
搭建pacemaker
安装pacemaker集群相关组件
yum install pcs pacemaker corosync fence-agents-all -y 启动pcsd服务(开机自启动)
systemctl start pcsd.service
systemctl enable pcsd
创建集群用户
hacluster用户会在集群安装的时候自动创建好。
passwd hacluster
上述所有的步骤需要在三个节点上都执行
集群各个节点之间进行认证
pcs cluster auth node-1 node-2 node-3此处需要输入的用户名必须为pcs自动创建的hacluster,其他用户不能添加成功

创建并启动名为my_cluster的集群
node-1,node-2,node-3集群成员:(在这一步其实就已经生成了corosync配置文件了)
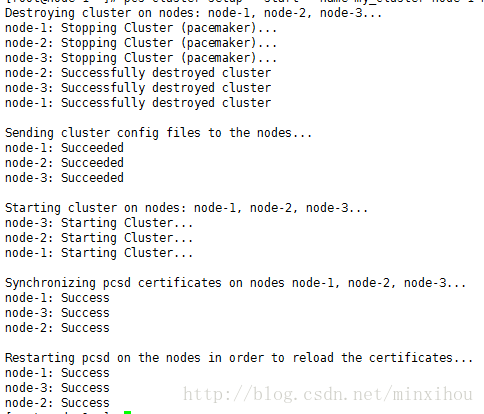
pcs cluster setup --start --name my_cluster node-1 node-2 node-3
pcs cluster start --all  #开启所有节点的方法
设置集群自启动
pcs cluster enable --allps:这里需要修改下corosync的配置文件,对比了使用pacemaker用命令生成的corosync.conf配置文件
首先是自动生成的:
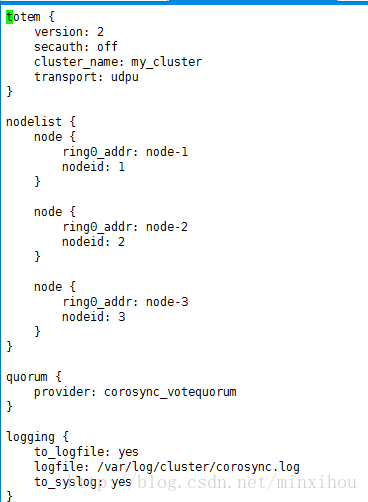
按照官方文档的话需要在对corosync在做更为详细的配置:
需要在totem中添加interface小节,然后加入如下的条目值。

这里我查找了之后资料后,按照redhat给出的安装步骤应该是先配置corosync然后在corosync中配置了pacemaker的资源,在启动corosync之后,pacemaker也会随之被启动。现在我们按照corosync.conf.example文档给出来的配置默认项。在pacemaker2.0之后安装集群会自动给你做corosync的最简化配置。俗话说就是保障能用,但是要做更加细节的配置需要自己调整。
检测集群的安装
1.查看集群是否正确启动并且已经可以与其他节点建立集群关系:
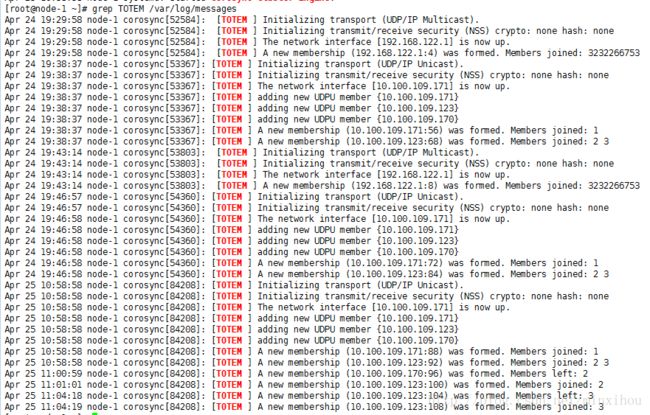
#grep -e "corosync.*network interface" -e "Corosync Cluster Engine" -e "Successfully read main configuration" /var/log/messages检查集群关系有没有正确建立:
#grep TOTEM /var/log/messages检查pacemaker的安装
#vim /var/log/pacemaker
Apr 25 10:58:58 [84214] node-1.example.com pacemakerd:   notice: crm_add_logfile:       Switching to /var/log/cluster/corosync.log
Apr 25 11:00:12 [84324] node-1.example.com pacemakerd:     info: crm_log_init:  Changed active directory to /var/lib/pacemaker/cores
Apr 25 11:00:12 [84324] node-1.example.com pacemakerd:     info: get_cluster_type:      Detected an active 'corosync' cluster
Apr 25 11:00:12 [84324] node-1.example.com pacemakerd:     info: mcp_read_config:       Reading configure for stack: corosync
Apr 25 11:00:12 [84324] node-1.example.com pacemakerd:   notice: crm_add_logfile:       Switching to /var/log/cluster/corosync.log
最后检查启动的过程中没有错误,按照常理应该没有任何错误并显示集群当前的状态。
#grep ERROR: /var/log/messages | grep -v unpack_resources查看并设置集群属性
查看当前集群状态:
The DC (Designated Controller)node is where all the decisions are made if the current DC fails a new one is elected from the remaining cluster nodes.
检查pacemaker服务:
ps aux | grep pacemaker校验Corosync的安装以及当前corosync状态:
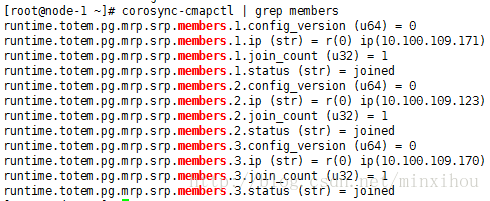
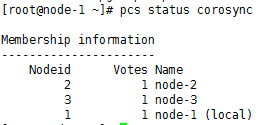
corosync-cfgtool -scorosync-cmapctl | grep memberspcs status corosync检查配置是否正确(假若没有输出任何则配置正确)
crm_verify -L -V禁用STONITH:
pcs property set stonith-enabled=false无法仲裁的时候,选择忽略:
pcs property set no-quorum-policy=ignorePacemaker/Corosync是linux下一组常用的高可用集群系统,Pacemaker本身已经自带了很多常用应用的管理功能,如果要是用Pacemaker来管理自己实现的服务或是一些别的没现成可用的服务时,就需要自己实现一个资源了。其中Pacemaker自带的资源管理程序都在/usr/lib/ocf/resource.d下。其中的heatbeat目录就包含了那些自带的脚本可以作为我们自己实现时候的参考。
简单操作
接下来针对一些常用的pcs命令进行简要讲解。查看pcs resource针对资源操作用法:
可以用pcs resource help查看帮助指令
List available OCF resource agent providers
pcs resource providers
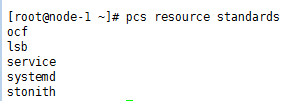
查看pcs支持的资源代理标准:
#pcs resource standards
