Android网络框架volley学习(一)基本用法
记录学习Android网络基础框架volley的过程。
首先我们需要将volley下载下来导入Android Studio中,我学习一个开源库,最好的方式就是将其源码以module的方式依赖到工程中去,这样我如果需要修改什么的话,就可以直接修改源码,同样volley学习也一样。
导入volley源码
1) 下载volley源码
git clone https://github.com/google/volley2)将volley源码依赖进工程
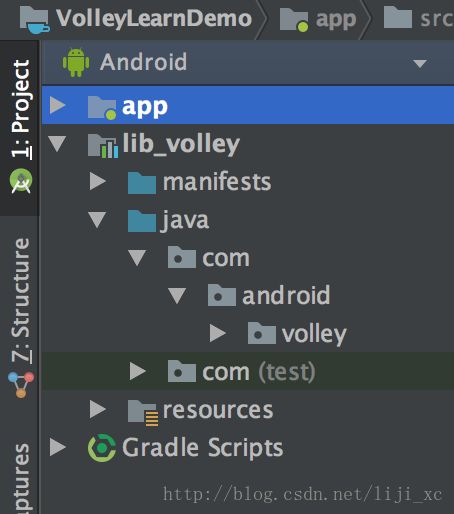
新建一个Android 工程,然后File -> New -> Import Module的方式,选择刚刚下载下来的源码。然后依次选择 File -> Project Structre -> Dependenices -> + 选择刚刚的volley module,这样源码就导入到Android Studio工程里了。
学习volley源码
学习volley源码,首页得学会它的基本使用方法。网络请求需要使用网络权限,所以在androidMainfest.xml中增加网络权限。
添加网络权限
<uses-permission android:name="android.permission.INTERNET">uses-permission>几种请求方式
volley主要实现了以下几种方式的Request:
- StringRequest
- JsonObjectRequest
- JsonArrayRequest
- ImageRequest
我们一个一个进行学习使用。首先对StringRequest进行熟悉。
StringRequest请求
// Instantiate the RequestQueue.
        RequestQueue queue = Volley.newRequestQueue(this);
        String url = "https://www.baidu.com/";

        // Request a string response from the provided URL.
        StringRequest stringRequest = new StringRequest(Request.Method.GET, url,
                new Response.Listener() {
                    @Override
                    public void onResponse(String response) {
                        // Display the first 500 characters of the response string.
                        resultTv.setText("Response is: " + response.substring(0, 500));
                    }
                }, new Response.ErrorListener() {
            @Override
            public void onErrorResponse(VolleyError error) {
                resultTv.setText("That didn't work!");
            }
        });
        // Add the request to the RequestQueue.
        queue.add(stringRequest);
可以看到StringRequest很简单,首先构造一个请求队列,然后创建一个StringRequest对象,也就是一个StringRequest请求,然后将这个请求添加队列中去,这样就完成了一次网络请求过程。
对于StringRequest请求,它有四个参数,
 public StringRequest(int method, String url, Listener<String> listener,
            ErrorListener errorListener) {
        super(method, url, errorListener);
        mListener = listener;
}- 请求方式,post、get等
- 请求的URL地址
- 请求成功的回调
- 请求失败的回调。
通过以上简单的几步,就可以构造一条网络请求,打印出来的结果如下:
<html><head><script>var actionSta = 1;if (actionSta === 1) {var startTime = Date.now();} else {var endTime = Date.now();}if (actionSta === 1 || (endTime && (endTime - startTime) > 3000)) {actionSta = actionSta == 1 ? 'start' : 'end';new Image().src = '//hpd.baidu.com/v.gif?tid=365&funcSta=whiteScreenEx&sourceSta=wiseindex&actionSta='+ actionSta + '&logid=2041427385&ssid=0'+ '&ct=1&cst=9&logFrom=mid_news&logInfo=stability';}script><meta name="referrer" content="always" /><meta charset='utf-8' /><meta name="viewport" content="width=device-width,minimum-scale=1.0,maximum-scale=1.0,user-scalable=no"/><meta http-equiv="x-dns-prefetch-control" content="on"><link rel="dns-prefetch" href="//m.baidu.com"/><link rel="shortcut icon" href="https://gss0.bdstatic.com/5bd1bjqh_Q23odCf/static/wiseindex/img/favicon64.ico" type="image/x-icon"><link rel="apple-touch-icon-precomposed" href="https://gss0.bdstatic.com/5bd1bjqh_Q23odCf/static/wiseindex/img/screen_icon_new.png"/><meta name="format-detection" content="telephone=no"/><noscript><style type="text/css">#page{display:none;}style><meta http-equiv="refresh" content="0; URL=http://m.baidu.com/?cip=183.128.158.47&baiduid=B56E01A6B7C95BBE8138AB8EFB00BA4F&from=844b&vit=fps?from=844b&vit=fps&index=&ssid=0&bd_page_type=1&logid=12677699628908750691&pu=sz%401321_480&t_noscript=jump" />noscript><title>百度一下title><script>window.PointerEvent = void 0script><script type="text/javascript">window.onerror=function(a,c,g){var w="//hpd.baidu.com/v.gif",v={tid:"259",ct:"1",cst:"9",logFrom:"mid_news",logInfo:"jsException",r:"l"+Date.now(),logExtra:{rta:"wise"}},E={};E.message=a||"",E.url=c||"",E.line=g||"",v.logExtra.excep=E;try{v.logExtra=JSON.stringify(v.logExtra)}catch(e){}var h="";for(var i in v)v.hasOwnProperty(i)&&(h+="&"+i+"="+encodeURIComponent(v[i]));var y=w+"?"+h.slice(1);(new Image).src=y};;script><style type="text/css" id='spa-base-style'>#search-card {display: none;}style><style type="text/css">@font-face {font-family: 'icons';src: url('https://gss0.bdstatic.com/5bd1bjqh_Q23odCf/static/wiseindex/iconfont/iconfont_b8e5ea1.eot');src: url('https://gss0.bdstatic.com/5bd1bjqh_Q23odCf/static/wiseindex/iconfont/iconfont_b8e5ea1.eot#iefix') format('embedded-opentype'),url('https://gss0.bdstatic.com/5bd1bjqh_Q23odCf/static/wiseindex/iconfont/iconfont_04b353e.woff') format('woff'),url('https://gss0.bdstatic.com/5bd1bjqh_Q23odCf/static/wiseindex/iconfont/iconfont_2681c2d.ttf') format('truetype'),url('https://gss0.bdstatic.com/5bd1bjqh_Q23odCf/static/wiseindex/iconfont/iconfont_b8f8f01.svg#iconfont') format('svg');font-weight: normal;font-style: normal;}i.ns-focus,i.ns-news,i.ns-novel,i.ns-video,i.ns-life,i.ns-map,i.ns-tieba,i.ns-app,i.ns-image,i.ns-website,i.ns-extend,i.ns-music,i.ns-listen,i.ns-waimai {background: url('https://gss0.bdstatic.com/5bd1bjqh_Q23odCf/static/wiseindex/img/ns_diff_color_v3_991d8b3.png') no-repeat;background-size: 22px auto;}style><style type="text/css" class="spa-index-style" data-lsid="plus_css_head">body,h1,h2,h3,p,div,ol,ul,input,button{margin:0;padding:0}body{font-family:Arial,Helvetica,sans-serif;text-align:center;-webkit-text-size-adjust:none;background:#f1f1f1;max-width:100%;overflow-x:hidden}ol,ul{list-style:none}a{text-decoration:none;-webkit-tap-highlight-color:rgba(0,0,0,0)}input,button,textarea{border:0;border-radius:0;background:transparent;-webkit-appearance:none;-webkit-box-sizing:border-box;box-sizing:border-box}button{outline:0}#index-card [class^=icon-],#index-card [class*=" icon-"],#__SF___mine [class^=icon-],#__SF___mine [class*=" icon-"],#index-view [class^=icon-],#index-view [class*=" icon-"]{font-family:icons;font-style:normal;-webkit-font-smoothing:antialiased;-webkit-text-stroke-width:.2px}#__SF___mine .normal-title>i{position:absolute;top:11px;left:-2px;display:none}#__SF___mine .icon-add,#index-view .icon-add{//font-size:24px;color:#B6B7BA;display:inherit;margin:auto}#__SF___mine
上面的打印结果其实就是 百度 首页的HTML代码。
JsonRequest的请求
通过查看volley的目录,我们发现还有其他类别的Request,我们依次学习他们的使用方法。
对于JsonRequest请求,由于这个类是个抽象类,我们得找它的实现类进行学习,它的实现类有JsonObjectRequest和JsonArrayRequest,这两种主要区别就是数据的格式,一个是object另一个是array,我们拿JsonObjectRequest来作说明。
JsonObjectRequest请求
JsonObjectRequest请求从名字上面也可以看出来,它是关于json类别的网络请求的,我们通过具体的实例来学习一下。
RequestQueue queue = Volley.newRequestQueue(this);
        String url = "http://www.weather.com.cn/data/sk/101010100.html";

        JsonObjectRequest jsonObjectRequest = new JsonObjectRequest(url, null,
                new Response.Listener() {
                    @Override
                    public void onResponse(JSONObject response) {
                        Log.d(TAG, response.toString());
                        resultTv.setText("" + response.toString());
                    }
                }, new Response.ErrorListener() {
            @Override
            public void onErrorResponse(VolleyError error) {
                Log.d(TAG, "error");
            }
        });

        queue.add(jsonObjectRequest);
这里面的URL是国家气象局的免费天气接口API,返回的一段json格式。使用方式跟StringRequest一样。
打印结果如下:
{"weatherinfo":{"city":"北京","cityid":"101010100","temp":"18","WD":"东南风","WS":"1级","SD":"17%","WSE":"1","time":"17:05","isRadar":"1","Radar":"JC_RADAR_AZ9010_JB","njd":"暂无实况","qy":"1011","rain":"0"}}
ImageRequest的请求
ImageRequest顾名思义,加载网络图片,就是请求一个URL图片的地址将其转化为bitmap,然后返回。首先我们找一张图片的URL地址,然后通过ImageRequest是来试试看。
RequestQueue queue = Volley.newRequestQueue(this);
        String url = "https://timgsa.baidu.com/timg?image&quality=80&size=b9999_10000&sec=1516182547984&di=a3d7fafe9308bb1115de7de852465db5&imgtype=0&src=http%3A%2F%2Fimage.tianjimedia.com%2FuploadImages%2F2015%2F215%2F41%2FM68709LC8O6L.jpg";

        ImageRequest imageRequest = new ImageRequest(url, new Response.Listener() {
            @Override
            public void onResponse(Bitmap response) {
                resultImg.setImageBitmap(response);
            }
        }, 0, 0, Bitmap.Config.RGB_565, new Response.ErrorListener() {
            @Override
            public void onErrorResponse(VolleyError error) {

            }
        });

        queue.add(imageRequest);
其实,volley默认提供的几种Request都是差不多的用法,ImageRequest也不例外,就简单就可以加载一张网络图片了。当然对于加载网络图片的使用方法,volley提供了另外一种方式,ImageLoader 通过ImageLoader来更加高效的解决加载网络图片的问题。有兴趣的可以去看下ImageLoader的用法。
以上便是几种常用的Request的使用方法,我们一一进行的介绍。接下来我们就来分析一下这几种Request是如何实现的,也就是分析源码的实现过程。
参考链接:
- https://developer.android.com/training/volley/simple.html#cancel
- http://blog.csdn.net/guolin_blog/article/details/17612763