pytorch中 PIL与tensor、numpy与tensor之间相互转化|简记
参考链接-Pytorch中Tensor与各种图像格式的相互转化
下面是整理的 cv、PIL 读取图片,然后PIL2tensor、Tensor2PILImage、tensor2numpy相互转化的代码,建议直接复制运行,观察输出 :
torch 1.1.0 ,torchvision 0.3.0
from torchvision import transforms
from PIL import Image
import cv2
import os
import numpy as np

if __name__ == '__main__':
    # 方法定义
    def denorm(x):
        return x * 0.5 + 0.5

    def tensor2numpy(x):
        return x.detach().cpu().numpy().transpose(1, 2, 0)

    def RGB2BGR(x):
        return cv2.cvtColor(x, cv2.COLOR_RGB2BGR)
    # 实例化
    test_transform = transforms.Compose([
        # transforms.Resize((256, 256)),
        transforms.ToTensor(),
        transforms.Normalize(mean=(0.5, 0.5, 0.5), std=(0.5, 0.5, 0.5))
    ])

    unloader = transforms.ToPILImage()

    print('-------------Start------------------')
    # cv read img
    img_path = 'default.jpg'
    cv2_image = cv2.imread(img_path)  # numpy.ndarray(H,W,C=3),通道顺序(B,G,R)
    print('type(cv2_image): ', type(cv2_image))
    print('cv2_image.size: ', cv2_image.shape)

    print()
    # PIL read img
    image = Image.open(img_path)
    image.save('PIL_default.jpg')
    print('type(image): ', type(image))
    print('PIL image.size: ', image.size)

    print()
    # PIL2tensor
    img_tensor = test_transform(image)  # (C,H, W), 通道顺序(R,G,B)
    print('PIL2tensor type: ', type(img_tensor))
    print('PIL2tensor shape: ', img_tensor.shape)

    print()
    # Tensor2PILImage, 使用 PIL 进行保存
    Tensor2PIL = unloader(img_tensor)
    Tensor2PIL.save('temp.jpg')
    print('Tensor2PIL type: ', type(Tensor2PIL))
    print('Tensor2PIL size: ', Tensor2PIL.size)

    print('---------------------------------------')
    # tensor2numpy.ndarray 使用cv2 来进行保存
    tensor2numpy_img = RGB2BGR(tensor2numpy(denorm(img_tensor)))
    cv2.imwrite(os.path.join('test_cv.jpg'), tensor2numpy_img)
    print('tensor2numpy_img type: ', type(tensor2numpy_img))
    print('tensor2numpy_img shape: ', tensor2numpy_img.shape)

    print()
    # 给 tensor 扩充一个 维度
    # pytorch中,处理图片需要一个batch一个batch的操作,需要准备的数据格式是 [batch_size, n_channels, hight, width]
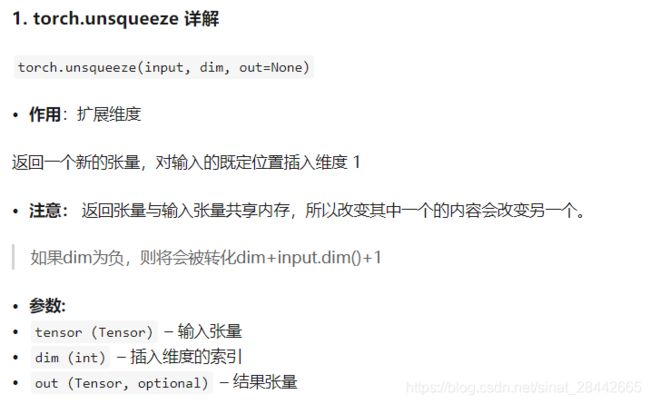
    img4 = test_transform(image).unsqueeze(0)
    print('add a dimension: ', img4.shape)
输出如下:
-------------Start------------------
type(cv2_image):
cv2_image.size:  (220, 178, 3)

type(image):
PIL image.size:  (178, 220)

PIL2tensor type:
PIL2tensor shape:  torch.Size([3, 220, 178])

Tensor2PIL type:
Tensor2PIL size:  (178, 220)
---------------------------------------
tensor2numpy_img type:
tensor2numpy_img shape:  (220, 178, 3)

add a dimension:  torch.Size([1, 3, 220, 178])
知识点:
torch.unsqueeze() 类似于 np.expand_dims() 、tf.expand_dims(input, axis=-1)
tf.expand_dims(input, axis=-1)

pytorch中squeeze()和unsqueeze()函数介绍
torch.unsqueeze() 和 torch.squeeze()