paddlehub 使用体验-视频抠图_乘风破浪的姐姐_人美路子野 2020-08-13
paddlehub 使用体验-视频抠图_乘风破浪的姐姐_人美路子野
PaddleHub就是为了解决对深度学习模型的需求而开发的工具。 基于飞桨领先的核心框架, 精选效果优秀的算法, 提供了百亿级大数据训练的预训练模型, 方便用户不用花费大量精力从头开始训练一个模型。
PaddleHub的github地址: https://github.com/PaddlePaddle/PaddleHub
首先介绍paddlehub的主要优势:
- 模型一键下载、 管理、 预测
- 迁移学习
Fine-tune API: 十行代码完成迁移学习
AutoDL Finetuner: 一键自动超参搜索 - 端到端部署
Hub Serving: 一键模型服务化部署
接下来实践部分:
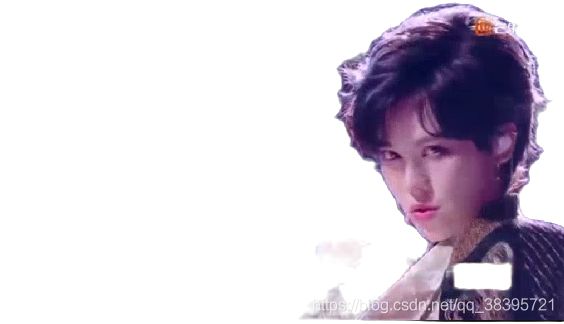
实践介绍:主要对乘风破浪的姐姐中人美路子野mv进行人像抠图,然后更换背景后,合并成新的一个视频。采用该mv是因为该视频中人物鲜明,为顺序出场安排,更加方便的查看模型抠图后的效果。
点击查看: 素材视频传送门
1.[ 模型即软件 ] 是paddlehub的使用原则,因此,使用paddlehub中的模型,重点应偏向于应用,拿来就用就OK了。
- PaddleHub的官网: https://www.paddlepaddle.org.cn/hub
- PaddleHub的课程地址: https://aistudio.baidu.com/aistudio/course/introduce/1070
- PaddleHub的官方教程地址: https://aistudio.baidu.com/aistudio/personalcenter/thirdview/79927
- 直接在AiStudio上对paddlehub进行一个安装。

2. 主要流程是:视频分帧–>进行抠图–>添加背景图片–>将每个图片合并成视频
首先看下文件目录结构:
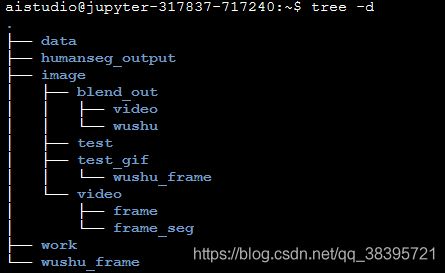
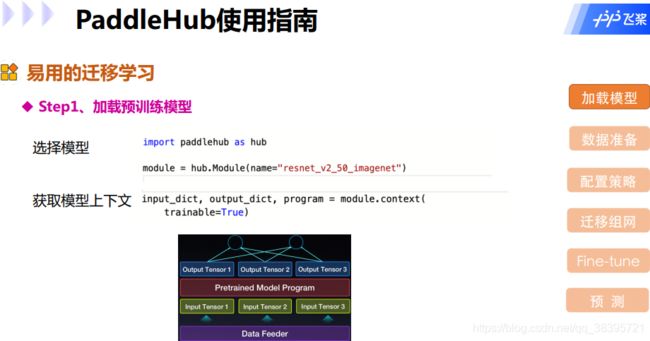
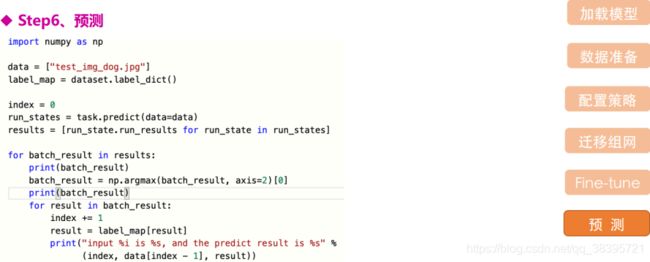
然后加载预训练模型:加载模型时候是要输入模型名称即可,此处使用的模型是 “deeplabv3p_xception65_humanseg”
module = hub.Module(name="deeplabv3p_xception65_humanseg")
input_dict = {"image": test_img_path}

# 执行并展示结果
results = module.segmentation(data=input_dict)
for result in results:
    print(result)
预测结果(即抠图的效果)进行展示:
# 预测结果展示
out_img_path = 'humanseg_output/' + os.path.basename(test_img_path[0]).split('.')[0] + '.png'
img = mpimg.imread(out_img_path)
plt.figure(figsize=(10,10))
plt.imshow(img)
plt.axis('off')
plt.show()
# 合成函数
def blend_images(fore_image, base_image, output_path):
    """
    将抠出的人物图像换背景
    fore_image: 前景图片,抠出的人物图片
    base_image: 背景图片
    """
    # 读入图片
    base_image = Image.open(base_image).convert('RGB')
    fore_image = Image.open(fore_image).resize(base_image.size)

    # 图片加权合成
    scope_map = np.array(fore_image)[:,:,-1] / 255
    scope_map = scope_map[:,:,np.newaxis]
    scope_map = np.repeat(scope_map, repeats=3, axis=2)
    res_image = np.multiply(scope_map, np.array(fore_image)[:,:,:3]) + np.multiply((1-scope_map), np.array(base_image))

    #保存图片
    res_image = Image.fromarray(np.uint8(res_image))
    res_image.save(output_path)
    return res_image
3. GIF函数处理
def create_gif(gif_name, path, duration=0.3):
    '''
    生成gif文件,原始图片仅支持png格式
    gif_name : 字符串,所生成的 gif 文件名,带 .gif 后缀
    path :      需要合成为 gif 的图片所在路径
    duration :  gif 图像时间间隔
    '''

    frames = []
    pngFiles = os.listdir(path)
    image_list = [os.path.join(path, f) for f in pngFiles]
    for image_name in image_list:
        frames.append(imageio.imread(image_name))
    # 保存为 gif
    imageio.mimsave(gif_name, frames, 'GIF', duration=duration)
    return

def split_gif(gif_name, output_path, resize=False):
    '''
    拆分gif文件,生成png格式,便于生成
    gif_name :  gif 文件路径,带 .gif 后缀
    path :      拆分图片所在路径
    '''
    gif_file = Image.open(gif_name)
    name = gif_name.split('/')[-1].split('.')[0]
    if not os.path.exists(output_path):                        # 判断该文件夹是否存在,如果存在再创建则会报错
        os.mkdir(output_path)

    for i, frame in enumerate(ImageSequence.Iterator(gif_file), 1):
        if resize:
            frame = frame.resize((300, 168), Image.ANTIALIAS)
        frame.save('%s/%s_%d.png' % (output_path, name, i))                       # 保存在等目录的output文件夹下

def plot_sequence_images(image_array):
    ''' Display images sequence as an animation in jupyter notebook

    Args:
        image_array(numpy.ndarray): image_array.shape equal to (num_images, height, width, num_channels)
    '''
    dpi = 72.0
    xpixels, ypixels = image_array[0].shape[:2]
    fig = plt.figure(figsize=(ypixels/dpi, xpixels/dpi), dpi=dpi)
    im = plt.figimage(image_array[0])

    def animate(i):
        im.set_array(image_array[i])
        return (im,)

    anim = animation.FuncAnimation(fig, animate, frames=len(image_array), interval=500, repeat_delay=1, repeat=True)
    display(HTML(anim.to_html5_video()))

# 合成GIF
create_gif('image/blend_out/blend_res_wushu.gif', './wushu_frame', duration=0.5)

imgs = []
for i, fname in enumerate(os.listdir('image/blend_out/wushu/')):
    img = cv2.imread('image/blend_out/wushu/' + fname)
    img_rgb = cv2.cvtColor(img, cv2.COLOR_BGR2RGB)
    imgs.append(img_rgb)
plot_sequence_images(imgs)
效果展示:
4. 将分割后的图片与背景图进行合并
# 合成图片
humanseg_wushu = [filename for filename in os.listdir('./humanseg_output/') if filename.startswith("wushu")]
# print(humanseg_wushu)

for i, img in enumerate(humanseg_wushu):
    # print(i)
    # if i > 50: continue
    img_path = os.path.join('./wushu_frame/wushu_%d.png' % (i+1))
    # print(img_path)
    output_path_img = output_path + 'wushu/%d.png' % i
    # print(output_path_img)
    blend_images(img_path, './image/test/12.png', output_path_img)
5. 输出视频,成avi格式
# 合并输出视频
humanseg_wushu = [filename for filename in os.listdir('image/video/frame_seg/')]
for i, img in enumerate(humanseg_wushu):
    if i <= 145 or (i >= 250 and i <= 427) or (i >= 552 and i <= 601) or (i >= 729 and i <= 761):
        img_path = os.path.join('image/video/frame_seg/%d.png' % (i+1))
        output_path_img = output_path + 'video/%d.png' % i
        img = blend_images(img_path, 'image/test/bg2.jpg', output_path_img)
    if (i >= 146 and i <= 249) or (i >= 428 and i<= 551) or (i >= 602 and i<= 728):
        img_path = os.path.join('image/video/frame_seg/%d.png' % (i+1))
        output_path_img = output_path + 'video/%d.png' % i
        img = blend_images(img_path, 'image/test/bg3.jpg', output_path_img)
效果展示:
后期处理:
为视频添加音频文件。
点击查看: 处理后的完整视频传送门 因音频是后期加上去的,所以未免会出现口型对不上的情况。
总结:
1、paddlehub为想要直接使用框架处理具体问题的用户提供了便捷。
2、paddlehub也可以快速验证一些你的想法。
3、有时间可以通过阅读paddlehub在github上面的源码来获得对模型以及训练过程更加深刻的认识。

