vue项目使用fullcalendar绘制自己想要的日历视图
由于业务需求,需要构建时间线视图和个人日历视图,经过师父指点发现了一款功能强大的日历插件(JavaScript Calendar),支持React, Vue, Angular and TypeScript 。真的很强大,谁用谁知道啊,哈哈哈,还有时区和语言设置,而且也一直在保持更新,最近一次更新时间是2020.5.20,文档很全,可以自定义你需要的各种样式和需求,并且拓展性很强。
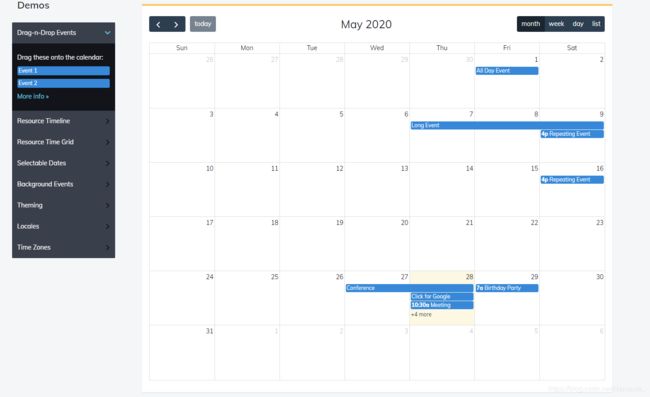
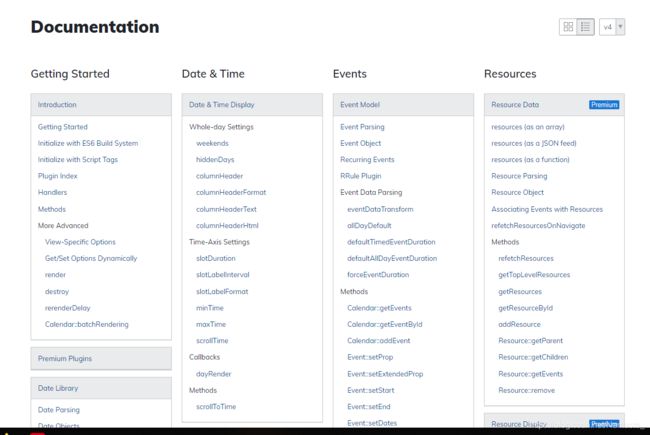
下面简单上几张demo和文档的图:
如果你是第一次用这个插件千万别被这复杂的英文文档吓退缩,相信我,好好研究,花一天时间你就能吃透了,接下来就能得心应手的使用它,因为我就是从零开始去研究这个插件,然后成功的绘制出了我们产品和UI想要的功能和效果,如果你英文不太好,这里可以参照最新FullCalendar中文文档。
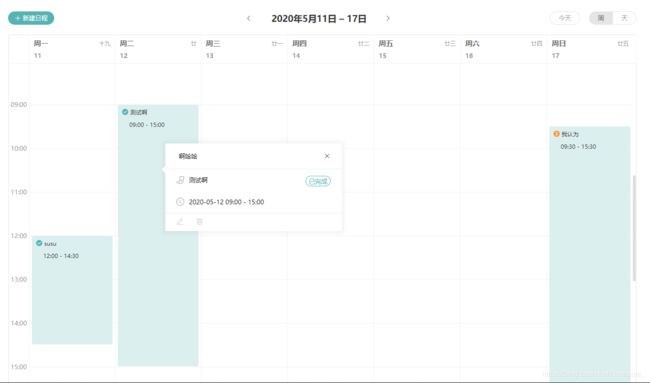
下面是我改造之后的效果图:
// 安装相关插件
npm install --save @fullcalendar/core
npm install --save @fullcalendar/resource-timeline
npm install --save @fullcalendar/timeline

//按需引入
import FullCalendar from '@fullcalendar/vue'
import resourceTimelinePlugin from '@fullcalendar/resource-timeline'
import interactionPlugin from '@fullcalendar/interaction'
import '@fullcalendar/core/main.css'
import '@fullcalendar/timeline/main.css'
import '@fullcalendar/resource-timeline/main.css'
import '@/styles/cover.scss' //覆盖样式文件
<FullCalendar ref="calendar" default-view="resourceTimelineNinetyDay" locale="zh-cn" week-number-calculation="ISO"
              slot-width="38"
              :scheduler-license-key="licenseKey"
              :slot-label-format="slotLabelFormat"
              :event-time-format="evnetTime"
              :header="header"
              :button-text="buttonText"
              :aspect-ratio="aspectRatio"
              :views="views"
              :plugins="calendarPlugins"
              resource-area-width="350px"
              resource-label-text="任务"
              :resources="resources"
              :events="calendarEvents"
              @eventResize="eventResizeFun"
              @eventDrop="eventDropFun"
              @resourceRender="resourceRenderFun"
              @eventRender="eventRenderFun"
/>
export default {
  components: {
    FullCalendar
  },
  data() {
    return {
      // buttonText: { day: '天', month: '月', week: '周' },
      licenseKey: 'GPL-My-Project-Is-Open-Source',
      calendarPlugins: [
        resourceTimelinePlugin, interactionPlugin
      ],
      aspectRatio: 2.2,
      // 自定义视图显示3个月
      views: {
        resourceTimelineNinetyDay: {
          type: 'resourceTimeline',
          // duration: { month: 2 }
          visibleRange: function(currentDate) {
            // Generate a new date for manipulating in the next step
            var startDate = new Date(currentDate.valueOf())
            var endDate = new Date(currentDate.valueOf())

            // Adjust the start & end dates, respectively
            startDate.setDate(startDate.getDate() - 15) // One day in the past
            endDate.setDate(startDate.getDate() + 91) // Two days into the future

            return { start: startDate, end: endDate }
          }
        }
      },
      header: {
        left: '',
        center: 'title',
        right: ''
        // prev,next
        // resourceTimelineDay,resourceTimelineWeek,resourceTimelineMonth
      },
      evnetTime: {
        // hour: 'numeric',
        // minute: '2-digit',
        // hour12: false
      },
      // slotLabelFormat: {},
      slotLabelFormat: [
        { day: 'numeric', weekday: 'short' } // top level of text
        // { weekday: 'short' } // lower level of text
      ],
      // titleFormat: { year: 'numeric', month: 'short', day: 'numeric' },
      resources: [],
      calendarEvents: [
        // { resourceId: '1', id: '1', event: '111', title: '111', start: '2020-04-01', end: '2020-04-13', workTime: 3 },
        // { resourceId: '1', id: '1', event: '', title: '', start: '2020-04-13', end: '2020-04-17', color: 'rgba(83,180,179,0.2)', workTime: 3 },
        // { resourceId: '1', id: '1', event: '111', title: '111', start: '2020-03-01', end: '2020-03-08', workTime: 3 },
        // { resourceId: '2', id: '2', event: '222', title: '222', start: '2020-04-03', end: '2020-04-07', workTime: 3 },
        // { resourceId: '222', id: '222', event: '222.1', title: '222.1', start: '2020-04-05', end: '2020-04-25', workTime: 3, color: 'rgba(83,180,179,1)' },
        // { resourceId: '3', event: '333', id: '333', title: '333', start: '2020-04-05', end: '2020-04-15', workTime: 3, color: 'rgba(83,180,179,1)' },
        // { resourceId: '4', event: '444', id: '444', title: '444', start: '2020-04-07', end: '2020-04-16', workTime: 3 },
        // { resourceId: '5', event: '555', id: '5', title: '555', start: '2020-04-11', end: '2020-04-18', workTime: 3 },
        // { resourceId: '6', event: '666', id: '6', title: '555', start: '2020-04-12', end: '2020-04-15', workTime: 3, color: 'rgba(83,180,179,1)' }
      ]
    }
  }
注:有很多样式是要自己处理的,因为官网的demo,emmn…,处理样式部分的代码就不贴了,此外时间线头部的日期格式要自己处理的可以在vue的mounted这个钩子里面进行处理,如果要自定义资源也就是时间线视图左侧的资源或者时间条可以在resourceRender和eventRender这两个事件里进行处理,就是找到那个对应的dom元素,然后进行处理和渲染,相信我们都可以的,这里日历视图的代码就不贴了,处理逻辑都是一样的,前提时一定要花时间去吃透文档。
长路漫漫,希望我们每天都在进步,加油,那个正在努力的自己!!!


