springboot+thymeleaf+mybatis实现个人博客系统(二)登入功能的实现
通过一段时间的学习,想找一个项目练练手,于是乎就想到了个人博客系统,所以想通过csdn,以博客的形式记录一下开发过程,如有哪里不对,还望大佬以留言或邮箱方式指正,邮箱地址 [email protected]
首先说一下实现思路:
- 从浏览器获取到用户输入的用户名和密码
- 拿到用户名密码,进行加密处理
- 后台从数据库中查询出数据
- 加密处理后的密码与数据库中数据进行比对,一致,返回登入成功信息,否则,弹出警告框
5.配置拦截器,拦截未登入用户
拦截器实现了 SpringBoot的HandlerInterceptor拦截器接口
拦截器主要逻辑代码为:
 @Override
    public boolean preHandle(HttpServletRequest request, HttpServletResponse response, Object o) throws Exception {

        // 请求URL不包含域名
        String uri = request.getRequestURI();
        // 日志输出
        LOGGER.info("UserAgent:{}", request.getHeader(USER_AGENT));
        LOGGER.info("用户访问地址:{},来路地址:{}",uri, IPKit.getIpAddressByRequest1(request));

        // 请求拦截处理
        UserDomain user = TaleUtils.getLoginUser(request);
        if (null == user) {
            Integer uid = TaleUtils.getCookieUid(request);
            if (null != uid) {
                //这里还是有安全隐患,cookie是可以伪造的
                user = userService.getUserInfoById(uid);
                request.getSession().setAttribute(WebConst.LOGIN_SESSION_KEY, user);
            }
        }

        if (uri.startsWith("/admin") && !uri.startsWith("/admin/login") && null == user
                && !uri.startsWith("/admin/css") && !uri.startsWith("/admin/images")
                && !uri.startsWith("/admin/js") && !uri.startsWith("/admin/plugins")
                && !uri.startsWith("/admin/editormd")) {
            response.sendRedirect(request.getContextPath() + "/admin/login");
            return false;
        }

        // 设置GET请求的token
        if (request.getMethod().equals("GET")) {
            String csrf_token = UUID.UU64();
            // 默认存储30分钟
            cache.hset(Types.CSRF_TOKEN.getType(), csrf_token, uri,30 * 60);
            request.setAttribute("_csrf_token", csrf_token);
        }
        // 返回true才会执行postHandle
        return true;
    }
model层对应的实体类为UserDomain.java
 /** 主键编号 */
    private Integer uid;
    /** 用户名 */
    private String username;
    /** 密码 */
    private String password;
    /** email */
    private String email;
    /** 主页地址 */
    private String homeUrl;
    /**  用户显示的名称 */
    private String screenName;
    /** 用户注册时的GMT unix时间戳 */
    private Integer created;
    /** 最后活动时间 */
    private Integer activated;
    /** 上次登录最后活跃时间 */
    private Integer logged;
    /** 用户组 */
    private String groupName;
    // 省略get set以及构造方法
前端js代码对应为:
 var tale = new $.tale();
    function checkForm() {
        tale.post({
            url: '/admin/login',
            data: $("#loginForm").serialize(),
            success: function (result) {
                if (result && result.code == 'success') {
                    window.location.href = '/admin/index';
                } else {
                    tale.alertError(result.msg || '登录失败');
                }
            }
        });
        return false;
    }
controller层对应的代码为:
 @ApiOperation("登录")
    @PostMapping(value = "/login")
    @ResponseBody
    public APIResponse toLogin(
            HttpServletRequest request,
            HttpServletResponse response,
            @ApiParam(name = "username", value = "用户名", required = true)
            @RequestParam(name = "username", required = true)
            String username,
            @ApiParam(name = "password", value = "用户名", required = true)
            @RequestParam(name = "password", required = true)
            String password,
            @ApiParam(name = "remember_me", value = "记住我", required = false)
            @RequestParam(name = "remember_me", required = false)
            String remember_me
    ) {
        Integer error_count = cache.get("login_error_count");
        try {
            // 调用Service登录方法
            UserDomain userInfo = userService.login(username, password);
            // 设置用户信息session
            request.getSession().setAttribute(WebConst.LOGIN_SESSION_KEY, userInfo);
            // 判断是否勾选记住我
            if (StringUtils.isNotBlank(remember_me)) {
                TaleUtils.setCookie(response, userInfo.getUid());
            }
            // 写入日志
            logService.addLog(LogActions.LOGIN.getAction(), userInfo.getUsername()+"用户", request.getRemoteAddr(), userInfo.getUid());
        } catch (Exception e) {
            LOGGER.error(e.getMessage());
            error_count = null == error_count ? 1 : error_count + 1;
            if (error_count > 3) {
                return APIResponse.fail("您输入密码已经错误超过3次,请10分钟后尝试");
            }
            System.out.println(error_count);
            // 设置缓存为10分钟
            cache.set("login_error_count", error_count, 10 * 60);
            String msg = "登录失败";
            if (e instanceof BusinessException) {
                msg = e.getMessage();
            } else {
                LOGGER.error(msg,e);
            }
            return APIResponse.fail(msg);
        }
        // 返回登录成功信息
        return APIResponse.success();
    }
service层对应代码为:
@Service
public class UserServiceImpl implements UserService {

    @Autowired
    private UserDao userDao;//这里会报错,但是并不影响


    @Override
    public UserDomain login(String username, String password) {

        if (StringUtils.isBlank(username) || StringUtils.isBlank(password))
            throw BusinessException.withErrorCode(ErrorConstant.Auth.USERNAME_PASSWORD_IS_EMPTY);
		// 获取到加密后的值
        String pwd = TaleUtils.MD5encode(username + password);
        UserDomain user = userDao.getUserInfoByCond(username,pwd);
        if (null == user)
            throw BusinessException.withErrorCode(ErrorConstant.Auth.USERNAME_PASSWORD_ERROR);
        return user;
    }

    @Override
    public UserDomain getUserInfoById(Integer uid) {
        return userDao.getUserInfoById(uid);
    }

    // 开启事务
    @Transactional
    @Override
    public int updateUserInfo(UserDomain user) {
        if (null == user.getUid())
            throw BusinessException.withErrorCode("用户编号不能为空");
        return userDao.updateUserInfo(user);
    }
}
dao层对应映射为:
<?xml version="1.0" encoding="UTF-8" ?>
<!DOCTYPE mapper PUBLIC "-//mybatis.org//DTD Mapper 3.0//EN" "http://mybatis.org/dtd/mybatis-3-mapper.dtd" >
<mapper namespace="com.lyp.dao.UserDao">

    <!--表名-->
    <sql id="BASE_TABLE">
        t_users
    </sql>
    <!--列名-->
    <sql id="BASE_COLUMN">
        uid,username,password,email,homeUrl,screenName,created,activated,logged,groupName
    </sql>

    <!--通过用户名和密码获取用户信息-->
    <select id="getUserInfoByCond" resultType="com.lyp.model.UserDomain">
        SELECT
          <include refid="BASE_COLUMN"/>
        FROM
          <include refid="BASE_TABLE"/>
        <where>
            <if test="username != null">
                AND username = #{username, jdbcType=VARCHAR}
            </if>
            <if test="password != null">
                AND password = #{password, jdbcType=VARCHAR}
            </if>
        </where>

    </select>
    <!--通过用户ID获取用户信息-->
    <select id="getUserInfoById" parameterType="com.lyp.model.UserDomain">
        SELECT
          <include refid="BASE_COLUMN"/>
        FROM
          <include refid="BASE_TABLE"/>
        WHERE
          uid = #{uid, jdbcType=INTEGER}
    </select>
    <!--更改用户信息-->
    <update id="updateUserInfo" parameterType="com.lyp.model.UserDomain">
        UPDATE
          <include refid="BASE_TABLE"/>
        <set>
            <if test="password != null">
                password = #{password, jdbcType=VARCHAR},
            </if>
            <if test="screenName != null">
                screenName = #{screenName, jdbcType=VARCHAR},
            </if>
            <if test="email != null">
                email = #{email, jdbcType=VARCHAR}
            </if>
        </set>
        WHERE
          uid = #{uid,jdbcType=INTEGER}
    </update>


</mapper>
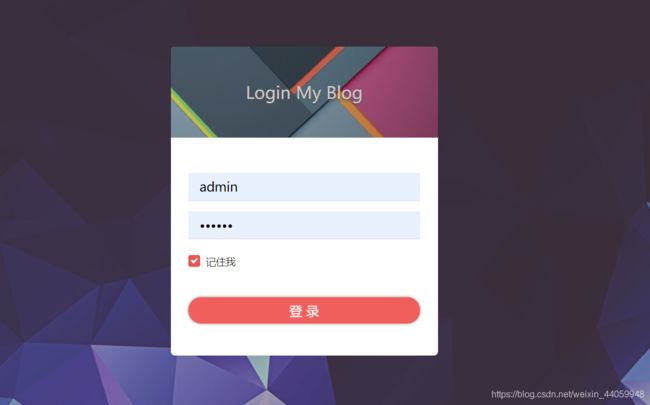
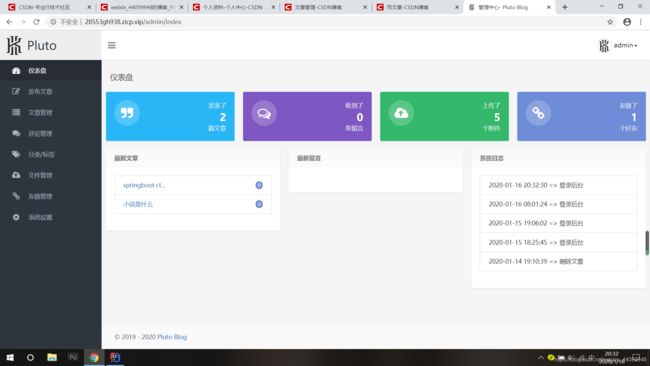
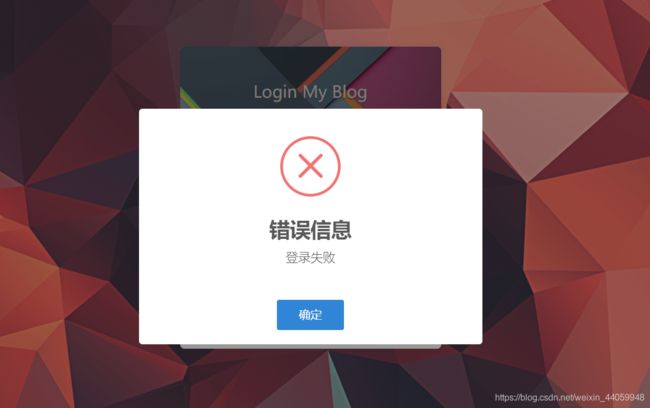
前端效果如图:


