2019独角兽企业重金招聘Python工程师标准>>> ![]()
UIView,UIButton,UIImageView等设置圆角,设置阴影,设置边框的方法
在iOS开发中,任何可见视图都是继承于UIView的。 继承体系中,大部分UIView的属性适用于其任何孩子。
而UIView的layer属性可以绘制UIView的各种效果。其实我们看到的View的动画实际上也是layer在绘制。
1、绘制圆角
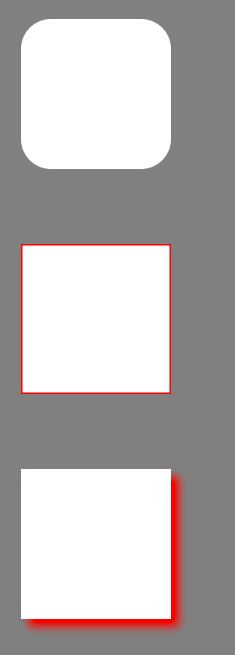
    cornerView.layer.cornerRadius = 20;
    cornerView.layer.masksToBounds = YES;
masksToBounds防止子元素溢出父视图。
如果一个正方形要设置成圆形,代码为:
    cornerView.layer.cornerRadius = cornerView.frame.size.height/2;
    cornerView.layer.masksToBounds = YES;
2、绘制边框
    borderView.layer.borderWidth = 1.0;
    borderView.layer.borderColor = [UIColor blackColor].CGColor;
注意此处使用的是CGColor而不是UIColor.
3、绘制阴影
    shadowView.layer.shadowColor = [UIColor redColor].CGColor;
    shadowView.layer.shadowOffset = CGSizeMake(5.0, 5.0);
    shadowView.layer.shadowOpacity = YES;
offset为偏移量,为正表示向frame x,y坐标增加的方向偏移。
opacity为透明度,默认为0,即表示透明的。所以我们要把opacity设置成1或者YES,表示不透明,也可以设置成0.5或者类似的值呈现半透明。
效果如下:
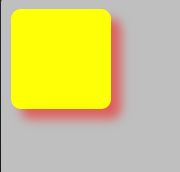
4、圆角阴影并存
UIView *v=[[UIView alloc]initWithFrame:CGRectMake(10, 10, 100, 100)];
v.backgroundColor=[UIColor yellowColor];
//v.layer.masksToBounds=YES;这行去掉
v.layer.cornerRadius=10;
v.layer.shadowColor=[UIColor redColor].CGColor;
v.layer.shadowOffset=CGSizeMake(10, 10);
v.layer.shadowOpacity=0.5;
v.layer.shadowRadius=5;
[self.view addSubview:v];
效果如下
/* When true an implicit mask matching the layer bounds is applied to
* the layer (including the effects of the `cornerRadius' property). If
* both `mask' and `masksToBounds' are non-nil the two masks are
* multiplied to get the actual mask values. Defaults to NO.
* Animatable. */

