一. 引言
随着公司项目整体架构由原来的多渠道各自为战,向着建立统一的服务端应用,从而为各渠道提供服务调用的转变,服务端应用接口测试成了我们日常工作中的重要任务之一。经过半年的摸索和项目实战,我们已经掌握了一套接口测试的流程。这里,对我们的接口测试流程进行下梳理,一来是对之前的工作进行总结,二来可以发现其中的不足和需要改进之处。
接口测试客户端的搭建,主要可以分为以下几个步骤:
1. 客户端项目搭建
2. 服务端地址配置
3. 接口请求封装
4. 测试用例编写
二. 正文
1. 客户端项目搭建
a.新建项目
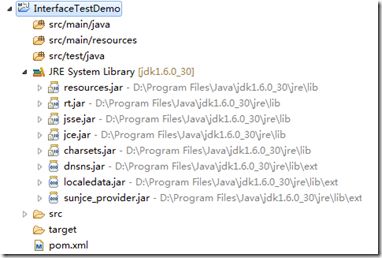
首先,在eclipse中创建一个简单的maven项目,目录结构可以为默认的,这里我们用不到test/resources这个路径,可以把它给去了。jdk版本可以根据服务端应用的版本来选择,这里我们选的是1.6的。
b.导入jar包
接着,编写pom.xml文件引入相应的jar包。相关的jar可以分为三类:框架/工具类、服务端应用接口包、测试用例框架包。框架一般会用到spring(配置服务端地址)、hibernate(连接数据库),工具类的有commons-lang,jackson,log4j等等;服务端应用相关的包,例如:我们的服务调用用的是dubbo协议,则需要引入dubbo相关的jar以及服务提供的相应接口api包, 如果我们想用cxf-jaxws来调用服务,则需要引入cxf相关的jar包;测试用例框架包,这里我们用的是junit;另外,如果还想要对接口进行性能测试的话,就需要引入对应测试工具相关的jar包,如:ApacheJMeter-core/ApacheJMeter-java。以下是一个简单的pom配置:
<project xmlns="http://maven.apache.org/POM/4.0.0" xmlns:xsi="http://www.w3.org/2001/XMLSchema-instance" xsi:schemaLocation="http://maven.apache.org/POM/4.0.0 http://maven.apache.org/xsd/maven-4.0.0.xsd">
  <modelVersion>4.0.0modelVersion>
  <groupId>com.lglangroupId>
  <artifactId>InterfaceTestDemoartifactId>
  <version>0.0.1-SNAPSHOTversion>

      <properties>
        <project.build.sourceEncoding>UTF-8project.build.sourceEncoding>
        <project.reporting.outputEncoding>UTF-8project.reporting.outputEncoding>
        <spring.version>3.1.2.RELEASEspring.version>
        <junit.version>4.9junit.version>
        <dubbo.version>2.5.3dubbo.version>
        <zkclient.version>0.1zkclient.version>
        <zookeeper.version>3.4.5zookeeper.version>
    properties>

    <dependencies>
        <dependency>
            <groupId>junitgroupId>
            <artifactId>junitartifactId>
            <version>${junit.version}version>
        dependency>
        <dependency>
            <groupId>org.springframeworkgroupId>
            <artifactId>spring-contextartifactId>
            <version>${spring.version}version>
        dependency>
        <dependency>
            <groupId>org.springframeworkgroupId>
            <artifactId>spring-coreartifactId>
            <version>${spring.version}version>
        dependency>
        <dependency>
            <groupId>org.springframeworkgroupId>
            <artifactId>spring-beansartifactId>
            <version>${spring.version}version>
        dependency>
        <dependency>
            <groupId>log4jgroupId>
            <artifactId>log4jartifactId>
            <version>1.2.14version>
        dependency>
        <dependency>
            <groupId>com.alibabagroupId>
            <artifactId>dubboartifactId>
            <version>${dubbo.version}version>
            <exclusions>
                <exclusion>
                    <groupId>org.springframeworkgroupId>
                    <artifactId>springartifactId>
                exclusion>
            exclusions>
        dependency>
        <dependency>
            <groupId>com.github.sgroschupfgroupId>
            <artifactId>zkclientartifactId>
            <version>${zkclient.version}version>
        dependency>
        <dependency>
            <groupId>org.apache.zookeepergroupId>
            <artifactId>zookeeperartifactId>
            <version>${zookeeper.version}version>
            <exclusions>
                <exclusion>
                    <artifactId>jmxtoolsartifactId>
                    <groupId>com.sun.jdmkgroupId>
                exclusion>
                <exclusion>
                    <artifactId>jmxriartifactId>
                    <groupId>com.sun.jmxgroupId>
                exclusion>
                <exclusion>
                    <artifactId>jmsartifactId>
                    <groupId>javax.jmsgroupId>
                exclusion>
            exclusions>
        dependency>
        <dependency>
            <groupId>org.apache.cxfgroupId>
            <artifactId>cxf-rt-frontend-simpleartifactId>
            <version>2.6.1version>
        dependency>
        <dependency>
            <groupId>org.apache.cxfgroupId>
            <artifactId>cxf-rt-transports-httpartifactId>
            <version>2.6.1version>
        dependency>
        <dependency>
            <groupId>org.apache.cxfgroupId>
            <artifactId>cxf-rt-frontend-jaxwsartifactId>
            <version>2.6.1version>
            <exclusions>
                <exclusion>
                    <groupId>org.apache.cxfgroupId>
                    <artifactId>cxf-rt-ws-addrartifactId>
                exclusion>
            exclusions>
        dependency>
    dependencies>

    <build>
        <plugins>
            <plugin>
                <groupId>org.apache.maven.pluginsgroupId>
                <artifactId>maven-surefire-pluginartifactId>
                <version>2.16version>
                <configuration>
                    <skipTests>trueskipTests>
                configuration>
            plugin>
        plugins>
    build>
project>
C. src/main/java目录下新建包
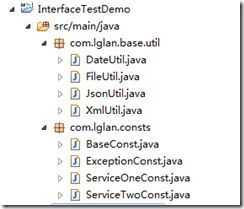
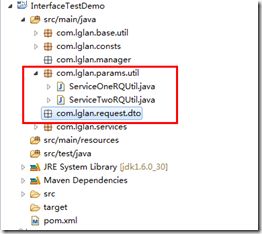
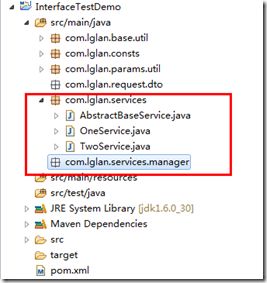
接下来,我们在src/main/java源码目录下新建相关的包路径,根据包中类的功能大致可以三类,
1. 工具辅组类,例如:常量类,以及常用工具类的封装类
2. 请求参数封装类
3.服务端接口封装及调用类
2.服务端地址配置
首先,在resources目录下新建xml配置文件,采用spring的IOC来管理各服务提供的接口地址。
例一:dubbo协议的服务地址配置文件
xml version="1.0" encoding="UTF-8"?>
<beans xmlns="http://www.springframework.org/schema/beans"
    xmlns:xsi="http://www.w3.org/2001/XMLSchema-instance"
    xmlns:dubbo="http://code.alibabatech.com/schema/dubbo"
    xmlns:context="http://www.springframework.org/schema/context"
    xmlns:tx="http://www.springframework.org/schema/tx"
    xsi:schemaLocation="http://code.alibabatech.com/schema/dubbo http://code.alibabatech.com/schema/dubbo/dubbo.xsd
        http://www.springframework.org/schema/beans http://www.springframework.org/schema/beans/spring-beans.xsd
        http://www.springframework.org/schema/tx http://www.springframework.org/schema/tx/spring-tx-3.1.xsd
        http://www.springframework.org/schema/context http://www.springframework.org/schema/context/spring-context.xsd">
    <context:annotation-config/>
    <context:component-scan base-package="com.*"/>


    <dubbo:application name="app_opentravel" />


     <dubbo:reference id="iOneService" interface="com.lglan.demo.service.IOneService" timeout="5000" url="dubbo://172.0.0.1:20880"/>
    <dubbo:reference id="iTwoService" interface="com.lglan.demo.service.ITwoService" timeout="5000" url="dubbo://172.0.0.1:20880"/>
beans>
例二:jaxws形式的远程调用接口地址配置
xml version="1.0" encoding="UTF-8"?>
<beans xmlns="http://www.springframework.org/schema/beans"
    xmlns:xsi="http://www.w3.org/2001/XMLSchema-instance"
    xmlns:context="http://www.springframework.org/schema/context"
    xmlns:tx="http://www.springframework.org/schema/tx"
    xmlns:jaxws="http://cxf.apache.org/jaxws"
    xsi:schemaLocation="http://www.springframework.org/schema/beans http://www.springframework.org/schema/beans/spring-beans.xsd
        http://www.springframework.org/schema/tx http://www.springframework.org/schema/tx/spring-tx-3.1.xsd
        http://cxf.apache.org/jaxws http://cxf.apache.org/schemas/jaxws.xsd
        http://www.springframework.org/schema/context http://www.springframework.org/schema/context/spring-context.xsd">
    <context:annotation-config/>
    <context:component-scan base-package="com.ceair.travel.handlers"/>

    <jaxws:client id="OneService" serviceClass="com.lglan.demo.service.IOneService"
                    address="http://172.0.0.1/lglan/services/IOneService?wsdl"/>

beans>
配置完接口地址后,接下来,我们在com.lglan.services路径下新建一个抽象类AbstractBaseService.java 用来默认加载配置文件,并且定义一个抽象方法,其它的service类可以通过继承该抽象类并实现抽象方法来获取特定的服务接口:
package com.lglan.services;

import org.springframework.beans.BeansException;
import org.springframework.context.ApplicationContext;
import org.springframework.context.ApplicationContextAware;
import org.springframework.context.support.ClassPathXmlApplicationContext;

public abstract class AbstractBaseService implements ApplicationContextAware{

    private ApplicationContext applicationContext;

    @Override
    public void setApplicationContext(ApplicationContext applicationContext)
            throws BeansException {

        this.applicationContext = applicationContext;
    }

    public ApplicationContext getApplicationContext(){
         if (null == this.applicationContext) {
            return new ClassPathXmlApplicationContext(new String[]{"classpath:dubboService.xml","classpath:wsdlService.xml"} );
        }else {
            return this.applicationContext;
        }
    }

    public abstract Object getRemoteService();

}
例如:OneService.java类可以用来获得OneService服务
package com.lglan.services;

public class OneService extends AbstractBaseService{

    @Override
    public OneService getRemoteService() {
        OneService iOneService = (OneService) getApplicationContext().getBean("iOneService");
        return iOneService;
    }

}
这样,如果在测试用例中要调用OneService接口,则直接创建一个OneService类就可以调用其具体的服务了。
3.接口请求封装
服务端提供的接口请求类,其结构根据业务需要往往是比较复杂的,一个请求包含几十个类几百个字段都是很正常的事。所以,在测试用例中,不可能把请求中的所有字段都填上,通常只是输入一些跟具体业务逻辑和常见相关的参数,其它字段要么不填要么写死(如果是必填的话)。为了测试用例代码的简洁,我们要对请求先进行封装,只暴露几个和业务相关的必填参数,这样,测试类中只要通过输入几个不同的参数组合,就可以得到不同的测试用例,来测试不同的业务逻辑和场景了。
例如:一个机票预定的请求,其数据结构如下图,如果每个测试用例都要去手动填写如下这些参数的话,那肯定得疯了。所以通过请求封装后,我们只暴露了出发到达城市和日期以及乘机人数,每个测试用例只要填写以上几个简单的参数就可以执行了。这也更符合实际的业务场景,对于用户来说,也只是需要输入这么几个参数就可以预定机票了。
4.测试用例编写
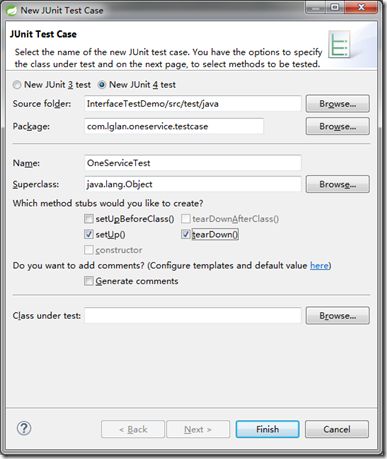
通过以上几个步骤的工作,我们的接口测试客户端就基本上算是搭建完成了。最后就是测试用例的设计和编写。一般我们采用junit框架来编写测试用例,在src/test/java下面按接口名新建一个包,并在包下面创建测试用例类,如:
package com.lglan.oneservice.testcase;

import static org.junit.Assert.*;

import org.junit.After;
import org.junit.Before;
import org.junit.Test;

import com.lglan.services.OneService;

public class OneServiceTest {

    OneService oneService;

    @Before
    public void setUp() throws Exception {
        oneService = new OneService();
    }

    @Test
    public void testOneService() {
        String agr1 = "请求参数1";
        String agr2 = "请求参数2";
        OneServiceRQ oneServiceRQ = OneServiceRQUtil.assembleRQ(arg1,arg2);
        OneServiceRS oneServiceRS = oneServiceRQ.getResponse(oneServiceRQ);
        System.out.println(oneServiceRS);
    }

    @After
    public void tearDown() throws Exception {
    }
}
三.总结
1.新建项目,引入相关jar包
2.配置接口地址的xml文件
3.用一个抽象类来读取配置文件,服务类继承该抽象类来获得相应的接口实例化对象(工厂模式)
4.对请求参数进行封装
5.编写测试用例,组装请求并通过服务类进行服务调用,打印响应结果
全文完…
