机器从零到 K8S 集群 Worker 节点的安装过程
最近基于 Hyper-V 虚拟机搭了一个单节点的 K8S,过程没有记录下来
本次实践从零开始搭建一个 K8S Slave 节点
机器从零到 K8S 集群 Slave 节点的安装过程
- 实践环境
- 安装 Linux 系统
- Linux 发行版选择
- Hyper-V 创建虚拟机
- Linux 安装过程
- Docker 安装与配置
- 通过脚本安装
- 配置国内镜像
- hello, world
- (可选)Docker 配置项
- 调整 max-concurrent-downloads 并发下载数
- 修改 Docker 的 Cgroup Driver
- K8S 安装与配置
- 添加源并安装
- 节点加入集群
- 关闭 swap
- swapoff
- 修改 /etc/fstab
实践环境
本次实验基于 Hyper-V 搭建虚拟机进行
| 指标 | 配置 |
|---|---|
| 宿主机系统 | Win10 Professional 1909 (18363.535) |
| Hyper-V 版本 | 10.0.18362.1 |
| CPU | i7-8700 6C12T |
| 内存 | DDR4 2666MHz 16G x 2 |
安装 Linux 系统
Linux 发行版选择
本人选择 Ubuntu Server 18.04.4 LTS 作为服务器系统。
Ubuntu Server 的镜像大小只有不到 900M,系统比较干净,安装过程相对简单。
Hyper-V 创建虚拟机
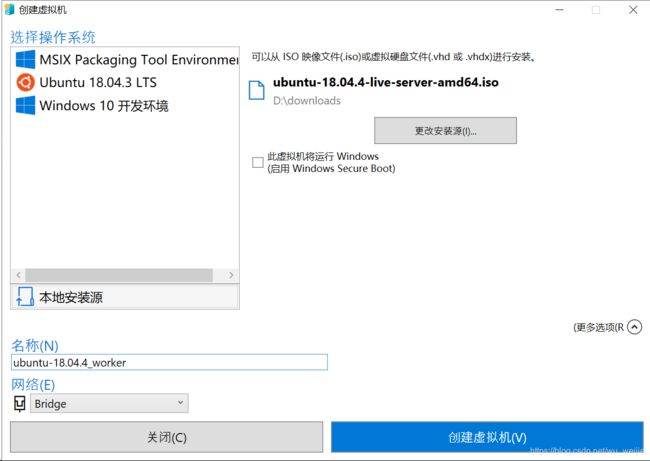
快速创建虚拟机,选择下载好的镜像

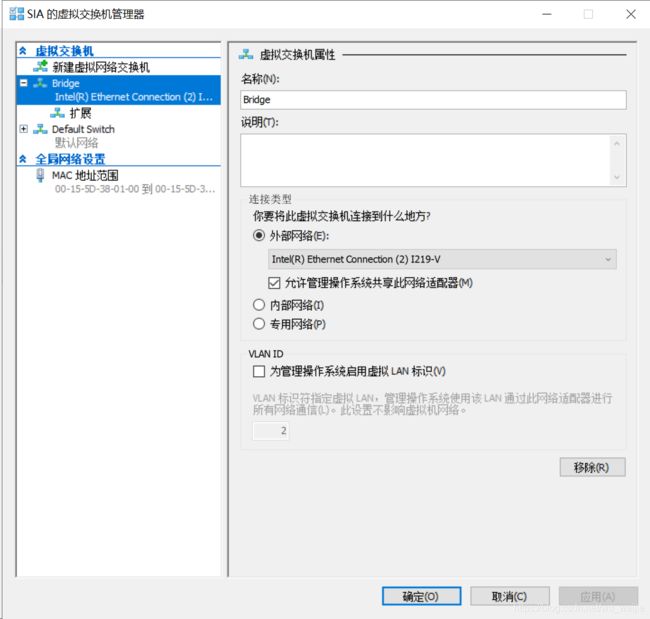
(可选,便于内网访问)创建和一个桥接物理网卡的虚拟交换机
编辑虚拟机设置,调整 CPU、内存、网络等
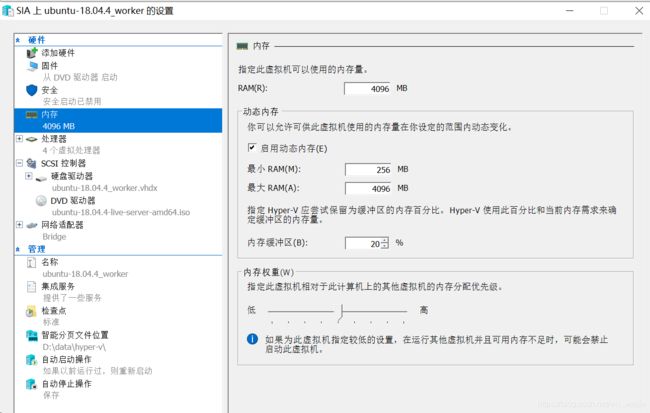
至此,虚拟机配置完成。
Linux 安装过程
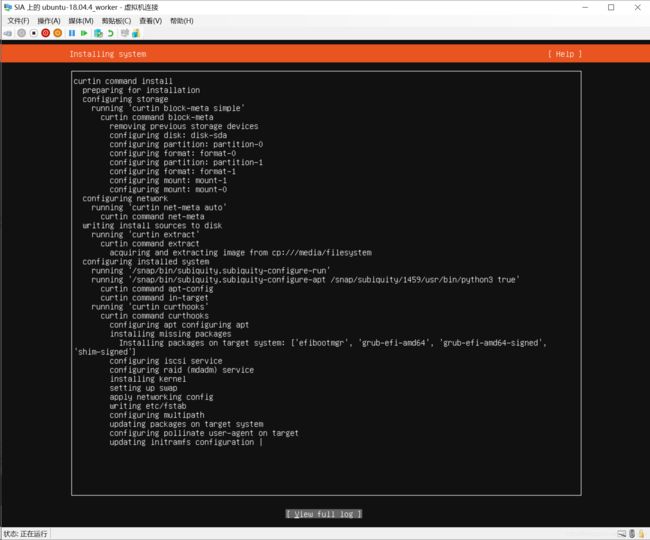
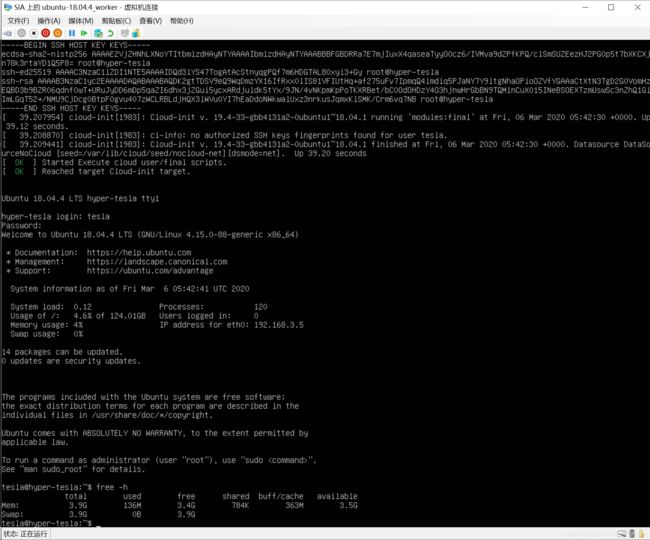
启动虚拟机并开始系统安装过程
Ubuntu 软件源建议根据当前的网络环境进行调整
根据网络环境,本人选择 华南农业大学开源镜像源,
将 Mirror address 调整为 https://mirrors.scau.edu.cn/ubuntu
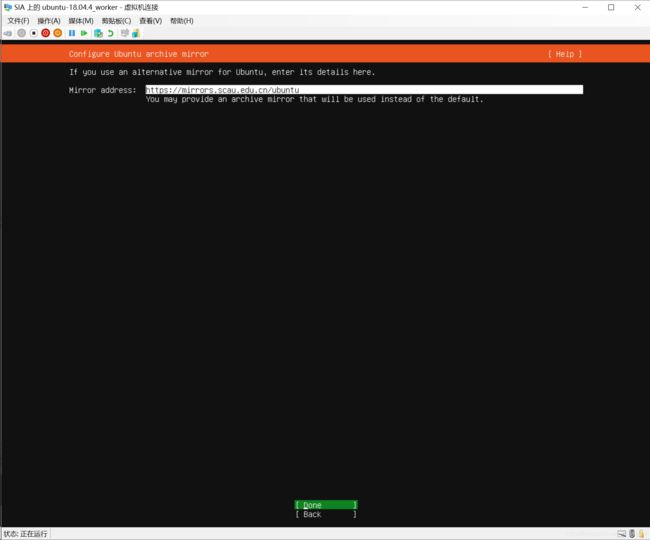
OpenSSH server 可以勾上

Docker 安装与配置
通过脚本安装
一键安装脚本选择 DaoCloud 提供的脚本
执行命令
curl -sSL https://get.daocloud.io/docker | sh
安装过程
tesla@hyper-tesla:~$ curl -sSL https://get.daocloud.io/docker | sh

# Executing docker install script, commit: f45d7c11389849ff46a6b4d94e0dd1ffebca32c1
+ sudo -E sh -c apt-get update -qq >/dev/null
[sudo] password for tesla:
+ sudo -E sh -c DEBIAN_FRONTEND=noninteractive apt-get install -y -qq apt-transport-https ca-certificates curl >/dev/null
+ sudo -E sh -c curl -fsSL "https://download.docker.com/linux/ubuntu/gpg" | apt-key add -qq - >/dev/null
Warning: apt-key output should not be parsed (stdout is not a terminal)
+ sudo -E sh -c echo "deb [arch=amd64] https://download.docker.com/linux/ubuntu bionic stable" > /etc/apt/sources.list.d/docker.list
+ sudo -E sh -c apt-get update -qq >/dev/null
+ [ -n  ]
+ sudo -E sh -c apt-get install -y -qq --no-install-recommends docker-ce >/dev/null
+ sudo -E sh -c docker version
Client: Docker Engine - Community
 Version:           19.03.7
 API version:       1.40
 Go version:        go1.12.17
 Git commit:        7141c199a2
 Built:             Wed Mar  4 01:22:36 2020
 OS/Arch:           linux/amd64
 Experimental:      false

Server: Docker Engine - Community
 Engine:
  Version:          19.03.7
  API version:      1.40 (minimum version 1.12)
  Go version:       go1.12.17
  Git commit:       7141c199a2
  Built:            Wed Mar  4 01:21:08 2020
  OS/Arch:          linux/amd64
  Experimental:     false
 containerd:
  Version:          1.2.13
  GitCommit:        7ad184331fa3e55e52b890ea95e65ba581ae3429
 runc:
  Version:          1.0.0-rc10
  GitCommit:        dc9208a3303feef5b3839f4323d9beb36df0a9dd
 docker-init:
  Version:          0.18.0
  GitCommit:        fec3683
If you would like to use Docker as a non-root user, you should now consider
adding your user to the "docker" group with something like:

  sudo usermod -aG docker tesla

Remember that you will have to log out and back in for this to take effect!

WARNING: Adding a user to the "docker" group will grant the ability to run
         containers which can be used to obtain root privileges on the
         docker host.
         Refer to https://docs.docker.com/engine/security/security/#docker-daemon-attack-surface
         for more information.
以上脚本安装完毕后,将当前用户加入 docker 用户组
sudo usermod -aG docker $USER
配置国内镜像
国内镜像有很多选择,此处继续选择 DaoCloud 提供的镜像源,并重启 Docker
curl -sSL https://get.daocloud.io/daotools/set_mirror.sh | sh -s http://f1361db2.m.daocloud.io
sudo systemctl restart docker
hello, world
一切就绪后,跑一个 hello, world 验证 Docker 安装结果
docker run hello-world
输出结果:
tesla@hyper-tesla:~$ docker run hello-world
Unable to find image 'hello-world:latest' locally
latest: Pulling from library/hello-world
1b930d010525: Pulling fs layer
latest: Pulling from library/hello-world
1b930d010525: Pull complete
Digest: sha256:fc6a51919cfeb2e6763f62b6d9e8815acbf7cd2e476ea353743570610737b752
Status: Downloaded newer image for hello-world:latest

Hello from Docker!
This message shows that your installation appears to be working correctly.

To generate this message, Docker took the following steps:
 1. The Docker client contacted the Docker daemon.
 2. The Docker daemon pulled the "hello-world" image from the Docker Hub.
    (amd64)
 3. The Docker daemon created a new container from that image which runs the
    executable that produces the output you are currently reading.
 4. The Docker daemon streamed that output to the Docker client, which sent it
    to your terminal.

To try something more ambitious, you can run an Ubuntu container with:
 $ docker run -it ubuntu bash

Share images, automate workflows, and more with a free Docker ID:
 https://hub.docker.com/

For more examples and ideas, visit:
 https://docs.docker.com/get-started/
Docker 安装完毕
(可选)Docker 配置项
调整 max-concurrent-downloads 并发下载数
根据网络环境,可以适当调整 Docker 拉取镜像时的并发下载数,充分利用网络
配置文件 daemon.json 示例
{
    "max-concurrent-downloads": 20
}
调整后重启 Docker 服务生效
修改 Docker 的 Cgroup Driver
较新版的 K8S 推荐使用 Systemd ,如果 Docker 使用了 cgroupfs ,可以在 daemon.json 调整
{
    "exec-opts": ["native.cgroupdriver=systemd"]
}
调整后重启 Docker 服务生效
K8S 安装与配置
添加源并安装
结合国内网络环境,选择阿里源安装 K8S
执行以下命令
curl https://mirrors.aliyun.com/kubernetes/apt/doc/apt-key.gpg | sudo apt-key add -
添加 apt 源,创建 /etc/apt/sources.list.d/kubernetes.list 并写入以下内容
deb https://mirrors.aliyun.com/kubernetes/apt/ kubernetes-xenial main
执行安装命令
sudo apt update && sudo apt install -y kubelet kubeadm kubectl
安装过程
tesla@hyper-tesla:~$ sudo apt update && sudo apt install -y kubelet kubeadm kubectl
Get:1 https://mirrors.aliyun.com/kubernetes/apt kubernetes-xenial InRelease [8,993 B]
Hit:2 https://mirrors.scau.edu.cn/ubuntu bionic InRelease
Hit:3 https://mirrors.scau.edu.cn/ubuntu bionic-updates InRelease
Hit:4 https://mirrors.scau.edu.cn/ubuntu bionic-backports InRelease
Hit:5 https://mirrors.scau.edu.cn/ubuntu bionic-security InRelease
Ign:6 https://mirrors.aliyun.com/kubernetes/apt kubernetes-xenial/main amd64 Packages
Get:6 https://mirrors.aliyun.com/kubernetes/apt kubernetes-xenial/main amd64 Packages [33.9 kB]
Hit:7 https://download.docker.com/linux/ubuntu bionic InRelease
Fetched 42.9 kB in 1s (85.5 kB/s)
Reading package lists... Done
Building dependency tree
Reading state information... Done
14 packages can be upgraded. Run 'apt list --upgradable' to see them.
Reading package lists... Done
Building dependency tree
Reading state information... Done
The following additional packages will be installed:
  conntrack cri-tools kubernetes-cni socat
The following NEW packages will be installed:
  conntrack cri-tools kubeadm kubectl kubelet kubernetes-cni socat
0 upgraded, 7 newly installed, 0 to remove and 14 not upgraded.
Need to get 51.6 MB of archives.
After this operation, 272 MB of additional disk space will be used.
Get:1 https://mirrors.scau.edu.cn/ubuntu bionic/main amd64 conntrack amd64 1:1.4.4+snapshot20161117-6ubuntu2 [30.6 kB]
Get:2 https://mirrors.scau.edu.cn/ubuntu bionic/main amd64 socat amd64 1.7.3.2-2ubuntu2 [342 kB]
Get:3 https://mirrors.aliyun.com/kubernetes/apt kubernetes-xenial/main amd64 cri-tools amd64 1.13.0-00 [8,776 kB]
Get:4 https://mirrors.aliyun.com/kubernetes/apt kubernetes-xenial/main amd64 kubernetes-cni amd64 0.7.5-00 [6,473 kB]
Get:5 https://mirrors.aliyun.com/kubernetes/apt kubernetes-xenial/main amd64 kubelet amd64 1.17.3-00 [19.2 MB]
Get:6 https://mirrors.aliyun.com/kubernetes/apt kubernetes-xenial/main amd64 kubectl amd64 1.17.3-00 [8,740 kB]
Get:7 https://mirrors.aliyun.com/kubernetes/apt kubernetes-xenial/main amd64 kubeadm amd64 1.17.3-00 [8,066 kB]
Fetched 51.6 MB in 3s (17.9 MB/s)
Selecting previously unselected package conntrack.
(Reading database ... 67250 files and directories currently installed.)
Preparing to unpack .../0-conntrack_1%3a1.4.4+snapshot20161117-6ubuntu2_amd64.deb ...
Unpacking conntrack (1:1.4.4+snapshot20161117-6ubuntu2) ...
Selecting previously unselected package cri-tools.
Preparing to unpack .../1-cri-tools_1.13.0-00_amd64.deb ...
Unpacking cri-tools (1.13.0-00) ...
Selecting previously unselected package kubernetes-cni.
Preparing to unpack .../2-kubernetes-cni_0.7.5-00_amd64.deb ...
Unpacking kubernetes-cni (0.7.5-00) ...
Selecting previously unselected package socat.
Preparing to unpack .../3-socat_1.7.3.2-2ubuntu2_amd64.deb ...
Unpacking socat (1.7.3.2-2ubuntu2) ...
Selecting previously unselected package kubelet.
Preparing to unpack .../4-kubelet_1.17.3-00_amd64.deb ...
Unpacking kubelet (1.17.3-00) ...
Selecting previously unselected package kubectl.
Preparing to unpack .../5-kubectl_1.17.3-00_amd64.deb ...
Unpacking kubectl (1.17.3-00) ...
Selecting previously unselected package kubeadm.
Preparing to unpack .../6-kubeadm_1.17.3-00_amd64.deb ...
Unpacking kubeadm (1.17.3-00) ...
Setting up conntrack (1:1.4.4+snapshot20161117-6ubuntu2) ...
Setting up kubernetes-cni (0.7.5-00) ...
Setting up cri-tools (1.13.0-00) ...
Setting up socat (1.7.3.2-2ubuntu2) ...
Setting up kubelet (1.17.3-00) ...
Created symlink /etc/systemd/system/multi-user.target.wants/kubelet.service → /lib/systemd/system/kubelet.service.
Setting up kubectl (1.17.3-00) ...
Setting up kubeadm (1.17.3-00) ...
Processing triggers for man-db (2.8.3-2ubuntu0.1) ...
节点加入集群
K8S 集群 Master 已经在运行状态了,当前节点通过以下命令加入集群
命令参数以自己环境为准
sudo kubeadm join 192.168.3.200:6443 --token n54f1g.sy6gfae598zgos2s \
    --discovery-token-ca-cert-hash sha256:ffcca8c63cea1f94bd92c935e1d71c0a5360a1989990c981692c30f6cf5d8a1c
运行报错:
W0306 06:38:41.660720    7834 join.go:346] [preflight] WARNING: JoinControlPane.controlPlane settings will be ignored when control-plane flag is not set.
[preflight] Running pre-flight checks
error execution phase preflight: [preflight] Some fatal errors occurred:
        [ERROR Swap]: running with swap on is not supported. Please disable swap
[preflight] If you know what you are doing, you can make a check non-fatal with `--ignore-preflight-errors=...`
To see the stack trace of this error execute with --v=5 or higher
需要关闭 swap
关闭 swap
swapoff
执行命令
sudo swapoff -a
查看结果
tesla@hyper-tesla:~$ free -h
              total        used        free      shared  buff/cache   available
Mem:           3.9G        2.6G        233M        840K        1.0G        1.0G
Swap:            0B          0B          0B
可以看到,swap 已经被关闭,但自动挂载尚未关闭
修改 /etc/fstab
将 /etc/fstab 文件中的 swap 相关行注释
# /etc/fstab: static file system information.
#
# Use 'blkid' to print the universally unique identifier for a
# device; this may be used with UUID= as a more robust way to name devices
# that works even if disks are added and removed. See fstab(5).
#
#
# / was on /dev/sda2 during curtin installation
/dev/disk/by-uuid/673d4dfb-f949-4c72-846e-aa29d469f939 / ext4 defaults 0 0
# /boot/efi was on /dev/sda1 during curtin installation
/dev/disk/by-uuid/204C-9129 /boot/efi vfat defaults 0 0
# /swap.img     none    swap    sw      0       0
重试 kubeadm 加入集群的命令
执行结果
tesla@hyper-tesla:~$ sudo kubeadm join 192.168.3.200:6443 --token n54f1g.sy6gfae598zgos2s     --discovery-token-ca-cert-hash sha256:ffcca8c63cea1f94bd92c935e1d71c0a5360a1989990c981692c30f6cf5d8a1c
W0306 06:46:35.722265    9243 join.go:346] [preflight] WARNING: JoinControlPane.controlPlane settings will be ignored when control-plane flag is not set.
[preflight] Running pre-flight checks
[preflight] Reading configuration from the cluster...
[preflight] FYI: You can look at this config file with 'kubectl -n kube-system get cm kubeadm-config -oyaml'
[kubelet-start] Downloading configuration for the kubelet from the "kubelet-config-1.17" ConfigMap in the kube-system namespace
[kubelet-start] Writing kubelet configuration to file "/var/lib/kubelet/config.yaml"
[kubelet-start] Writing kubelet environment file with flags to file "/var/lib/kubelet/kubeadm-flags.env"
[kubelet-start] Starting the kubelet
[kubelet-start] Waiting for the kubelet to perform the TLS Bootstrap...

This node has joined the cluster:
* Certificate signing request was sent to apiserver and a response was received.
* The Kubelet was informed of the new secure connection details.

Run 'kubectl get nodes' on the control-plane to see this node join the cluster.
此时在 Master 节点机器执行命令
kubectl get nodes
经过短暂的 NotReady,可以看到当前节点(hyper-tesla)已经加入了 K8S 集群中
sia@hyper-sia:~$ kubectl get nodes
NAME          STATUS     ROLES    AGE   VERSION
hyper-sia     Ready      master   17h   v1.17.3
hyper-tesla   NotReady      23s   v1.17.3

sia@hyper-sia:~$ kubectl get nodes
NAME          STATUS   ROLES    AGE   VERSION
hyper-sia     Ready    master   17h   v1.17.3
hyper-tesla   Ready       83s   v1.17.3
所有的 pods 也在正常工作
sia@hyper-sia:~$ kubectl get pods --all-namespaces
NAMESPACE              NAME                                         READY   STATUS    RESTARTS   AGE
kube-system            coredns-9d85f5447-ggt84                      1/1     Running   0          17h
kube-system            coredns-9d85f5447-pnfcm                      1/1     Running   0          17h
kube-system            etcd-hyper-sia                               1/1     Running   4          17h
kube-system            kube-apiserver-hyper-sia                     1/1     Running   4          17h
kube-system            kube-controller-manager-hyper-sia            1/1     Running   5          17h
kube-system            kube-flannel-ds-amd64-czzpr                  1/1     Running   1          5m34s
kube-system            kube-flannel-ds-amd64-rx8p7                  1/1     Running   0          14h
kube-system            kube-proxy-7khrt                             1/1     Running   0          5m34s
kube-system            kube-proxy-89flh                             1/1     Running   4          17h
kube-system            kube-scheduler-hyper-sia                     1/1     Running   4          17h
kubernetes-dashboard   dashboard-metrics-scraper-76585494d8-pxpd5   1/1     Running   0          14h
kubernetes-dashboard   kubernetes-dashboard-5996555fd8-7vz88        1/1     Running   0          14h
以上就是一台机器从零到加入 K8S 集群成为 Worker 节点的过程
