代码
1. 导包
import keras,os
from keras.models import *
from keras.layers import *
from keras.optimizers import *
from keras.losses import *
from keras import backend as K
import numpy as np
import matplotlib.pyplot as plt
import pandas as pd
from PIL import Image
from keras.preprocessing import image


from keras.datasets import fashion_mnist,cifar10,cifar100,mnist
from keras.utils import to_categorical

os.environ["CUDA_VISIBLE_DEVICES"] = " 2"
2. 鉴别器和生成器的定义、创建
def generator(input_shape):
    inputs = Input(input_shape)
    # 先全连接到64*7*7的维度上
    x = Dense(128 * 14 * 14)(inputs)
    x = LeakyReLU(0.2)(x)
    x = Reshape((14, 14, 128))(x)

    x = Conv2D(256, 5, padding = 'same')(x)
    x = LeakyReLU(0.2)(x)


    x = Conv2DTranspose(256, 4, strides = 2, padding = 'same')(x)
    x = LeakyReLU(0.2)(x)


    x = Conv2D(256, 5, padding = 'same')(x)
    x = LeakyReLU(0.2)(x)

    x = Conv2D(256, 5, padding = 'same')(x)
    x = LeakyReLU(0.2)(x)


    x = Conv2D(1, 7, activation='tanh', padding = 'same')(x)
    return Model(inputs,x)


def discriminator(input_shape):

    inputs = Input(input_shape)
    # 28, 28, 1 -> 14, 14, 32
    x = Conv2D(128, 3)(inputs)
    x = LeakyReLU(0.2)(x)

    x = Conv2D(128,4,strides = 2)(x)
    x = LeakyReLU(0.2)(x)

    x = Conv2D(128,4,strides = 2)(x)
    x = LeakyReLU(0.2)(x)

    x = Conv2D(128, 4,strides = 2)(x)
    x = LeakyReLU(0.2)(x)

    x = Flatten()(x)

    x = Dropout(0.4)(x)
    x = Dense(1, activation='sigmoid')(x) #分类层

    return Model(inputs,x)


gen = generator((100,))

dis = discriminator((28,28,1))

dis.compile(loss=keras.losses.binary_crossentropy,optimizer= keras.optimizers.RMSprop(lr = 0.0008,clipvalue = 1.0,decay=1e-8))
3. 联合生成器和鉴别器创建 GAN 网络
def GAN():
    gan_input = Input((100,))
    fake_image = gen(gan_input)
    dis.trainable=False
    score = dis(fake_image)
    return Model(gan_input,score)

gan = GAN()
gan.compile(loss=keras.losses.binary_crossentropy,optimizer=keras.optimizers.RMSprop(lr=0.0004, clipvalue=1.0, decay=1e-8))
4. 数据导入+规范化
(x_train,y_train),(x_test,y_test)= mnist.load_data()

x_train = x_train[y_train.flatten() == 6]

x_train = x_train.reshape(x_train.shape[0],28,28,1).astype('float32')/255.
5. 训练
epochs = 10000
batch_size = 64


generated_img = []
discriminator_loss = []
generator_loss = []
save_dir = './A-GAN-PHOTO'

start = 0

for epoch in range(epochs):

    noise = np.random.normal(size=(batch_size,100))
    stop = start + batch_size

    real_img = x_train[start:stop]

    fake_img = gen.predict(noise)

    data = np.concatenate([fake_img, real_img])

    valid = np.ones((batch_size,1))
    fake = np.zeros((batch_size,1))

    label = np.concatenate([fake,valid])
    label += 0.05 * np.random.random(label.shape)  ## 训练时加入噪声

    d_loss = dis.train_on_batch(data,label)

    # ---------------------
    #  训练生成模型
    # ---------------------
    noise_ = np.random.normal(size=(batch_size,100))
    g_loss = gan.train_on_batch(noise_, valid)

#     dis.trainable=True
#     dis.compile(loss=keras.losses.binary_crossentropy,optimizer= keras.optimizers.RMSprop(lr = 0.0008,clipvalue = 1.0,decay=1e-8))

    start += batch_size
    if start > len(x_train) - batch_size:
        start = 0


    if epoch%100 == 0:
#         im = fake_img[0].reshape((28,28))
        im = fake_img[0]

#         im = fake_img[0].reshape(32,32,3)
        generated_img.append(im)
        img = image.array_to_img(im * 255, scale=False)
        img.save(os.path.join(save_dir, 'fake_six' + str(epoch) + '.png'))	#保存一张生成图像

        img = image.array_to_img(real_img[0] * 255, scale=False)
        img.save(os.path.join(save_dir, 'real_six' + str(epoch) +'.png'))   #保存一张真实图像用于对比

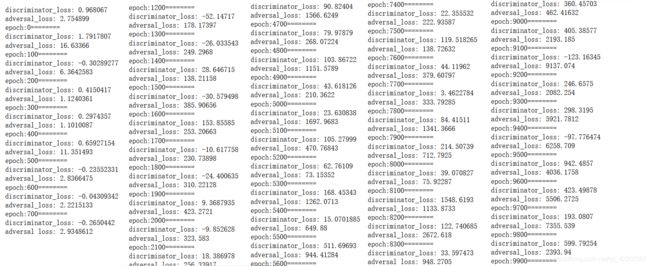
        print('discriminator_loss:',d_loss)
        print('adversal_loss:',g_loss)
        discriminator_loss.append(d_loss)
        generator_loss.append(g_loss)
        print("epoch:%d" % epoch + "========")
6. 可视化
fig, axes = plt.subplots(nrows=5, ncols=20, sharex=True, sharey=True, figsize=(80,12))
imgs = [i.reshape(28,28) for i in generated_img]
# imgs = generated_img

for image, row in zip([imgs[:20], imgs[20:40],imgs[40:60],imgs[60:80],imgs[80:100]], axes):
# for image, row in zip([imgs[0:10],imgs[5:10]], axes):

    for img, ax in zip(image, row):
        ax.imshow(img)
        ax.get_xaxis().set_visible(False)
        ax.get_yaxis().set_visible(False)

fig.tight_layout(pad=0.1)

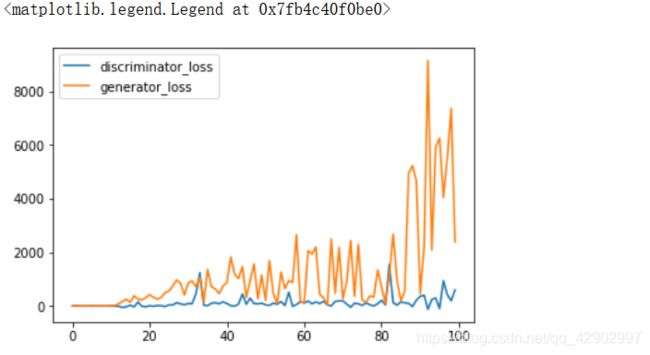
plt.plot(discriminator_loss,label='discriminator_loss')
plt.plot(generator_loss,label='generator_loss')
plt.legend()

fig, axes = plt.subplots(nrows=5, ncols=20, sharex=True, sharey=True, figsize=(80,12))
imgs = [i.reshape(28,28) for i in generated_img]
# imgs = generated_img

for image, row in zip([imgs[:20], imgs[20:40],imgs[40:60],imgs[60:80],imgs[80:100]], axes):
# for image, row in zip([imgs[0:10],imgs[5:10]], axes):

    for img, ax in zip(image, row):
        ax.imshow(img)
        ax.get_xaxis().set_visible(False)
        ax.get_yaxis().set_visible(False)

fig.tight_layout(pad=0.1)


