一、实验说明
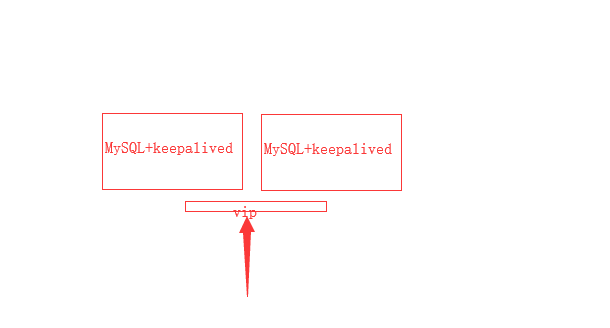
MySQL主主模式,是两台MySQL数据库互为主从。
此实验是用keepalived实现MySQL主主模式的高可用,基于已经安装好了主主架构的MySQL,然后配置keepalived,验证高可用性!
二、实验环境
操作系统:CentOS 7.5
serverA:192.168.1.101
serverB: 192.168.1.102
vip: 192.168.1.110
三、关闭selinux
# setenforce 0
# sed -i 's/^SELINUX=.*/SELINUX=permissive/g' /etc/selinux/config
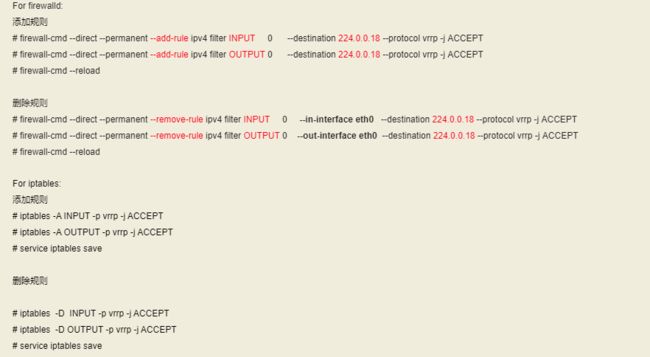
四、防火墙设置
firewalld和iptables二选一
五、软件安装
在serverA和serverB
# yum -y install epel-release
# yum -y install keepalived
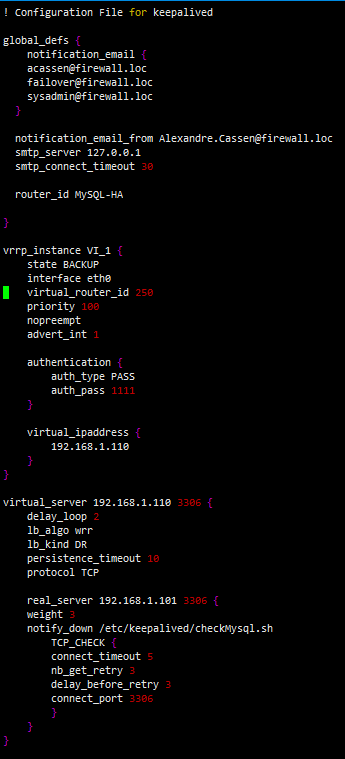
六、在serverA配置keepalived
# vim /etc/keepalived/keepalived.conf
#######################################
! Configuration File for keepalived
global_defs {
notification_email {
}
notification_email_from [email protected]
smtp_server 127.0.0.1
smtp_connect_timeout 30
router_id MySQL-HA
}
vrrp_instance VI_1 {
state BACKUP
interface eth0
virtual_router_id 250
priority 100
nopreempt
advert_int 1
authentication {
auth_type PASS
auth_pass 1111
}
virtual_ipaddress {
192.168.1.110
}
}
virtual_server 192.168.1.110 3306 {
delay_loop 2
lb_algo wrr
lb_kind DR
persistence_timeout 10
protocol TCP
real_server 192.168.1.101 3306 {
weight 3
notify_down /etc/keepalived/checkMysql.sh
TCP_CHECK {
connect_timeout 5
nb_get_retry 3
delay_before_retry 3
connect_port 3306
}
}
}
#############################################
# /etc/keepalived/checkMysql.sh
##############################################
#!/bin/bash
systemctl restart keepalived
##############################################
# chmod 700 /etc/keepalived/checkMysql.sh
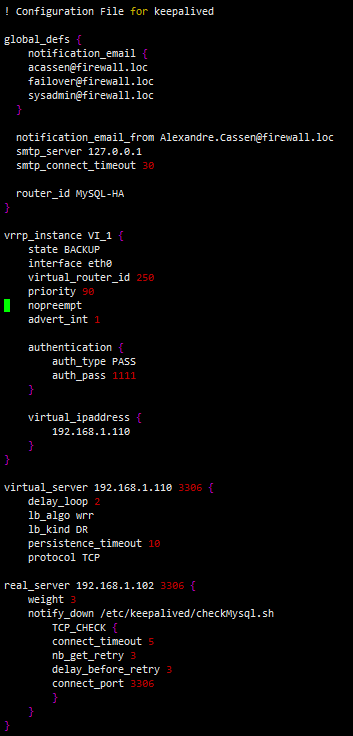
七、在serverA配置keepalived
# vim /etc/keepalived/keepalived.conf
#######################################
! Configuration File for keepalived
global_defs {
notification_email {
}
notification_email_from [email protected]
smtp_server 127.0.0.1
smtp_connect_timeout 30
router_id MySQL-HA
}
vrrp_instance VI_1 {
state BACKUP
interface eth0
virtual_router_id 250
priority 90
nopreempt
advert_int 1
authentication {
auth_type PASS
auth_pass 1111
}
virtual_ipaddress {
192.168.1.110
}
}
virtual_server 192.168.1.110 3306 {
delay_loop 2
lb_algo wrr
lb_kind DR
persistence_timeout 10
protocol TCP
real_server 192.168.1.102 3306 {
weight 3
notify_down /etc/keepalived/checkMysql.sh
TCP_CHECK {
connect_timeout 5
nb_get_retry 3
delay_before_retry 3
connect_port 3306
}
}
}
#############################################
# /etc/keepalived/checkMysql.sh
##############################################
#!/bin/bash
systemctl restart keepalived
##############################################
# chmod 700 /etc/keepalived/checkMysql.sh
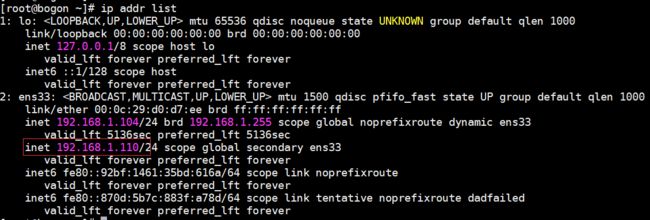
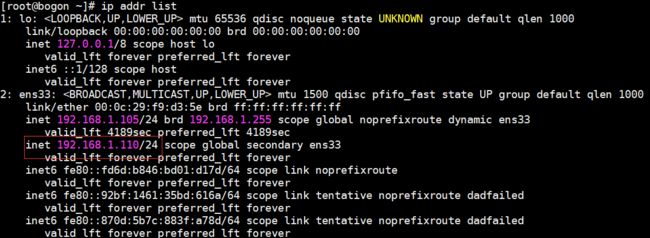
八、验证MySQL的高可用性
在serverA
# ip addr list
# systemctl stop mysqld
在serverB
# ip addr list
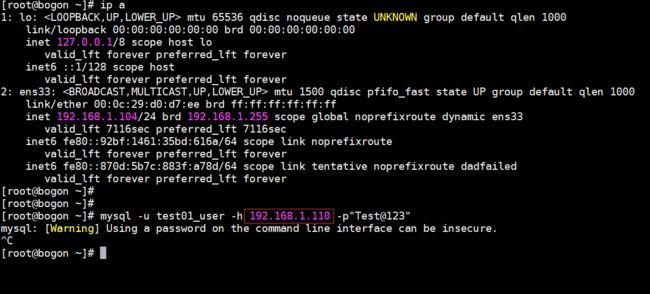
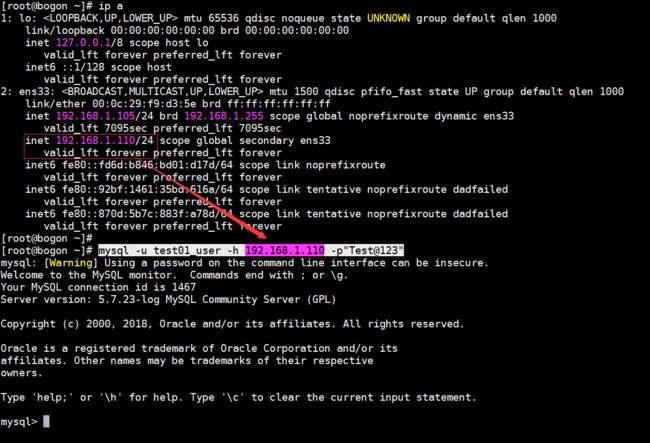
从上可以看出,关闭serverA上的MySQL,vip成功漂移到了severB,数据库的连接不受影响,实现了一定程度的高可用。
两个注意点:
1. 具体通过vip连接到serverA或者severB 时,服务器上的vip才监听3306端口,无连接时,不监听
2. vip在serverA时,在severB上无法通过vip连接上数据库,反之亦然
九、参考
keepalived + mysql 实现单向备份、故障转移
https://www.jianshu.com/p/35030921dab5
Centos7+Keepalived实现Mariadb(MYSQL)的高可用(HA)
http://blog.51cto.com/gaowenlong/1888036
使用Keepalived实现MySQL主主高可用
https://www.helloweba.net/server/547.html
MySQL主主互备结合keepalived实现高可用
http://blog.51cto.com/7424593/1741717
