Pytorch:图像风格快速迁移
Pytorch: 图像风格快速迁移-残差网络,固定风格任意内容
Copyright: Jingmin Wei, Pattern Recognition and Intelligent System, School of Artificial and Intelligence, Huazhong University of Science and Technology
Pytorch教程专栏链接
文章目录
-
-
- Pytorch: 图像风格快速迁移-残差网络,固定风格任意内容
- @[toc]
-
-
- Reference
- 快速风格迁移网络准备
-
- 定义残差块结构
- 定义图像转换网络
- 快速风格迁移数据准备
- 快速风格迁移网络训练和数据可视化展示
- CPU 上使用预训练好的 GPU 模型
文章目录
-
-
- Pytorch: 图像风格快速迁移-残差网络,固定风格任意内容
- @[toc]
-
-
- Reference
- 快速风格迁移网络准备
-
- 定义残差块结构
- 定义图像转换网络
- 快速风格迁移数据准备
- 快速风格迁移网络训练和数据可视化展示
- CPU 上使用预训练好的 GPU 模型
-
-
本教程不商用,仅供学习和参考交流使用,如需转载,请联系本人。
Reference
Perceptual Losses for Real-Time Style Transfer and Super-Resolution
ResNet
和普通风格迁移不一样,普通图像风格迁移的输入图像是随机噪声,而快速风格迁移的输入是一张图像转换网络 f w fw fw 的输出。
快速风格迁移是通过输入图像 x x x 经过图像转换网络 f w fw fw ,得到网络的输出 y ^ \hat{y} y^ 。因此它可以实现任意内容的快速图像迁移。
参考 Perceptual Losses for Real-Time Style Transfer and Super-Resolution 一文,对图像转换网络的上采样操作进行相应调整。在建立的网络中,将会使用转置卷积操作进行特征映射的上采样。
import numpy as np
import pandas as pd
import matplotlib.pyplot as plt
from PIL import Image
import time

import torch
import torch.nn as nn
import torch.utils.data as Data
import torch.nn.functional as F
import torch.optim as optim
from torchvision import transforms
from torchvision.datasets import ImageFolder
from torchvision import models
import os
os.environ["KMP_DUPLICATE_LIB_OK"]="TRUE"

# 模型加载选择GPU
device = torch.device("cuda" if torch.cuda.is_available() else "cpu")
# device = torch.device('cpu')
print(device)
print(torch.cuda.device_count())
print(torch.cuda.get_device_name(0))
cuda
1
GeForce MX250
快速风格迁移网络准备
通过 3 3 3 个卷积层对图像的特征映射进行降维操作,然后通过 5 5 5 个残差连接层,学习图像风格,并添加到内容图像上,最后通过 3 3 3 个转置卷积操作,对特征映射进行升维(类比语义分割网络) ,以重构风格迁移后的图像。
在转换网络的升维操作中,使用转置卷积来代替提文章中的上采样和卷积层的结合,因为输入的是标准化后的图像,像素值范围在 − 2.1 − 2.7 -2.1-2.7 −2.1−2.7 之间,所以在网络最后的输出层中,不使用激活函数,网络的输出值大多会在 − 2.1 − 2.7 -2.1-2.7 −2.1−2.7 之间,只有少部分不在该区间,故在实际训练网络时,会将输出裁剪到 − 2.1 − 2.7 -2.1-2.7 −2.1−2.7 之间,即最后一层无需使用激活函数,其它层使用 ReLU 函数。在网络中,特征映射的数量逐渐从 3 3 3 增加到 128 128 128 ,并且每个残差连接层有 128 128 128 个特征映射,在转置卷积层特征映射的数量会从 128 128 128 减到 3 3 3 ,对应着图像的三个通道。
定义残差块结构
这部分如果不记得可以参考 ResNet教程。
聚焦于神经网络局部。设输入为 x 。假设我们希望学出的理想映射为 f(x),从而作为激活函数的输入。部分需要拟合出有关恒等映射的残差映射 f(x)−x 。残差映射在实际中往往更容易优化。以恒等映射作为我们希望学出的理想映射 f(x) 。我们只需将加权运算(如仿射)的权重和偏差参数学成 0 0 0 ,那么 f(x) 即为恒等映射。实际中,当理想映射 f(x) 极接近于恒等映射时,残差映射也易于捕捉恒等映射的细微波动。在残差块中,输入可通过跨层的数据线路更快地向前传播。
定义残差连接网络, 128 128 128 个特征映射,激活尺寸为 128 × 64 × 64 128\times64\times64 128×64×64
# ResidualBlock 残差块
class ResidualBlock(nn.Module):
    def __init__(self, channels):
        super(ResidualBlock, self).__init__()
        self.conv = nn.Sequential(
            nn.Conv2d(channels, channels, kernel_size = 3, stride = 1, padding = 1),
            nn.ReLU(),
            nn.Conv2d(channels, channels, kernel_size = 3, stride = 1, padding = 1)
        )
    def forward(self, x):
        return F.relu(self.conv(x) + x)
定义图像转换网络
分别是下采样模块, 5 5 5 个残差连接模块以及上采样模块
# 定义图像转换网络
class ImfwNet(nn.Module):
    def __init__(self):
        super(ImfwNet, self).__init__()
        # 下采样
        self.downsample = nn.Sequential(
            nn.ReflectionPad2d(padding = 4), # 使用边界反射填充
            nn.Conv2d(3, 32, kernel_size = 9, stride = 1),
            nn.InstanceNorm2d(32, affine = True), # 像素值上做归一化
            nn.ReLU(),
            nn.Conv2d(32, 64, kernel_size = 3, stride = 2),
            nn.InstanceNorm2d(64, affine = True),
            nn.ReLU(),
            nn.ReflectionPad2d(padding = 1),
            nn.Conv2d(64, 128, kernel_size = 3, stride = 2),
            nn.InstanceNorm2d(128, affine = True),
            nn.ReLU()
        )
        # 5个残差连接
        self.res_blocks = nn.Sequential(
            ResidualBlock(128),
            ResidualBlock(128),
            ResidualBlock(128),
            ResidualBlock(128),
            ResidualBlock(128),
        )
        # 上采样
        self.unsample = nn.Sequential(
            nn.ConvTranspose2d(128, 64, kernel_size = 3, stride = 2, padding = 1, output_padding = 1),
            nn.InstanceNorm2d(64, affine = True),
            nn.ReLU(),
            nn.ConvTranspose2d(64, 32, kernel_size = 3, stride = 2, padding = 1, output_padding = 1),
            nn.InstanceNorm2d(32, affine = True),
            nn.ReLU(),
            nn.ConvTranspose2d(32, 3, kernel_size = 9, stride = 1, padding = 4)
        )
    def forward(self, x):
        x = self.downsample(x) # 输入像素值在-2.1-2.7之间
        x = self.res_blocks(x)
        x = self.unsample(x) # 输出像素值在-2.1-2.7之间
        return x
myfwnet = ImfwNet().to(device)
from torchsummary import summary
summary(myfwnet, input_size=(3, 256, 256))
----------------------------------------------------------------
        Layer (type)               Output Shape         Param #
================================================================
   ReflectionPad2d-1          [-1, 3, 264, 264]               0
            Conv2d-2         [-1, 32, 256, 256]           7,808
    InstanceNorm2d-3         [-1, 32, 256, 256]              64
              ReLU-4         [-1, 32, 256, 256]               0
            Conv2d-5         [-1, 64, 127, 127]          18,496
    InstanceNorm2d-6         [-1, 64, 127, 127]             128
              ReLU-7         [-1, 64, 127, 127]               0
   ReflectionPad2d-8         [-1, 64, 129, 129]               0
            Conv2d-9          [-1, 128, 64, 64]          73,856
   InstanceNorm2d-10          [-1, 128, 64, 64]             256
             ReLU-11          [-1, 128, 64, 64]               0
           Conv2d-12          [-1, 128, 64, 64]         147,584
             ReLU-13          [-1, 128, 64, 64]               0
           Conv2d-14          [-1, 128, 64, 64]         147,584
    ResidualBlock-15          [-1, 128, 64, 64]               0
           Conv2d-16          [-1, 128, 64, 64]         147,584
             ReLU-17          [-1, 128, 64, 64]               0
           Conv2d-18          [-1, 128, 64, 64]         147,584
    ResidualBlock-19          [-1, 128, 64, 64]               0
           Conv2d-20          [-1, 128, 64, 64]         147,584
             ReLU-21          [-1, 128, 64, 64]               0
           Conv2d-22          [-1, 128, 64, 64]         147,584
    ResidualBlock-23          [-1, 128, 64, 64]               0
           Conv2d-24          [-1, 128, 64, 64]         147,584
             ReLU-25          [-1, 128, 64, 64]               0
           Conv2d-26          [-1, 128, 64, 64]         147,584
    ResidualBlock-27          [-1, 128, 64, 64]               0
           Conv2d-28          [-1, 128, 64, 64]         147,584
             ReLU-29          [-1, 128, 64, 64]               0
           Conv2d-30          [-1, 128, 64, 64]         147,584
    ResidualBlock-31          [-1, 128, 64, 64]               0
  ConvTranspose2d-32         [-1, 64, 128, 128]          73,792
   InstanceNorm2d-33         [-1, 64, 128, 128]             128
             ReLU-34         [-1, 64, 128, 128]               0
  ConvTranspose2d-35         [-1, 32, 256, 256]          18,464
   InstanceNorm2d-36         [-1, 32, 256, 256]              64
             ReLU-37         [-1, 32, 256, 256]               0
  ConvTranspose2d-38          [-1, 3, 256, 256]           7,779
================================================================
Total params: 1,676,675
Trainable params: 1,676,675
Non-trainable params: 0
----------------------------------------------------------------
Input size (MB): 0.75
Forward/backward pass size (MB): 246.85
Params size (MB): 6.40
Estimated Total Size (MB): 253.99
----------------------------------------------------------------
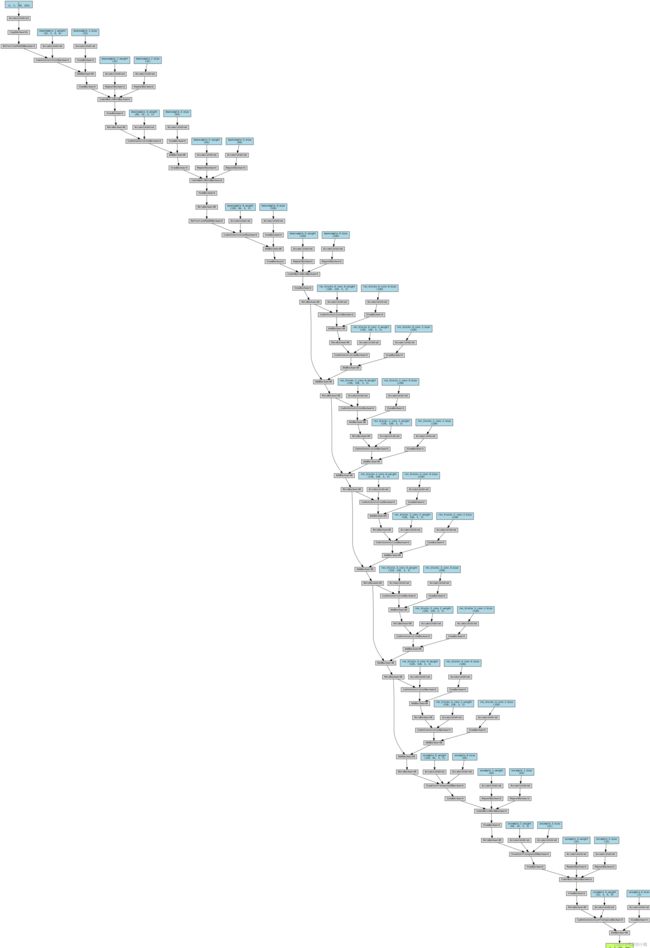
# 输出网络结构
from torchviz import make_dot

x = torch.randn(1, 3, 256, 256).requires_grad_(True)
y = myfwnet(x.to(device))
myResNet_vis = make_dot(y, params=dict(list(myfwnet.named_parameters()) + [('x', x)]))
myResNet_vis
快速风格迁移数据准备
下载地址:https://cocodataset.org/#home
使用 COCO2014 的验证集作为模型输入。
# 定义图像预处理
data_transform = transforms.Compose([
    transforms.Resize(256),
    transforms.CenterCrop(256), # 图像尺寸为256*256
    transforms.ToTensor(), # 转为0-1的张量
    transforms.Normalize(mean = [0.485, 0.456, 0.406],
                         std = [0.229, 0.224, 0.225])
                         # 像素值转为-2.1-2.7
])
# 从文件夹中读取数据
dataset = ImageFolder('./data/COCO', transform = data_transform)
# 每个batch使用4张图像
data_loader = Data.DataLoader(dataset, batch_size = 4, shuffle = True,
                              num_workers = 8, pin_memory = True)
dataset
Dataset ImageFolder
    Number of datapoints: 40504
    Root location: ./data/COCO
    StandardTransform
Transform: Compose(
               Resize(size=256, interpolation=bilinear)
               CenterCrop(size=(256, 256))
               ToTensor()
               Normalize(mean=[0.485, 0.456, 0.406], std=[0.229, 0.224, 0.225])
           )
说明:参数 pin_memory 表示创建 DataLoader 时,生成的 Tensor 数据最开始是属于内存中的锁页内存(显卡中的显存全部是锁页内存),这样将内存的 Tensor 转移到 GPU 的显存就会更快一些,并且针对高性能的 GPU 运算速度会更快。
接下来读取预训练的 VGG16 网络,只需要其中的 features 包含的层,将其设置到 GPU 设备上。计算时只需要使用 VGG 网络提取特定层的特征映射,不需要对其中参数进行训练,设置为 eval 即可
# 读取预训练的VGG16网络
vgg16 = models.vgg16(pretrained = True)
# 不需要分类器,只需要卷积层和池化层
vgg = vgg16.features.to(device).eval()
定义一个方法,能读取风格图像,且转为 VGG 网络可使用的四维张量的格式。
# 定义一个读取风格图像函数,并将图像进行必要的转化
def load_image(img_path, shape = None):
    image = Image.open(img_path)
    size = image.size
    if shape is not None:
        size = shape # 如果指定了图像尺寸就转为指定的尺寸
    # 使用transforms将图像转为张量,并标准化
    in_transform = transforms.Compose([
        transforms.Resize(size),
        transforms.ToTensor(), # 转为0-1的张量
        transforms.Normalize(mean = [0.485, 0.456, 0.406],
                            std = [0.229, 0.224, 0.225])
    ])
    # 使用图像的RGB通道,并添加batch维度
    image = in_transform(image)[:3, :, :].unsqueeze(dim = 0)
    return image
# 定义一个将标准化后的图像转化为便于利用matplotlib可视化的函数
def im_convert(tensor):
    '''
    将[1, c, h, w]维度的张量转为[h, w, c]的数组
    因为张量进行了表转化,所以要进行标准化逆变换
    '''
    tensor = tensor.cpu()
    image = tensor.data.numpy().squeeze() # 去除batch维度的数据
    image = image.transpose(1, 2, 0) # 置换数组维度[c, h, w]->[h, w, c]
    # 进行标准化的逆操作
    image = image * np.array((0.229, 0.224, 0.225)) + np.array((0.485, 0.456, 0.406))
    image = image.clip(0, 1) # 将图像的取值剪切到0-1之间
    return image
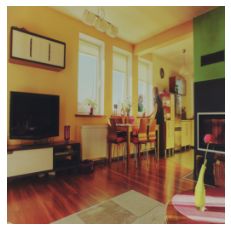
读取风格图像并可视化
# 读取风格图像
style = load_image('./data/COCO/COCO/COCO_val2014_000000000139.jpg', shape = (256, 256)).to(device)
# 可视化图像
plt.figure()
plt.imshow(im_convert(style))
plt.axis('off')
plt.show()
快速风格迁移网络训练和数据可视化展示
与普通风格迁移一样,首先要计算输入张量的 Gram 矩阵:
# 定义计算格拉姆矩阵
def gram_matrix(tensor):
    '''
    计算表示图像风格特征的Gram矩阵,它最终能够在保证内容的情况下,
    进行风格的传输。tensor:是一张图像前向计算后的一层特征映射
    '''
    # 获得tensor的batch_size, channel, height, width
    b, c, h, w = tensor.size()
    # 改变矩阵的维度为(深度, 高*宽)
    tensor = tensor.view(b, c, h * w)
    tensor_t = tensor.transpose(1, 2)
    # 计算gram matrix,针对多张图像进行计算
    gram = tensor.bmm(tensor_t) / (c * h * w)
    return gram
注意的是,因输入的数据使用一个 batch 的特征映射,所以在张量乘以其转置时,需要计算每张图像的 Gram 矩阵,故使用 tensor.bmm 方法完成相关的矩阵乘法计算
定义 get-features 获取图像数据在指定网络指定层上的特征映射:
# 定义一个用于获取图像在网络上指定层的输出的方法
def get_features(image, model, layers = None):
    '''
    将一张图像image在一个网络model中进行前向传播计算,
    并获取指定层layers中的特征输出
    '''
    # 将映射层名称与论文中的名称相对应
    if layers is None:
        layers = {'3': 'relu1_2',
                  '8': 'relu2_2',
                  '15': 'relu3_3', # 内容图层表示
                  '22': 'relu4_3'} # 经过ReLU激活后的输出
    features = {} # 获得的每层特征保存到字典中
    x = image # 需要获取特征的图像
    # model._modules是一个字典,保存着网络model每层的信息
    for name, layer in model._modules.items():
        # 从第一层开始获取图像的特征
        x = layer(x)
        # 如果是layers参数指定的特征,就保存到features中
        if name in layers:
            features[layers[name]] = x
    return features
其中 relu3_3 层输出的特征映射用于度量图像内容的相似性。
下面计算风格图像的 4 4 4 个指定多层上的 Gram 矩阵,并用字典来保存
# 计算风格图像的风格表示
style_layer = {'3': 'relu1_2',
               '8': 'relu2_2',
               '15': 'relu3_3',
               '22': 'relu4_3'}
content_layer = {'15': 'relu3_3'}
# 内容表示的图层,均使用经过relu激活后的输出
style_features = get_features(style, vgg, layers = style_layer)
# 为我们的风格表示计算每层的格拉姆矩阵,使用字典保存
style_grams = {layer: gram_matrix(style_features[layer]) for layer in style_features}
接下来开始对网络进行训练。在训练过程中定义了三种损失,分别为风格损失、内容损失和全变分(Total Variation)损失,它们的权重为 1 0 5 , 1 , 1 0 − 5 10^5,1,10^{-5} 105,1,10−5 ,优化器为 Adam,学习率为 0.0003 0.0003 0.0003 。针对 4 4 4 万多张图像数据,每 4 4 4 张图像为一个 batch,训练 4 4 4 个 epoch,即约有 40000 40000 40000 次迭代。
# 网络训练,定义三种损失的权重
style_weight = 1e5
content_weight = 1
tv_weight = 1e-5
# 定义优化器
optimizer = optim.Adam(myfwnet.parameters(), lr = 1e-3)
myfwnet.train()
since = time.time()
for epoch in range(4):
    print('Epoch: {}'.format(epoch + 1))
    content_loss_all = []
    style_loss_all = []
    tv_loss_all = []
    all_loss = []
    for step, batch in enumerate(data_loader):
        optimizer.zero_grad()

        # 计算使用图像转换网络后,内容图像得到的输出
        content_images = batch[0].to(device)
        transformed_images = myfwnet(content_images)
        transformed_images = transformed_images.clamp(-2.1, 2.7)

        # 使用VGG16计算原图像对应的content_layer特征
        content_features = get_features(content_images, vgg, layers = content_layer)

        # 使用VGG16计算\hat{y}图像对应的全部特征
        transformed_features = get_features(transformed_images, vgg)

        # 内容损失
        # 使用F.mse_loss函数计算预测(transformed_images)和标签(content_images)之间的损失
        content_loss = F.mse_loss(transformed_features['relu3_3'], content_features['relu3_3'])
        content_loss = content_weight * content_loss

        # 全变分损失
        # total variation图像水平和垂直平移一个像素,与原图相减
        # 然后计算绝对值的和即为tv_loss
        y = transformed_images # \hat{y}
        tv_loss = torch.sum(torch.abs(y[:, :, :, :-1] - y[:, :, :, 1:])) + torch.sum(torch.abs(y[:, :, :-1, :] - y[:, :, 1:, :]))
        tv_loss = tv_weight * tv_loss

        # 风格损失
        style_loss = 0
        transformed_grams = {layer: gram_matrix(transformed_features[layer]) for layer in transformed_features}
        for layer in style_grams:
            transformed_gram = transformed_grams[layer]
            # 是针对一个batch图像的Gram
            style_gram = style_grams[layer]
            # 是针对一张图像的,所以要扩充style_gram
            # 并计算计算预测(transformed_gram)和标签(style_gram)之间的损失
            style_loss += F.mse_loss(transformed_gram,
                                style_gram.expand_as(transformed_gram))
        style_loss = style_weight * style_loss

        # 3个损失加起来,梯度下降
        loss = style_loss + content_loss + tv_loss
        loss.backward(retain_graph = True)
        optimizer.step()

        # 统计各个损失的变化情况
        content_loss_all.append(content_loss.item())
        style_loss_all.append(style_loss.item())
        tv_loss_all.append(tv_loss.item())
        all_loss.append(loss.item())
        if step % 5000 == 0:
            print('step: {}; content loss: {:.3f}; style loss: {:.3f}; tv loss: {:.3f}, loss: {:.3f}'.format(step, content_loss.item(), style_loss.item(), tv_loss.item(), loss.item()))
            time_use = time.time() - since
            print('Train complete in {:.0f}m {:.0f}s'.format(time_use // 60, time_use % 60))
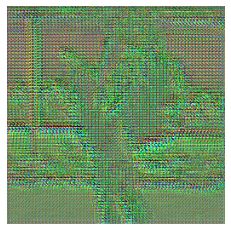
            # 可视化一张图像
            plt.figure()
            im = transformed_images[1, ...] # 省略号表示后面的内容不写了
            plt.axis('off')
            plt.imshow(im_convert(im))
            plt.show()
Epoch: 1
step: 0; content loss: 21.736; style loss: 679.825; tv loss: 17.357, loss: 718.918
Train complete in 0m 10s
step: 5000; content loss: 11.223; style loss: 4.921; tv loss: 1.068, loss: 17.212
Train complete in 32m 21s
step: 10000; content loss: 10.715; style loss: 3.768; tv loss: 1.101, loss: 15.584
Train complete in 64m 34s
Epoch: 2
step: 0; content loss: 12.664; style loss: 3.324; tv loss: 1.182, loss: 17.170
Train complete in 65m 40s
step: 5000; content loss: 5.582; style loss: 3.621; tv loss: 1.234, loss: 10.438
Train complete in 97m 55s
step: 10000; content loss: 5.797; style loss: 3.302; tv loss: 1.209, loss: 10.308
Train complete in 130m 11s
Epoch: 3
step: 0; content loss: 4.639; style loss: 3.312; tv loss: 1.250, loss: 9.201
Train complete in 131m 16s
step: 5000; content loss: 4.507; style loss: 3.565; tv loss: 1.291, loss: 9.364
Train complete in 163m 32s
step: 10000; content loss: 4.570; style loss: 3.609; tv loss: 1.098, loss: 9.276
Train complete in 195m 48s
Epoch: 4
step: 0; content loss: 4.425; style loss: 2.844; tv loss: 1.239, loss: 8.509
Train complete in 196m 46s
step: 5000; content loss: 6.227; style loss: 4.176; tv loss: 1.231, loss: 11.633
Train complete in 229m 2s
step: 10000; content loss: 4.537; style loss: 3.191; tv loss: 1.178, loss: 8.906
Train complete in 261m 19s
# 保存训练好的网络myfwnet
torch.save(myfwnet.state_dict(), './model/imfwnet_dict.pkl')
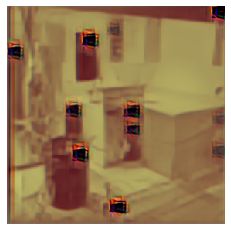
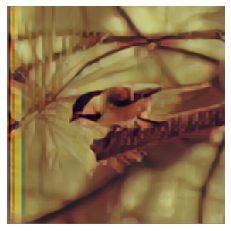
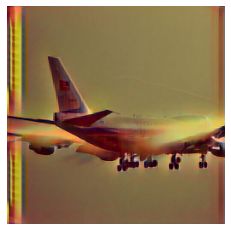
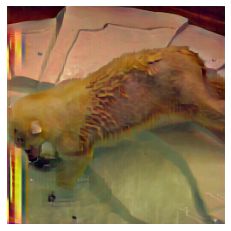
为了测试训练得到的风格迁移网络 fwnet,下面随机获取数据集中的一个 batch 的图像,进行图像风格迁移:
myfwnet.eval()
for step, batch in enumerate(data_loader):
    content_images = batch[0].to(device)
    if step > 0:
        break
plt.figure(figsize = (16, 4))
for ii in range(4):
    im = content_images[ii, ...]
    plt.subplot(1, 4, ii + 1)
    plt.axis('off')
    plt.imshow(im_convert(im))
plt.show()
transformed_images = myfwnet(content_images)
transformed_images = transformed_images.clamp(-2.1, 2.7)
plt.figure(figsize = (16, 4))
for ii in range(4):
    im = im_convert(transformed_images[ii, ...])
    plt.subplot(1, 4, ii + 1)
    plt.axis('off')
    plt.imshow(im)
plt.show()
CPU 上使用预训练好的 GPU 模型
# 读取内容图像
content = load_image('./data/COCO/COCO/COCO_val2014_000000000192.jpg', shape = (256, 256))
# 导入训练好的GPU网络
device = torch.device('cpu')
newfwnet = ImfwNet()
newfwnet.load_state_dict(torch.load('./model/imfwnet_dict.pkl', map_location = device)) # GPU模型映射到基于CPU计算的网络
transform_content = newfwnet(content)
# 可视化图像
plt.figure()
plt.subplot(1, 2, 1)
plt.imshow(im_convert(content))
plt.axis('off')
plt.subplot(1, 2, 2)
plt.imshow(im_convert(transform_content))
plt.axis('off')
plt.show()
一般而言,普通风格迁移花费时间长(会花费数个小时),但风格迁移效果好。
快速风格迁移非常迅速(网络已训练好,是个 offline 的过程),但效果相对没那么理想。
