【神经网络 | 深度学习】pytorch快速搭建网络
快速搭建
导入包
torch.nn包含了大量和网络相关的方法
import torch
import torch.nn as nn
使用GPU计算
device = torch.device('cuda' if torch.cuda.is_available else 'cpu')
device = torch.device('cuda:0')
用第一块显卡计算,就一块显卡的话,传入'cuda'
设立输入和输出
torch.Tensor()直接建立张量,
.to(device)表示使用CPU或者GPU计算
x = torch.Tensor([[0.1,0.2],[0.2,0.3],[0.3,0.4]]).to(device)
#.to(device)表示使用CPU或者GPU计算
y = torch.Tensor([[0.3],[0.5],[0.7]]).to(device)
#直接建立张量
建立神经网络类
class NET(nn.Module):
    def __init__(self):
        super(NET,self).__init__()
        self.fc = nn.Sequential(
            nn.Linear(2,4),
            nn.ReLU(),
            nn.Linear(4,4),
            nn.ReLU(),
            nn.Linear(4,1)
        )#fc全连接层
        #nn.Sequential网络层的容器,按顺序放入网络,两个入一个出
self.fc = nn.Sequential( nn.Linear(2,4), nn.ReLU(), nn.Linear(4,4), nn.ReLU(), nn.Linear(4,1) )#fc全连接层
下层要承接上层的输出,激活函数穿插在神经元之间
        self.opt = torch.optim.Adam(self.parameters(),lr = 0.002 )
        #优化器,SGD随机梯度下降,用于更新
        #lr为学习率
        self.mls = torch.nn.MSELoss()
        #损失函数  MSELoss()均方误差
以上分别为 优化器 和 损失函数
    def forward(self,input):
        return self.fc(input)
        #传入输入
定义前向传播
把输入传入fc
    def train_(self,x,y):
        out = self.forward(x)
        loss = self.mls(out,y)
        print('loss',loss)
        self.opt.zero_grad()
        loss.backward()
        self.opt.step()
out = self.forward(x) 从前向传播中获取输出
loss = self.mls(out,y) 获取损失函数
print(‘loss’,loss)
self.opt.zero_grad() pytorch或累加传递,所以需要清零梯度
loss.backward() 反向传播
self.opt.step() 更新权重
    def test(self,x):
        return self.forward(x)
用于测试
使用自己构建网络
net = NET()#实例化网络
net.cuda()#使用GPU
for i in range(1000):#训练1000次
    net.train_(x,y)#训练

# print("test",net.test(x))
# print("out",net(x))

#测试一下
x = torch.Tensor([[0.1,0.7]]).to(device)#传入新的输入x
out = net.test(x)
print(out)
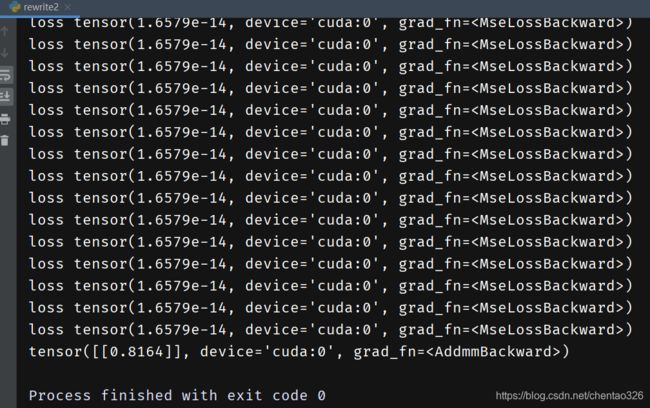
输出
完整代码
#快速搭建

import torch
import torch.nn as nn

device = torch.device('cuda' if torch.cuda.is_available else 'cpu')

#自动求导
# c = torch.tensor([0,1],requires_grad=True)
x = torch.Tensor([[0.1,0.2],[0.2,0.3],[0.3,0.4]]).to(device)
#直接建立张量
y = torch.Tensor([[0.3],[0.5],[0.7]]).to(device)


class NET(nn.Module):
    def __init__(self):
        super(NET,self).__init__()
        self.fc = nn.Sequential(
            nn.Linear(2,4),
            nn.ReLU(),
            nn.Linear(4,4),
            nn.ReLU(),
            nn.Linear(4,1)
        )#网络层的容器,按顺序放入网络,两个入一个出

        self.opt = torch.optim.Adam(self.parameters(),lr = 0.002 )
        self.mls = torch.nn.MSELoss()

    def forward(self,input):
        return self.fc(input)
        #传入输入

    def train_(self,x,y):
        out = self.forward(x)
        loss = self.mls(out,y)
        print('loss',loss)
        self.opt.zero_grad()
        loss.backward()
        self.opt.step()

    def test(self,x):
        return self.forward(x)

net = NET()
net.cuda()
for i in range(1000):
    net.train_(x,y)
# print("test",net.test(x))
#
# print("out",net(x))

x = torch.Tensor([[0.1,0.7]]).to(device)

out = net.test(x)
print(out)
