导入(excel)+导出(excel)+国际化(i18n)+
一、基于前后端配合
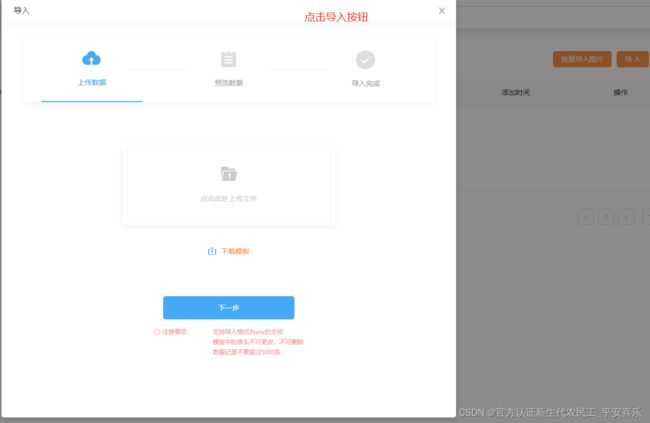
1.导入(excel)
思路:确认导入 执行方法importFile 调用后台接口
// 车型导入数据
const ImportCarcate = function (data) {
    return axios({
        method: 'post',
        url: `/lzkc/manager/car/typeNos/batch`,
        data: data
    })
}
// 导入
importFile() {
console.log(this.uploadLoading);
if (this.uploadLoading) { // 是false 初始值 则不继续执行
return;
}
this.uploadLoading = true; // 设置为true 开始执行
this.importInterface(this.dataList) // 传递数据
.then((res) => {
this.uploadLoading = false; // 设置为false
if (res.resultStatus) {
this.step = 3;
this.successNum = res.resultData.successNum;
this.failNum = res.resultData.errorNum;
this.key = res.resultData.errorExcelUrl;
}
})
.catch((err) => {
console.error(err);
this.uploadLoading = false;
});
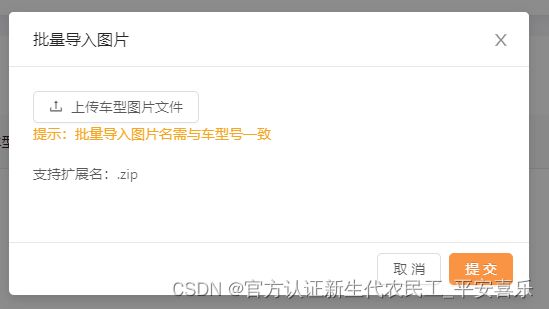
},2.导入(批量上传图片)
思路:和导入 同理↑
3.导出(excel)
调用接口,传递参数
    //导出
    exportFile() {
      this.loading = true;
      GStoreexport().then((res) => {
        const blob = new Blob([res]);
        const fileName = "门店列表.xlsx"; // 设置下载的文件名
        const elink = document.createElement("a"); // 创建a标签
        elink.download = fileName; // 指定a标签的下载名
        elink.style.display = "none"; // 隐藏a标签
        elink.href = URL.createObjectURL(blob); // 解析 blob格式地址 赋值给a标签
        document.body.appendChild(elink); // 添加到页面中
        elink.click(); // 实现点击下载
        URL.revokeObjectURL(elink.href); // 清除a标签的地址
        this.loading = false;
        this.$message.success("导出成功");
      });
    },

// 导出接口
const GStoreexport = function (params) {
    return axios({
        method: 'get',
        responseType: 'blob',
        url: '/lzkc/manager/stores/export',
        params: params
    })
}
二、前端基于插件
README.md:
## 后台管理系统
某个个后台管理系统,包含商品管理 用户管理 订单等等信息。
前端开发内容:
PC端(比如:京东) 移动端(手机预览的网页) 小程序 后台管理界面
后台开发:
服务器: 后台语言 java、 php、 python 、大数据、人工智能
架构师: --- 技术总监
前后端分离:
用户 --- >前端-视图-数据---->后台-提供接口 ---> 数据库
## 技术点
Vue + Vue-router + Vuex + Element-ui + Axios + Echarts + 其他三方库
## 项目搭建
1. vue create vue-ego
2. vue-router vuex
3. axios
4. vue add element --(按需)
## 项目初始化
1. 删除无用的组件 home.vue about.vue hello...
2. css初始化
3. incofont 图标导入
## 后台服务
1. node.js服务
2. express
3. jwt(生成token)jsonwebtoken 解析token: 安装: jwt-decode
4. mysql
5. mockjs -- 模拟数据
1. 安装: cnpm i mockjs -S
2. 引入:
node.js: const Mock = require('mockjs')
前端js: import Mock from 'mockjs'
3. 语法:
Mock.mock()
## 路由大配置
1. 页码布局配置 同级登录界面
## 商品管理界面
### 类目选择
### 上传图片
1. upload 图片上传
2. 后台配置
1. 后台安装 multer 模块 同时引入fs模块
2. router.js入口文件导入模块
const fs=require('fs')
const multer=require('multer')
3. 上传图片 配置upload
### 富文本编辑
1. 百度编译器
2. wangEditor
wangEditor使用步骤:
1. 官网网址:https://www.wangeditor.com/doc/
2. 基本使用
1. 安装:npm i wangeditor --save
2. 引入模块:
import E from "wangeditor"
3. 使用wangeditor
const editor = new E("#div1")
editor.create()
3. 常用配置
1. 清空内容
editor.txt.clear() 清空编辑器内容。
2. 设置内容
editor.txt.html('') 获取 html
3. 配置菜单
1. 配置菜单使用 editor.config.menus 定义显示哪些菜单和菜单的顺序
4. 配置 onchange 回调函数
配置 onchange 函数之后,用户操作(鼠标点击、键盘打字等)导致的内容变化之后,会自动触发 onchange 函数执行
## 国际化
### vuei8n
1. 介绍:
Vue I18n 是 Vue.js 的国际化插件。它可以轻松地将一些本地化功能集成到你的 Vue.js 应用程序中。
2. 安装
1. npm install vue-i18n
2. main.js导入或者是单独的文件
import Vue from 'vue'
import VueI18n from 'vue-i18n'
Vue.use(VueI18n)
3. 使用步骤
1. 如果使用模块系统 (例如通过 vue-cli),则需要导入 Vue 和 VueI18n ,然后调用 Vue.use(VueI18n)。
// import Vue from 'vue'
// import VueI18n from 'vue-i18n'
//
// Vue.use(VueI18n)
2. 准备翻译的语言环境信息
const messages = {
en: {//英文
home: {
hello: 'hello world',
xx:xx,
...
},
goods:{
}
},
zh: {//中文
home: {
hello: '你好 世界',
xx:xx,
...
},
goods:{
}
}
}
3. 通过选项创建 VueI18n 实例
const i18n = new VueI18n({
locale: 'en', // 设置地区
messages, // 设置地区信息
})
4. 通过 `i18n` 选项创建 Vue 实例
new Vue({ i18n }).$mount('#app')
5. 使用语法:
{{ $t("home.hello") }}
### element 国际化
1. 导入
import Element from 'element-ui'
2. 导入语言环境
import enLocale from 'element-ui/lib/locale/lang/en'
import zhLocale from 'element-ui/lib/locale/lang/zh-CN'
目前 Element 内置了以下语言:
简体中文(zh-CN)
英语(en)
德语(de)
葡萄牙语(pt)
西班牙语(es)
丹麦语(da)
法语(fr)
...
3. 配置语言环境
const messages = {
en: {
message: 'hello',
...enLocale // 或者用 Object.assign({ message: 'hello' }, enLocale)
},
zh: {
message: '你好',
...zhLocale // 或者用 Object.assign({ message: '你好' }, zhLocale)
}
}
4. 配置使用
Vue.use(Element, {
i18n: (key, value) => i18n.t(key, value)
})
## 登录--路由拦截
## echarts
1. 安装:npm install echarts -S
2. 使用方式
1. 导入echarts在组件内使用
2. 导入全局 挂载原型上 全局使用
3. 开发成vue插件
3. 使用 -main.js
1. import * as echarts from 'echarts'
Vue.prototype.$echarts = echarts;
2. 直接使用
this.$echarts.xxx
## 规格参数
## 订单列表
## vue-PDF
参考:gitHub: https://github.com/FranckFreiburger/vue-pdf
步骤:
1. npm install --save vue-pdf
2. import pdf from 'vue-pdf'
3. components: {
pdf
}
4. 1.导出为pdf
插件:vue-pdf
github地址:https://github.com/FranckFreiburger/vue-pdf
npm地址:vue-pdf - npm
解决pdf文件位置:vue中本地pdf文件加载错误,文件不显示_生活的小欢呼的博客-CSDN博客_vue-pdf 不显示
解决pdf乱码:
Fix fonts issue in printing by arioth · Pull Request #130 · FranckFreiburger/vue-pdf · GitHub
1.下载
npm install vue-pdf
2.import 引入, 使用组件注册,并使用
3.代码写法:
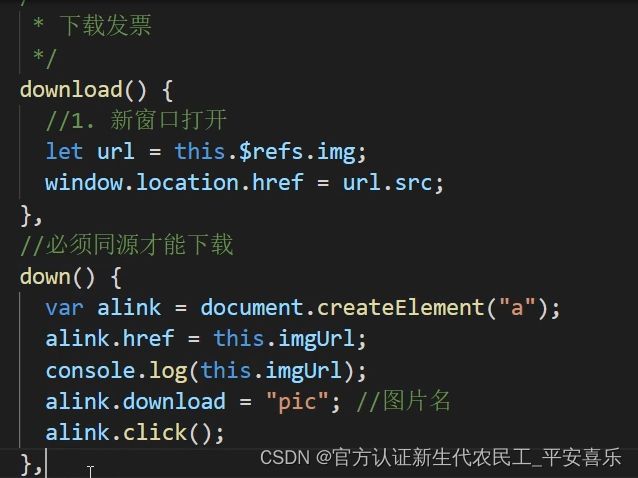
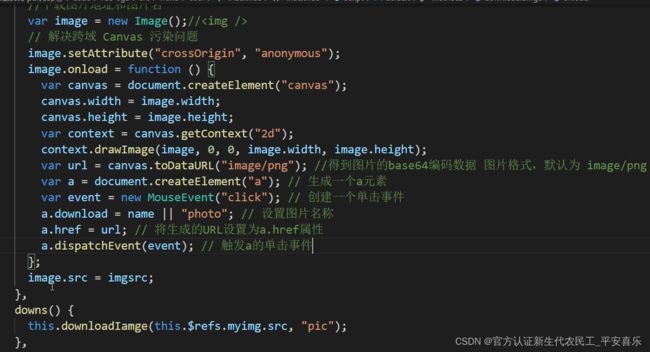
2.图片下载
得到图片的base64编码
3.导出为excel
1.下载
npm install file-saver xlsx -S
npm install script-loader - D
2.在src目录下新建一个excel文件夹,存入Blob.js和Export2Excel.js文件
js文件存放位置:
https://gitee.com/wei-shuai-lei/vuetwo
3.在common文件夹里新建js文件夹再新建util.js
/***
 * export2Excel(columns,list) 导出excel表格
 * columns Arrary=[{},{}]  表头 =[{title:'',key:''}]
 * list =[] table的数据 [{},{}]
 */
export function export2Excel(columns,list,name){
    require.ensure([], () => {
        const { export_json_to_excel } = require('../../excel/Export2Excel');
        let tHeader = []
        let filterVal = []
        console.log(columns)
        if(!columns){
            return;
        }
        columns.forEach(item =>{
            tHeader.push(item.title)
            filterVal.push(item.key)
        })
        const data = list.map(v => filterVal.map(j => v[j]))
        export_json_to_excel(tHeader, data,name);
    })
}
4.国际化
1.vue-i18n:
通过原型上的 vuei18n.locale
介绍 | Vue I18n
1. 介绍:
Vue I18n 是 Vue.js 的国际化插件。它可以轻松地将一些本地化功能集成到你的 Vue.js 应用程序中。
2. 安装
1. npm install vue-i18n
2. main.js导入或者是单独的文件
import Vue from 'vue'
import VueI18n from 'vue-i18n'
Vue.use(VueI18n)
3. 使用步骤
1. 如果使用模块系统 (例如通过 vue-cli),则需要导入 Vue 和 VueI18n ,然后调用 Vue.use(VueI18n)。
// import Vue from 'vue'
// import VueI18n from 'vue-i18n'
//
// Vue.use(VueI18n)
2. 准备翻译的语言环境信息
const messages = {
en: {//英文
home: {
hello: 'hello world',
xx:xx,
...
},
goods:{
}
},
zh: {//中文
home: {
hello: '你好 世界',
xx:xx,
...
},
goods:{
}
}
}
3. 通过选项创建 VueI18n 实例
const i18n = new VueI18n({
locale: 'en', // 设置地区
messages, // 设置地区信息
})
4. 通过 `i18n` 选项创建 Vue 实例
new Vue({ i18n }).$mount('#app')
5. 使用语法:
{{ $t("home.hello") }}
2.element中的国际化
### element 国际化
1. 导入
import Element from 'element-ui'
2. 导入语言环境
import enLocale from 'element-ui/lib/locale/lang/en'
import zhLocale from 'element-ui/lib/locale/lang/zh-CN'
目前 Element 内置了以下语言:
简体中文(zh-CN)
英语(en)
德语(de)
葡萄牙语(pt)
西班牙语(es)
丹麦语(da)
法语(fr)
...
3. 配置语言环境
const messages = {
en: {
message: 'hello',
...enLocale // 或者用 Object.assign({ message: 'hello' }, enLocale)
},
zh: {
message: '你好',
...zhLocale // 或者用 Object.assign({ message: '你好' }, zhLocale)
}
}
4. 配置使用
Vue.use(Element, {
i18n: (key, value) => i18n.t(key, value)
})
5.富文本编辑
### 富文本编辑
1. 百度编译器
2. wangEditor
wangEditor使用步骤:
1. 官网网址:wangEditor
2. 基本使用
1. 安装:npm i wangeditor --save
2. 引入模块:
import E from "wangeditor"
3. 使用wangeditor
const editor = new E("#div1")
editor.create()
3. 常用配置
1. 清空内容
editor.txt.clear() 清空编辑器内容。
2. 设置内容
editor.txt.html('') 获取 html
3. 配置菜单
1. 配置菜单使用 editor.config.menus 定义显示哪些菜单和菜单的顺序
4. 配置 onchange 回调函数
配置 onchange 函数之后,用户操作(鼠标点击、键盘打字等)导致的内容变化之后,会自动触发 onchange 函数执行


