uni-app图片加水印;小程序图片添加水印;使用canvas上传图片加水印
原博主:点击查看
需求: 微信小程序,上传图片,成功后图片有水印,既图片的网络地址也有水印。
上传图片使用uni-app的uni.chooseImage()方法,水印是用canvas。
以下代码可以直接使用:(注意:如果遇到canvas无效或者图片不显示问题:可能就是你在自定义组件内使用canvas,但是没有传递第二个参数this导致的,详见已知问题和解决办法)
<template>
<view class="content">
<view v-for="(photo,index) in photoData" :key="index" class="photo">
<image :src="photo" @click="previewPhoto(photo,photoData)"></image>
<view class="closeA" @tap="deletePhoto(index)">×</view>
</view>
<view class="btnAddPhoto" @click="btnAddPhoto">+</view>
<!-- 获取有水印的图片过程 必须使canvas显示 获取完成后在隐藏掉canvas 配合canvas样式定位 使其错位 -->
<!-- canvas的隐藏 在小程序中 使用 v-if或display:none 都不生效 使用hidden属性 true隐藏 false显示 -->
<canvas :style="{width:canvasWidth,height:canvasHeight}" canvas-id="myCanvas" :hidden='flagC'></canvas>
</view>
</template>
<script>
export default {
data() {
return {
flagC: false,
photoData: [],
photoArray: [],
canvasWidth: '',
canvasHeight: '',
photoIndex: 0
}
},
onLoad() {
},
methods: {
// 添加图片事件
btnAddPhoto() {
this.photoIndex = 0;
let ctx = uni.createCanvasContext('myCanvas');
uni.chooseImage({
count: 6,
sourceType: ['album', 'camera'],
success: res => {
this.photoArray = res.tempFilePaths;
uni.showLoading({
title: "图片加载中..."
})
this.callAddWaterMart();
}
})
},
// 调用添加水印的函数
callAddWaterMart() {
this.addWaterMark(() => {
if (this.photoIndex < this.photoArray.length - 1) {
this.photoIndex++;
this.callAddWaterMart()
} else {
uni.hideLoading()
}
})
},
// 添加水印
addWaterMark(callback) {
this.flagC = false
uni.getImageInfo({
// 注意此时的地址是正常的图片地址 以下是给图片添加水印返回新的url地址
src: this.photoArray[this.photoIndex],
success: res => {
this.canvasWidth = `${res.width}px`;
this.canvasHeight = `${res.height}px`;
var ctx = uni.createCanvasContext('myCanvas');
// 在自定义组件内 需要传递第二参数 this canvas才生效
// var ctx = uni.createCanvasContext('myCanvas', this);
ctx.clearRect(0, 0, res.width, res.height);
ctx.beginPath();
ctx.drawImage(this.photoArray[this.photoIndex], 0, 0, res.width, res.height); // 第一个参数是图片 第二、三是图片在画布位置 第四、五是将图片绘制成多大宽高(不写四五就是原图宽高)
// 为图片添加水印
ctx.translate(res.width / 2, res.height / 2);
ctx.rotate(45 * Math.PI / 180);
//这部分是水印的大小位置和数量
let horizontal = res.width / 4;
let vertical = res.height / 3;
let fonstsize = res.width / 30;
for (let i = 0; i <= 2; i++) {
for (let j = 0; j <= 2; j++) {
ctx.beginPath();
ctx.setFontSize(fonstsize);
ctx.setFillStyle("rgba(255,255,255,0.3)");
// ctx.fillText("-仅供保险投保使用-", i * horizontal - res.width / 2, j * vertical - res.height / 2);
ctx.fillText("--仅供保险投保使用--", (i * horizontal - res.width / 2) * 2, j * vertical - res.height / 2, fonstsize*15*2);
}
}
// 开始绘制添加水印的图片并显示在页面中
ctx.draw(false, () => {
setTimeout(() => {
console.log("asdf");
uni.canvasToTempFilePath({
canvasId: "myCanvas",
success: res => {
// 注意此时的地址是加了水印的图片地址(直接url输入浏览器也可以查看包含水印)
console.log(123,res.tempFilePath)
this.flagC = true
this.photoData.push(res.tempFilePath);
callback();
}
})
// 在自定义组件内 需要传递第二参数 this canvas才生效
// }, this)
}, 500)
});
}
})
},
// 预览图片
previewPhoto(url, list) {
uni.previewImage({
current: url,
urls: list.map(item => item)
})
},
// 删除图片
deletePhoto(index) {
this.photoArray.splice(index, 1);
this.photoData.splice(index, 1);
console.log(this.photoArray)
}
}
}
</script>
<style>
.content {
padding: 20upx;
}
.photo,
.photo image {
display: inline-block;
width: 220upx;
height: 220upx;
}
.btnAddPhoto {
width: 220upx;
height: 220upx;
border: dashed 1px #aaa;
display: flex;
justify-content: center;
align-items: center;
font-size: 50upx;
}
canvas {
border: solid 1px gray;
position: absolute;
left: 5000upx;
}
</style>
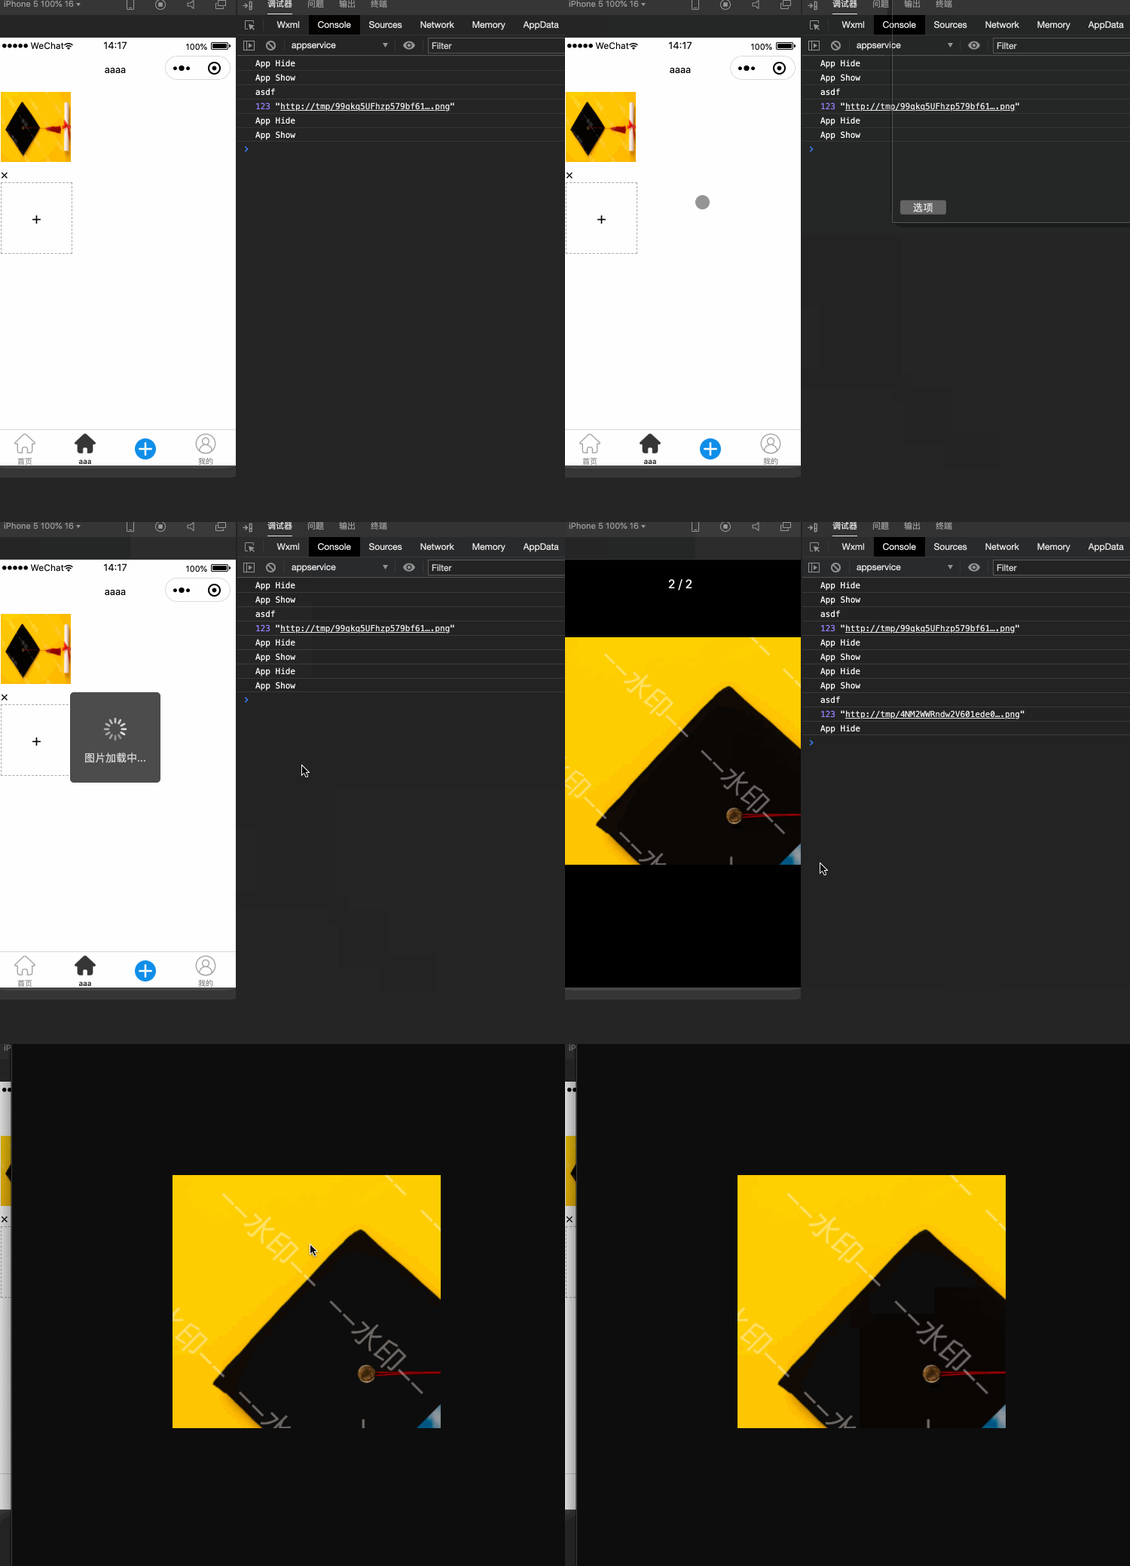
未知问题: 小程序模拟器上,上传第一张图片没问题,再次上传第二张图片,会发现第二张图片显示出来的是两张图片的叠加图;但是在真机使用时候,却不会出现也不影响(故没有处理,猜测解决方案:可以再每次上传图片处理水印时候,使用不同的canvas元素,不要使用同一个去做水印);
已知问题:
1.若canvas图片渲染不出来,也就是uni.createCanvasContext()方法无效
2.或ctx.draw()无效,
3.或uni.canvasToTempFilePath()接口总是失败;
4.或拿不到图片的tempFilePath;以上问题都是一个原因导致
(查看uni-app文档或者微信小程序canvas文档 ,可知原因:1.是需要在template模板里有canvas元素;2.是在自定义组件或者公共组件内,必须传递第二个参数this)。
解决办法就是: createCanvasContext和canvasToTempFilePath两个地方的方法需要传递第二参数this
既
var ctx = uni.createCanvasContext('myCanvas', this);

uni.canvasToTempFilePath({获取图片的内容代码 详见下面}, this)
未知问题演示:上传第二张图:(叠加图片问题只会在小程序模拟器中出现,在实际真机使用中不会影响)


