阿里云GPU服务器安装深度学习环境
首先安装显卡驱动:
参考: https://blog.csdn.net/weixin_43738628/article/details/105516038
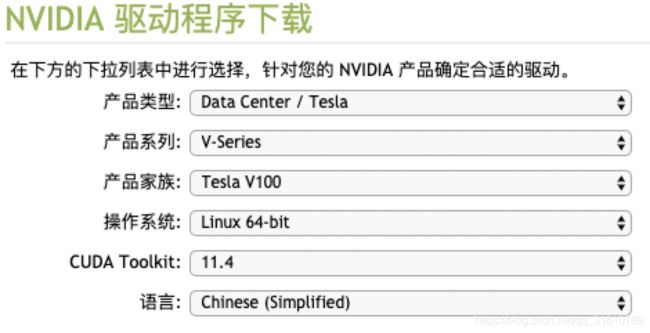
1、官方选择驱动版本:https://www.nvidia.cn/Download/index.aspx?lang=cn
下载对应系列显卡驱动,这里是Tesla v100
Tips: 使用:
wget 下载文件链接
进行下载更方便。
2、安装
bash NVIDIA-Linux-x86_64-440.118.02.run
期间会有很多选项,按自己情况,或者都默认选择安装。
3、验证
nvidia-smi
安装完显卡驱动后会有这个提示
WARNING: nvidia-installer was forced to guess the X library path '/usr/lib64' and X module path '/usr/lib64/xorg/modules'; these paths were not queryable from the system. If X fails to find the NVIDIA X driver module, please install the
`pkg-config` utility and the X.Org SDK/development package for your distribution and reinstall the driver.
OK
二、
安装cuda,这里笔者需要跑yolox, 准备跑cuda10.2. + pytorch1.9 的版本
Cuda 官方获取即可:https://developer.nvidia.com/cuda-toolkit-archive 选择10.2
如图:笔者阿里云是centos7.7系统
接下来继续下载安装即可,注意有两个补丁包。按顺序安装即可。
验证:
nvcc —version
如果报错表示不存在nvcc
当然先查看/usr/local里面有没有cuda-10.2 以及软连接出来的cuda文件夹
如果存在则可能没有添加环境变量导致,添加方法如下:
sudo vim ~/.bashrc
如果不存在下面这两行,则在文件末尾添加
export PATH=/usr/local/cuda/bin:$PATH
export LD_LIBRARY_PATH=/usr/local/cuda/lib64$LD_LIBRARY_PATH
三、
这里笔者使用Anaconda作为构建镜像环境的工具
安装包来自于清华镜像源:https://mirrors.tuna.tsinghua.edu.cn/anaconda/archive/
选择了较新的Anaconda3-5.3.1-Linux-x86_64.sh
bash Anaconda3-5.3.1-Linux-x86_64.sh期间一直按默认值就行,最后会有个是否下载VSCODE选择no即可。
ps: 寻找pytorch版本最好的地方是:https://download.pytorch.org/whl/torch_stable.html

