Unity Shader PostProcessing - 1 - 后处理概念
(加粗的内容需要留意)
什么叫PostProcessing?
Post Processing 中文直译:后处理(以前我是不知道是怎么回事,总觉得好高端的感觉,-_-)
我们知道:在场景的所有需要渲染的对象,渲染完后,就可得到的图像内容,这个图像内容通常与我们的屏幕尺寸一样大。
后处理简单总结为:在渲染得出上面图像内容后,再对该图像内容处理。
后处理因为是对图像内容处理,一般对几何处理就简单。(ShaderToy网站除外,那里的炫酷效果遍地的各种运算都有)
而图像内容基本就是像素处理,所以后处理的shader的vs基本处理:
- 顶点坐标变换到clipPos
- 传uv到fs
就完事了
主要一般的内容都在:fs中处理(fragment shader)
后处理的几何体对象很简单,就是一个Quad,只不过它的位置,大小都刚好放置、布满整屏
后处理计算量:(复杂度:O(n),n是像素数量)
- 依赖像素数量(分辨率决定数量)
- fs中的运算量
Unity Scene Rendering
先来看看Unity中的Scene Rendering的概要图
上图的函数都是再MonoBehaviour类中
从英文名上简单理解为:
- OnWillRenderObject - 在即将渲染对象
- OnPreCull - 在剔除对象前
- OnBecameVisible - 在对象确定为可见时
- OnBecameInvisible - 在对象不可见时
- OnPreRender - 在渲染前
- OnRenderObject - 在渲染对象
- OnPostRender - 在渲染对象后
- OnRenderImage - 在渲染到图像
留意函数的顺序,与函数的意思,按需在我们的脚本中来声明对应函数处理功能即可
Post Processing(后处理)的话,从上面函数的渲染,当然是选择OnRenderImage函数来处理。
另外我们的后处理脚本需要附加到:Camera组件中
OnRenderImage函数参数理解,往下看:
一般后处理脚本结构
因为后处理有些逻辑是通用的,所以封装一个基类,如下:PostEffectBasic
// jave.lin 2019.08.24
// 后处理基类
using System;
using UnityEngine;

public class PostEffectBasic : MonoBehaviour
{
    public Shader shader;	                                // 后处理shader
    protected Material mat;	                                // 材质对象
    public bool IsSupported { get; private set; }           // 该后处理是否支持
    public string UnsupportedMsg { get; private set; }      // 不支持的消息
    protected virtual void Start()
    {
        try
        {
            IsSupported = CheckSupported(out string UnsupportedMsg);    // 检测是否支持
            if (IsSupported) mat = new Material(shader);
        }
        catch (Exception er)
        {
            IsSupported = false;
            UnsupportedMsg = $"{GetType().Name} post processing init er:{er}";
            Debug.LogError(UnsupportedMsg);
        }
    }
    private void OnDestroy()
    {
        Destroy(mat);
    }
    // 检测支持与否的函数
    protected virtual bool CheckSupported(out string unsupportedMsg)
    {
        unsupportedMsg = shader.isSupported ? null :
            $"post processing effect shader unsupported, shader name:{shader.name}" ;
        if (!string.IsNullOrEmpty(unsupportedMsg)) Debug.LogError(unsupportedMsg);
        return shader.isSupported;
    }
    // 后处理入口函数
    protected virtual void OnRenderImage(RenderTexture source, RenderTexture destination)
    {
        // source 参数:是场景渲染后的图像渲染纹理
        // destination 参数:是经过我们的后处理后要填充的目标图像渲染纹理
        // if (!IsSupported) { Graphics.Blit(source, destination); return; } // 不支持
        // mat.SetFloat("paramName", xx);
        // mat.SetColor("paramName", xx);
        // Graphics.Blit(source, destination, mat);
    }
}
调用Graphics.Blit
		public static void Blit(Texture source, Material mat);
        public static void Blit(Texture source, RenderTexture dest, Material mat);
        public static void Blit(Texture source, RenderTexture dest, Material mat, [Internal.DefaultValue("-1")] int pass);
重载有很多个,这里只介绍三个:
- 第一个:没有destination,那么source经过对应的mat中的shader的所有pass处理后,就直接写入到后台屏幕帧缓存了
- 第二个:相比第一个,可以指定写入的RT,如果dest传入null,那么效果和第一个方法一样
- 第三个:相比第二个,多了int pass,默认pass传-1,那么将会执行shader中所有pass,否则执行指定的pass;
实现一个简单的边缘检测
有了后处理基本概念理解,我们可以实现一个很基础的边缘检测:Sobel图像边缘检测
后处理CSharp脚本
// jave.lin 2019.08.24
// 边缘检测
using UnityEngine;

public class EdgeDetectProstEffect : PostEffectBasic
{
    [Range(0, 1)] public float edgeIntensity = 1;
    [Range(0, 1)] public float edgeThreshold = 0.6f;
    [ColorUsage(false)] public Color edgeColor = Color.white;

    protected override void OnRenderImage(RenderTexture source, RenderTexture destination)
    {
        if (!IsSupported) { Graphics.Blit(source, destination); return; } // 不支持
        mat.SetFloat("_EdgeIntensity", edgeIntensity);
        mat.SetFloat("_EdgeThreshold", edgeThreshold);
        mat.SetColor("_EdgeColor", edgeColor);
        Graphics.Blit(source, destination, mat);
    }
}
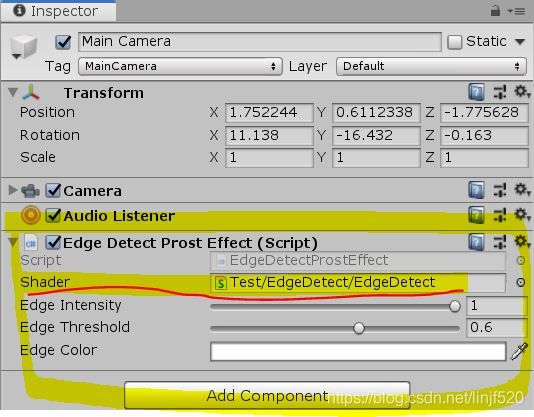
有了后处理脚本后,我们添加到对应Camera的GameObject中,注意shader需要设置好(往下面看,提供shader)

边缘检测Shader
// jave.lin 2019.08.24
Shader "Test/EdgeDetect/EdgeDetect" {
    Properties {
        _MainTex ("Texture", 2D) = "white" {}
        _EdgeIntensity ("EdgeIntensity", Range(0,1)) = 1
        _EdgeThreshold ("EdgeThreshold", Range(0,1)) = 0.5
        _EdgeColor ("EdgeColor", Color) = (1,1,1,1)
    }
    SubShader {
        Tags { "RenderType"="Opaque" }
        LOD 100
        Pass {
            ZTest Always
            ZWrite Off
            Cull Off
            CGPROGRAM
            #pragma vertex vert
            #pragma fragment frag
            #include "UnityCG.cginc"
            struct appdata {
                float4 vertex : POSITION;
                float2 uv : TEXCOORD0;
            };
            struct v2f {
                float4 vertex : SV_POSITION;
                float2 uv : TEXCOORD0;
            };
            sampler2D _MainTex;
            float4 _MainTex_ST;
            float4 _MainTex_TexelSize;
            fixed _EdgeIntensity;
            fixed _EdgeThreshold;
            fixed4 _EdgeColor;
            fixed luminance(fixed3 c) {
                return c.r * 0.212 + c.g * 0.715 + c.b * 0.072;
            }
            fixed Sobel(sampler2D tex, float2 uv, float4 texelSize) {
                /*
                    |-1| 0| 1|
                gx =|-2| 0| 2|
                    |-1| 0| 1|

                    |-1|-2|-1|
                gy =| 0| 0| 0|
                    | 1| 2| 1|

                final_g = |gx|+|gy|
                */

                fixed
                gx  = luminance(tex2D(tex, uv + float2(-texelSize.x, texelSize.y  )).rgb) * -1;
                gx += luminance(tex2D(tex, uv + float2(-texelSize.x,  0           )).rgb) * -2;
                gx += luminance(tex2D(tex, uv + float2(-texelSize.x, -texelSize.y )).rgb) * -1;

                gx += luminance(tex2D(tex, uv + float2( texelSize.x,  texelSize.y )).rgb);// * 1;
                gx += luminance(tex2D(tex, uv + float2( texelSize.x,  0           )).rgb) * 2;
                gx += luminance(tex2D(tex, uv + float2( texelSize.x, -texelSize.y )).rgb);// * 1;

                fixed
                gy  = luminance(tex2D(tex, uv + float2(-texelSize.x,  texelSize.y )).rgb) * -1;
                gy += luminance(tex2D(tex, uv + float2( 0          ,  texelSize.y )).rgb) * -2;
                gy += luminance(tex2D(tex, uv + float2( texelSize.x,  texelSize.y )).rgb) * -1;

                gy += luminance(tex2D(tex, uv + float2(-texelSize.x, -texelSize.y )).rgb);// * 1;
                gy += luminance(tex2D(tex, uv + float2( 0          , -texelSize.y )).rgb) * 2;
                gy += luminance(tex2D(tex, uv + float2( texelSize.x, -texelSize.y )).rgb);// * 1;

                return abs(gx) + abs(gy);
            }
            v2f vert (appdata v) {
                v2f o;
                o.vertex = UnityObjectToClipPos(v.vertex);
                o.uv = TRANSFORM_TEX(v.uv, _MainTex);
                return o;
            }
            fixed4 frag (v2f i) : SV_Target {
                fixed4 col = tex2D(_MainTex, i.uv);
                fixed g = Sobel(_MainTex, i.uv, _MainTex_TexelSize);
                fixed ts = step(_EdgeThreshold, g); // step函数等价于:step(a,b)=>a
                return lerp(col, _EdgeColor * ts, ts*_EdgeIntensity);
            }
            ENDCG
        }
    }
}
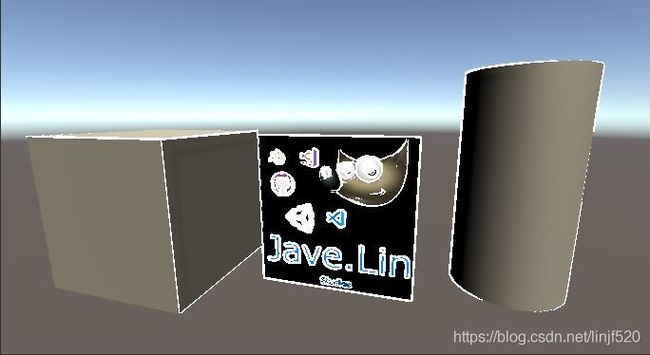
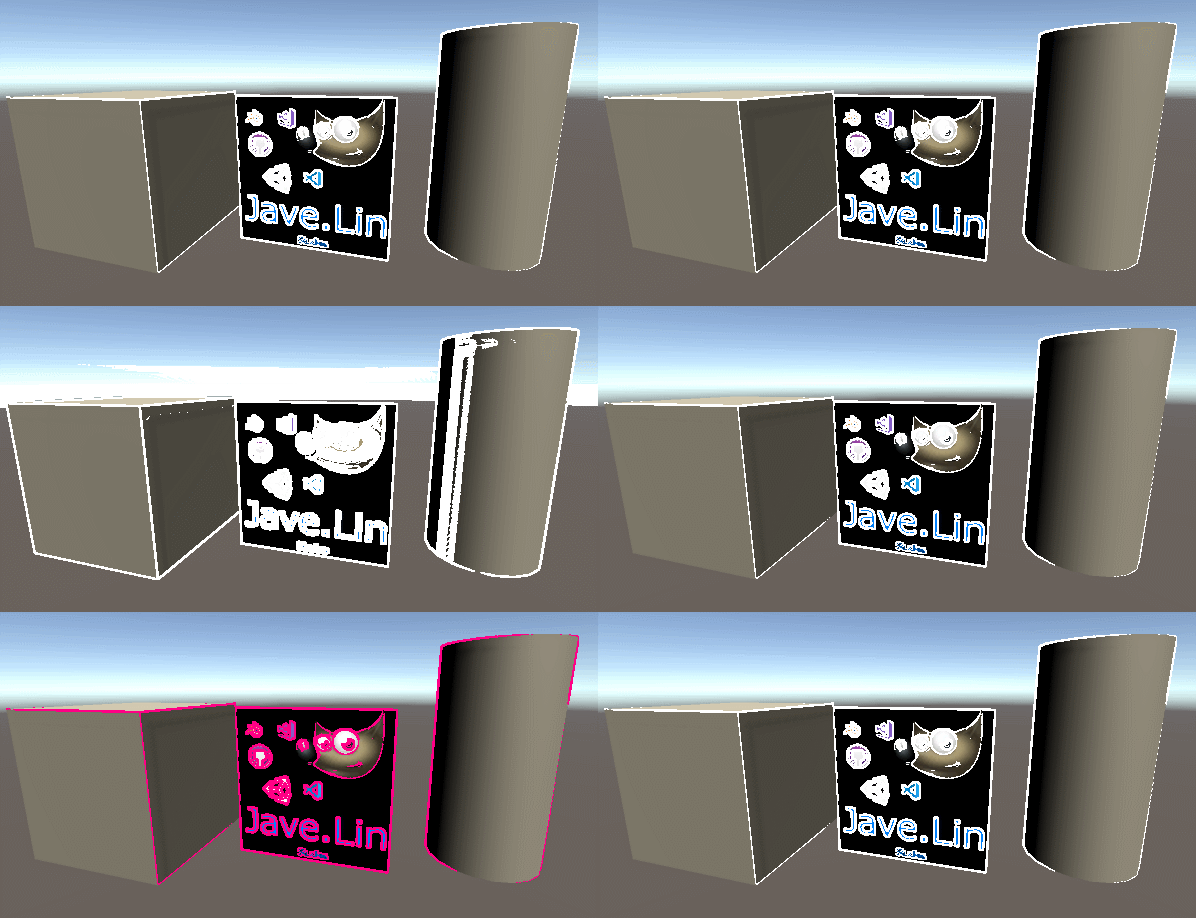
边缘检测运行效果
可以看到Sobel图像的边缘检测还是有很多不足的,后续可以使用其他的方式来处理
由于篇幅,就到这吧。
总结
总结Unity中的后处理
- 后处理是整个场景渲染完后的图像处理
- 图像处理主要处理像素内容
- 选择MonoBehaviour的OnRenderImage函数来处理
- 在OnRenderImage中主要掉用Graphics.Blit方法来将源图像纹理经过我们制定的Shader后的图像写入到目标图像纹理
- 后处理脚本组件附加到拥有Camera的GameObject中
- 后处理的几何体对象就是一个Quad,只不过它的位置,大小都刚好放置、布满整屏
- 复杂度:O(n),n是像素数量
- 依赖像素数量(分辨率决定数量)
- fs中的运算量
- 所以低端运行设备,如:移动端,尽量精简运算
- 一般实现的图像效果有:
- 边缘检测
- 色调调整
- 图像风格化,如:像素化
- 图像AA:Image Anti-Aliasing,图像抗锯齿/反走样
- Bloom - 泛光
- DepthOfField 景深
- 模糊
- 均值、高斯的运动、径向模糊
- 波纹
- 高温热浪导致部分图像扭曲
- 游戏刀光扭曲
- 等等的全屏图像效果
Unity Post Processing 升级
- 文档
- Version2.0文档
- PostProcessing V2 Git : Unity-Technologies/PostProcessing
- 如何编写自定义 PP : Writing custom effects
而且还分:
- Built-in pipeline 的post processing
- LWRP(URP) 的
- HDRP的
但是先研究一样前身还是很有必要的
(其实如果你写一个引擎,就知道后处理,肯定需要自己封装因为要等所有然后都渲染到一张RT后,再处理你需要额外处理的图像shader,而且可以是一到多个(甚至需要写个Stack,Sorting来处理应用顺序),就是后处理了)


