【1.使用Clion调试ROS基本步骤】

1.使用Clion调试ROS基本步骤

1.使用Clion调试ROS基本步骤

  • 前言
  • 一、版本
  • 二、使用步骤
    • 1.创建ROS基本工作空间
    • 2.启动CLION
    • 3.使用CLION进行调试
  • 总结


前言

例如:ROS1入门学习笔记


一、版本

IDE:CLion-2020.2
环境:Ubuntu20.04\ROS1Noetic

二、使用步骤

1.创建ROS基本工作空间

1.1打开一个终端,创建一个工作空间命名为my_ws
打开一个终端:
//创建名为my_ws的工作空间
//进入my_ws
//cmake一下,工作空间会生成devel,build,src三个子文件夹
代码如下:

mkdir -p my_ws/src
cd my_ws
catkin_make

在这里插入图片描述【1.使用Clion调试ROS基本步骤】_第1张图片
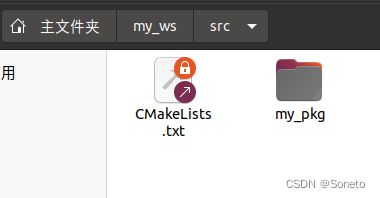
1.2在工作空间的src文件夹里创建功能包my_pkg
//进入my_ws下的src子文件夹
//创建名为my_pkg的功能包,同时添加一些依赖包
代码如下(示例):

cd src
catkin_create_pkg my_pkg roscpp rospy std_msgs

【1.使用Clion调试ROS基本步骤】_第2张图片

2.启动CLION

2.1 source工作空间
//退回my_ws工作空间下
//source一下

cd ..
source ./devel/setup.bash

此时devel里会生成.bash文件
【1.使用Clion调试ROS基本步骤】_第3张图片2.2 启动CLION
执行此步骤之前,先检查自己的CLION安装路径以及文件命名

sh /home/allen/CLion-2020.2/clion-2020.2/bin/clion.sh

运行成功会打开CLION
【1.使用Clion调试ROS基本步骤】_第4张图片

3.使用CLION进行调试

3.1 打开功能包
在CLION功能栏点击文件/打开,找到功能包的路径点击打开(注意,这里必须选择工作空间的CMakeLists.txt打开,否则build时会失败)
【1.使用Clion调试ROS基本步骤】_第5张图片
open as project->this window

【1.使用Clion调试ROS基本步骤】_第6张图片
3.2 添加源文件并编辑配置文件
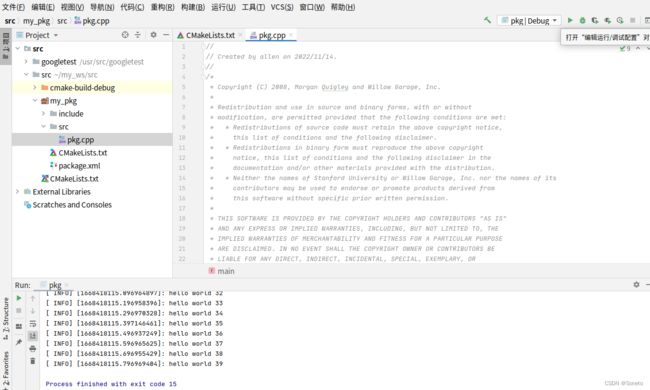
在功能包的src树上右击添加cpp源文件,命名为pkg.cpp

【1.使用Clion调试ROS基本步骤】_第7张图片
3.3 编写源文件
将下列代码copy到pkg.cpp中保存(原文->https://raw.githubusercontent.com/ros/ros_tutorials/kinetic-devel/roscpp_tutorials/talker/talker.cpp)

/*
 * Copyright (C) 2008, Morgan Quigley and Willow Garage, Inc.
 *
 * Redistribution and use in source and binary forms, with or without
 * modification, are permitted provided that the following conditions are met:
 *   * Redistributions of source code must retain the above copyright notice,
 *     this list of conditions and the following disclaimer.
 *   * Redistributions in binary form must reproduce the above copyright
 *     notice, this list of conditions and the following disclaimer in the
 *     documentation and/or other materials provided with the distribution.
 *   * Neither the names of Stanford University or Willow Garage, Inc. nor the names of its
 *     contributors may be used to endorse or promote products derived from
 *     this software without specific prior written permission.
 *
 * THIS SOFTWARE IS PROVIDED BY THE COPYRIGHT HOLDERS AND CONTRIBUTORS "AS IS"
 * AND ANY EXPRESS OR IMPLIED WARRANTIES, INCLUDING, BUT NOT LIMITED TO, THE
 * IMPLIED WARRANTIES OF MERCHANTABILITY AND FITNESS FOR A PARTICULAR PURPOSE
 * ARE DISCLAIMED. IN NO EVENT SHALL THE COPYRIGHT OWNER OR CONTRIBUTORS BE
 * LIABLE FOR ANY DIRECT, INDIRECT, INCIDENTAL, SPECIAL, EXEMPLARY, OR
 * CONSEQUENTIAL DAMAGES (INCLUDING, BUT NOT LIMITED TO, PROCUREMENT OF
 * SUBSTITUTE GOODS OR SERVICES; LOSS OF USE, DATA, OR PROFITS; OR BUSINESS
 * INTERRUPTION) HOWEVER CAUSED AND ON ANY THEORY OF LIABILITY, WHETHER IN
 * CONTRACT, STRICT LIABILITY, OR TORT (INCLUDING NEGLIGENCE OR OTHERWISE)
 * ARISING IN ANY WAY OUT OF THE USE OF THIS SOFTWARE, EVEN IF ADVISED OF THE
 * POSSIBILITY OF SUCH DAMAGE.
 */
// %Tag(FULLTEXT)%
// %Tag(ROS_HEADER)%
#include "ros/ros.h"
// %EndTag(ROS_HEADER)%
// %Tag(MSG_HEADER)%
#include "std_msgs/String.h"
// %EndTag(MSG_HEADER)%

#include 

/**
 * This tutorial demonstrates simple sending of messages over the ROS system.
 */
int main(int argc, char **argv)
{
  /**
   * The ros::init() function needs to see argc and argv so that it can perform
   * any ROS arguments and name remapping that were provided at the command line.
   * For programmatic remappings you can use a different version of init() which takes
   * remappings directly, but for most command-line programs, passing argc and argv is
   * the easiest way to do it.  The third argument to init() is the name of the node.
   *
   * You must call one of the versions of ros::init() before using any other
   * part of the ROS system.
   */
// %Tag(INIT)%
  ros::init(argc, argv, "talker");
// %EndTag(INIT)%

  /**
   * NodeHandle is the main access point to communications with the ROS system.
   * The first NodeHandle constructed will fully initialize this node, and the last
   * NodeHandle destructed will close down the node.
   */
// %Tag(NODEHANDLE)%
  ros::NodeHandle n;
// %EndTag(NODEHANDLE)%

  /**
   * The advertise() function is how you tell ROS that you want to
   * publish on a given topic name. This invokes a call to the ROS
   * master node, which keeps a registry of who is publishing and who
   * is subscribing. After this advertise() call is made, the master
   * node will notify anyone who is trying to subscribe to this topic name,
   * and they will in turn negotiate a peer-to-peer connection with this
   * node.  advertise() returns a Publisher object which allows you to
   * publish messages on that topic through a call to publish().  Once
   * all copies of the returned Publisher object are destroyed, the topic
   * will be automatically unadvertised.
   *
   * The second parameter to advertise() is the size of the message queue
   * used for publishing messages.  If messages are published more quickly
   * than we can send them, the number here specifies how many messages to
   * buffer up before throwing some away.
   */
// %Tag(PUBLISHER)%
  ros::Publisher chatter_pub = n.advertise<std_msgs::String>("chatter", 1000);
// %EndTag(PUBLISHER)%

// %Tag(LOOP_RATE)%
  ros::Rate loop_rate(10);
// %EndTag(LOOP_RATE)%

  /**
   * A count of how many messages we have sent. This is used to create
   * a unique string for each message.
   */
// %Tag(ROS_OK)%
  int count = 0;
  while (ros::ok())
  {
// %EndTag(ROS_OK)%
    /**
     * This is a message object. You stuff it with data, and then publish it.
     */
// %Tag(FILL_MESSAGE)%
    std_msgs::String msg;

    std::stringstream ss;
    ss << "hello world " << count;
    msg.data = ss.str();
// %EndTag(FILL_MESSAGE)%

// %Tag(ROSCONSOLE)%
    ROS_INFO("%s", msg.data.c_str());
// %EndTag(ROSCONSOLE)%

    /**
     * The publish() function is how you send messages. The parameter
     * is the message object. The type of this object must agree with the type
     * given as a template parameter to the advertise<>() call, as was done
     * in the constructor above.
     */
// %Tag(PUBLISH)%
    chatter_pub.publish(msg);
// %EndTag(PUBLISH)%

// %Tag(SPINONCE)%
    ros::spinOnce();
// %EndTag(SPINONCE)%

// %Tag(RATE_SLEEP)%
    loop_rate.sleep();
// %EndTag(RATE_SLEEP)%
    ++count;
  }


  return 0;
}
// %EndTag(FULLTEXT)%

3.4 编辑配置文件并重载
将下列代码copy到Cmakelist.txt中,并Reload重新加载变更

add_executable(pkg src/pkg.cpp)
target_link_libraries(pkg ${catkin_LIBRARIES})

点击重新加载变更
无报错,显示FINISH已完成

【1.使用Clion调试ROS基本步骤】_第8张图片
3.5 可以在CLION终端或者Linux终端启动Roscore
然后选择pkd|debug运行即可完成调试

【1.使用Clion调试ROS基本步骤】_第9张图片

总结

实现了CLion调试ROS程序

你可能感兴趣的:(ROS1,人工智能,c++)