Unity 一键制作预制体,一键修改预制体
生成 、修改预制体属性 所用到的API
PrefabUtility.SaveAsPrefabAsset(GameObject instanceRoot, string assetPath);
PrefabUtility.SavePrefabAsset(GameObject asset);
AssetDatabase.LoadAssetAtPath(string assetPath, Type type);
AssetDatabase.SaveAssets();
AssetDatabase.Refresh();
具体用法:
一、制作预制体
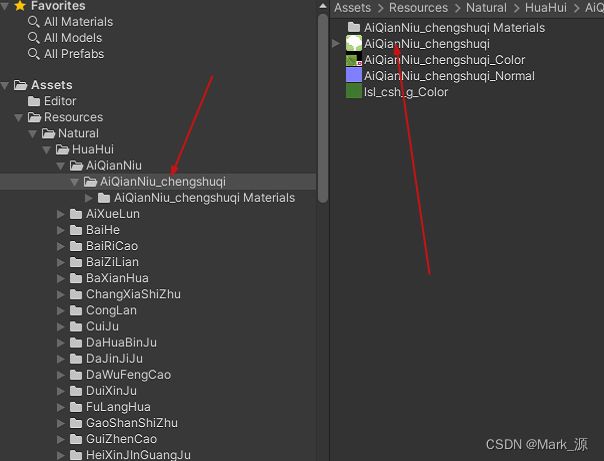
获取预制体所需源文件路径(源文件最好放在Resources文件夹内方便加载,等制作完成后可以移动到合适位置)
主要方法:
1)、获取路径下的所有文件夹
///
/// 获取路径下的所有文件夹
///
///
/// 2)、获取文件下的文件
///
/// 获取路径下的 Obj
///
///
/// (path);
if (go != null)
{
return go;
}
else
{
Debug.Log(path);
return null;
}
} 3)、实践:
导入需要制作预制体的源文件,查看文件结构
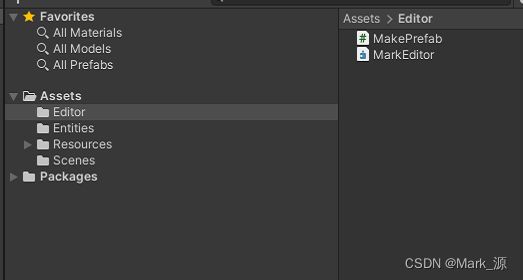
新建Editor 文件夹 并创建脚本 MakePrefab
public class MakePrefab : EditorWindow
{
[MenuItem("Tools/MakePrefab")]
public static void CreatePrefabWindow()
{
EditorWindow window = EditorWindow.GetWindowWithRect(typeof(MakePrefab), new Rect(Screen.width / 3, Screen.height / 3, 800, 500), true, "MakePrefab");
window.Show();
}
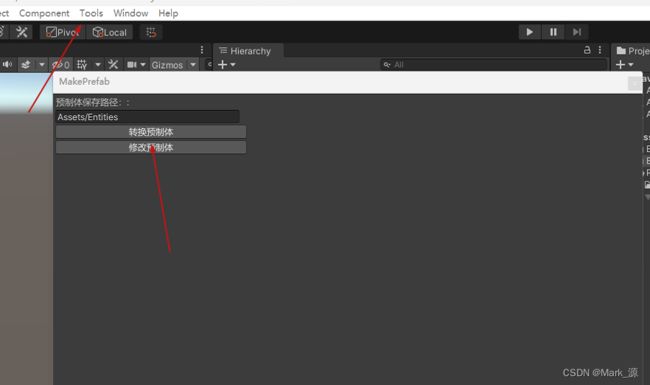
}绘制面板
 private static string toSavePrefabPath = "Assets/Entities";


    private void OnGUI()
    {

        EditorGUILayout.LabelField("预制体保存路径::", toSavePrefabPath, GUILayout.Width(110));
        toSavePrefabPath = EditorGUILayout.TextArea(toSavePrefabPath, GUILayout.Width(250));

        if (GUILayout.Button("转换预制体", GUILayout.Width(260)))
        {
            ToPrefab();
        }

        if (GUILayout.Button("修改预制体", GUILayout.Width(260)))
        {
            ModifyPrefab(toSavePrefabPath);
        }

    }
效果展示
制作预制体
private void ToPrefab()
{
string path = "Assets/Resources";
string[] allFolder1 = GetAllFolder(path);
if (allFolder1 == null)
return;
//循环次数取决于 ,源文件的目录结构 ,此处为 4 级结构
for (int i = 0; i < allFolder1.Length; i++)
{
string path2 = $"{path}/{allFolder1[i]}";
string[] allFolder2 = GetAllFolder(path2);
if (allFolder2 == null)
{
return;
}
for (int j = 0; j < allFolder2.Length; j++)
{
string path3 = $"{path2}/{allFolder2[j]}";
string[] allFolder3 = GetAllFolder(path3);
if (allFolder3 == null)
return;
for (int k = 0; k < allFolder3.Length; k++)
{
string path4 = $"{path3}/{allFolder3[k]}";
string[] allFolder4 = GetAllFolder(path4);
Debug.Log($"编号:{k} {allFolder3[k]}文件下有 {allFolder4.Length} 个文件夹!");
if (allFolder4 == null)
return;
if (!Directory.Exists(toSavePrefabPath))
{
Directory.CreateDirectory(toSavePrefabPath);
}
for (int l = 0; l < allFolder4.Length; l++)
{
string speedTree = $"{path4}/{allFolder4[l]}/{allFolder4[l]}";
string[] strs = Regex.Split(speedTree, path + "/", RegexOptions.IgnoreCase);
GameObject go = Instantiate(GetFileObj(strs[1]));
go.name = go.name.Replace("(Clone)", string.Empty);
//给预制体添加脚本,修改属性
//go.transform.tag = "Model";
if (go.GetComponent() == null)
go.AddComponent();
if (go.GetComponent() == null)
go.AddComponent();
go.GetComponent().isKinematic = true;
string modeName = allFolder4[l].Split('_')[0];
PrefabUtility.SaveAsPrefabAsset(go, $"{toSavePrefabPath}/{modeName}.prefab");
DestroyImmediate(go);
}
AssetDatabase.Refresh();
}
}
}
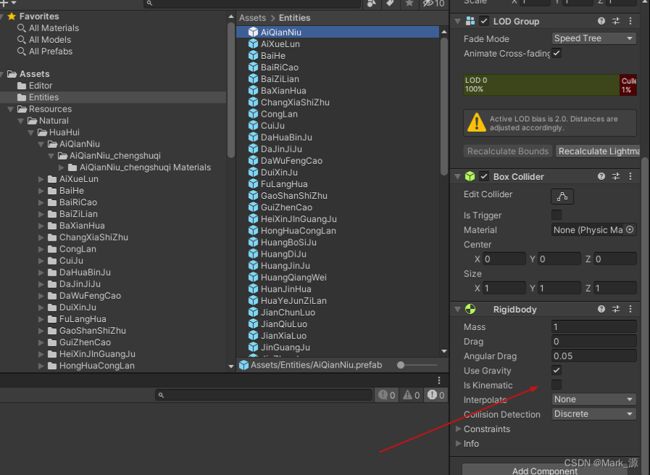
} 效果展示
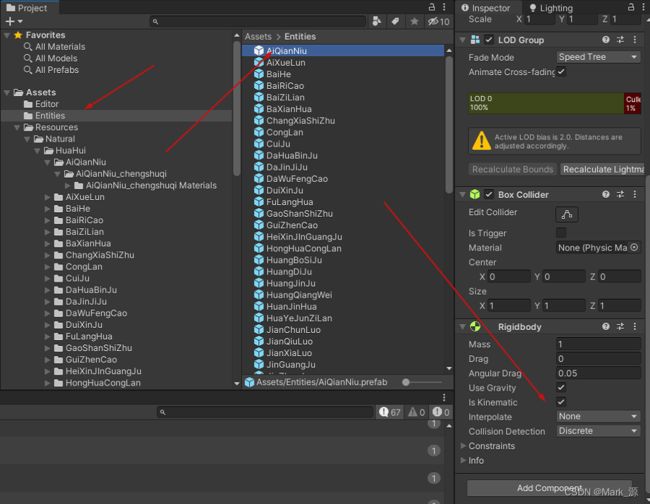
二、修改预制体:
当预制体中的某个属性设置错误的时候,比如 IsKinematic 属性时,需要统一修改这个属性
    ///
    /// 修改预制体
    ///
    ///
    private void ModifyPrefab(string path)
    {
        //获取文件下所有预制体文件
        DirectoryInfo info = new DirectoryInfo(path);
        FileInfo[] fileInfos = info.GetFiles("*.prefab");
        List prefabs = new List();
        foreach (var item in fileInfos)
        {
            string paths = $"{path}/{item.Name}";
            GameObject prefab = AssetDatabase.LoadAssetAtPath(paths, typeof(GameObject)) as GameObject;
            prefabs.Add(prefab);
        }
        //修改属性
        for (int i = 0; i < prefabs.Count; i++)
        {
            if (prefabs[i].transform.childCount > 0 && prefabs[i].transform.GetChild(0) != null)
            {
                if (prefabs[i].GetComponent() != null)
                {
                    prefabs[i].GetComponent().isKinematic = false;
                    PrefabUtility.SavePrefabAsset(prefabs[i]);
                }
            }
        }
        AssetDatabase.SaveAssets();
        AssetDatabase.Refresh();
    }
效果展示
这样所有的预制体都已经制作完成啦,以及后续修改里面的属性!