PyTorch学习笔记-6.PyTorch的正则化
6.PyTorch的正则化
6.1.正则项
为了减小过拟合,通常可以添加正则项,常见的正则项有L1正则项和L2正则项
L1正则化目标函数:
L2正则化目标函数:
PyTorch中添加L2正则:PyTorch的优化器中自带一个参数weight_decay,用于指定权值衰减率,相当于L2正则化中的λ参数。
权值未衰减的更新公式:
权值衰减的更新公式:
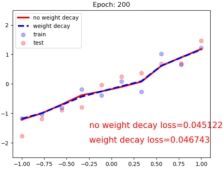
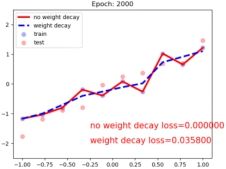
下面,分别通过不添加L2正则与添加L2正则进行比较:
代码实现:
# -*- coding:utf-8 -*-
import torch
import numpy as np
import random
import torch.nn as nn
import matplotlib.pyplot as plt
from torch.utils.tensorboard import SummaryWriter
def set_seed(seed=1):
random.seed(seed)
np.random.seed(seed)
torch.manual_seed(seed)
torch.cuda.manual_seed(seed)
set_seed(1) # 设置随机种子
# 隐藏层神经单元数量
n_hidden = 200
# 迭代次数
max_iter = 2000
# 每200轮进行一次绘图
disp_interval = 200
# 学习率
lr_init = 0.01
# 1.准备数据
def get_data(num_data=10, x_range=(-1, 1)):
# 定义权重
w = 1.5
# 定义训练集的x
# *x_range表示将参数名为x_range的内容打散,即生成-1到1的10个数并扩展维度
train_x = torch.linspace(*x_range, num_data).unsqueeze_(1)
# 定义训练集的y,为w*x+正太分布的随机数
train_y = w*train_x + torch.normal(0, 0.5, size=train_x.size())
# 生成测试集
test_x = torch.linspace(*x_range, num_data).unsqueeze_(1)
test_y = w*test_x + torch.normal(0, 0.3, size=test_x.size())
return train_x, train_y, test_x, test_y
train_x, train_y, test_x, test_y = get_data(x_range=(-1, 1))
# 2.创建模型
class MLP(nn.Module):
def __init__(self, neural_num):
super(MLP, self).__init__()
# 利用容器构建模型
self.linears = nn.Sequential(
# 创建线性层和激活函数
nn.Linear(1, neural_num),
nn.ReLU(inplace=True),
nn.Linear(neural_num, neural_num),
nn.ReLU(inplace=True),
nn.Linear(neural_num, neural_num),
nn.ReLU(inplace=True),
nn.Linear(neural_num, 1),
)
def forward(self, x):
return self.linears(x)
# 创建两个模型,第一个不添加L2正则,第二个添加L2正则
net_normal = MLP(neural_num=n_hidden)
net_weight_decay = MLP(neural_num=n_hidden)
# 3.创建优化器
optim_normal = torch.optim.SGD(net_normal.parameters(), lr=lr_init, momentum=0.9)
optim_wdecay = torch.optim.SGD(net_weight_decay.parameters(), lr=lr_init, momentum=0.9, weight_decay=1e-2)
# 4.定义损失函数
loss_func = torch.nn.MSELoss()
# 5.开始训练
# 定义tensorboard的输出路径
writer = SummaryWriter(comment='_test_tensorboard', filename_suffix="12345678")
for epoch in range(max_iter):
# 分别用两个模型对训练集训练,得到预测结果
pred_normal, pred_wdecay = net_normal(train_x), net_weight_decay(train_x)
# 分别获得损失
loss_normal, loss_wdecay = loss_func(pred_normal, train_y), loss_func(pred_wdecay, train_y)
# 反向传播
loss_normal.backward()
loss_wdecay.backward()
# 执行优化
optim_normal.step()
optim_wdecay.step()
# 清空梯度
optim_normal.zero_grad()
optim_wdecay.zero_grad()
#可视化和绘图
if (epoch+1) % disp_interval == 0:
# 可视化
for name, layer in net_normal.named_parameters():
# 绘制直方图,分别添加tag,value值,global_step即y轴
writer.add_histogram(name + '_grad_normal', layer.grad, epoch)
writer.add_histogram(name + '_data_normal', layer, epoch)
for name, layer in net_weight_decay.named_parameters():
writer.add_histogram(name + '_grad_weight_decay', layer.grad, epoch)
writer.add_histogram(name + '_data_weight_decay', layer, epoch)
# 利用模型对测试集测试并得到预测结果
test_pred_normal, test_pred_wdecay = net_normal(test_x), net_weight_decay(test_x)
# 绘图
plt.scatter(train_x.data.numpy(), train_y.data.numpy(), c='blue', s=50, alpha=0.3, label='train')
plt.scatter(test_x.data.numpy(), test_y.data.numpy(), c='red', s=50, alpha=0.3, label='test')
plt.plot(test_x.data.numpy(), test_pred_normal.data.numpy(), 'r-', lw=3, label='no weight decay')
plt.plot(test_x.data.numpy(), test_pred_wdecay.data.numpy(), 'b--', lw=3, label='weight decay')
plt.text(-0.25, -1.5, 'no weight decay loss={:.6f}'.format(loss_normal.item()), fontdict={'size': 15, 'color': 'red'})
plt.text(-0.25, -2, 'weight decay loss={:.6f}'.format(loss_wdecay.item()), fontdict={'size': 15, 'color': 'red'})
plt.ylim((-2.5, 2.5))
plt.legend(loc='upper left')
plt.title("Epoch: {}".format(epoch+1))
plt.show()
plt.close()
plt绘制图:
可以看出当设置正则后的拟合曲线更平滑,而没有正则的曲线发生了过拟合
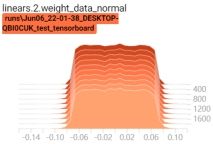
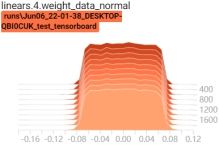
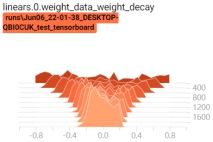
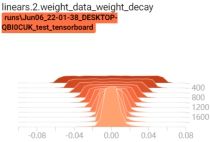
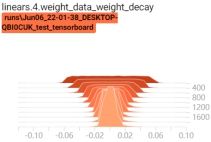
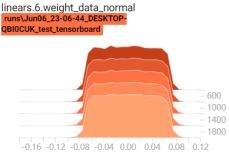
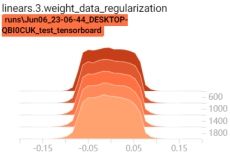
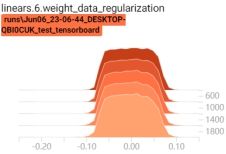
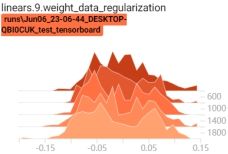
启动tensorboard客户端,查看权重变换过程:tensorboard --logdir=./
可以看到,当有正则项时,权重在不断变小
6.2.Dropout
Dropout:随机失活
指在深度学习网络的训练过程中,对于神经网络单元,按照一定的概率将其暂时从网络中丢弃。注意是暂时,对于随机梯度下降来说,由于是随机丢弃,故而每一个mini-batch都在训练不同的网络。
上图为Dropout的可视化表示,左边是应用Dropout之前的网络,右边是应用了Dropout的同一个网络。
PyTorch的Dropout
torch.nn.Dropout
功能:Dropout层
• p:被舍弃概率, 失活概率
torch.nn.Dropout(p=0.5, inplace=False)
实现细节:
Dropout 在训练时采用,是为了减少神经元对部分上层神经元的依赖,减少过拟合的风险。
而在测试时,应该用整个训练好的模型,因此不需要dropout。
测试时,所有权重乘以![]()
代码实现:
# -*- coding:utf-8 -*-
import torch
import numpy as np
import random
import torch.nn as nn
import matplotlib.pyplot as plt
from torch.utils.tensorboard import SummaryWriter
def set_seed(seed=1):
random.seed(seed)
np.random.seed(seed)
torch.manual_seed(seed)
torch.cuda.manual_seed(seed)
set_seed(1) # 设置随机种子
n_hidden = 200
max_iter = 2000
disp_interval = 400
lr_init = 0.01
# 1.准备数据
def get_data(num_data=10, x_range=(-1, 1)):
w = 1.5
train_x = torch.linspace(*x_range, num_data).unsqueeze_(1)
train_y = w*train_x + torch.normal(0, 0.5, size=train_x.size())
test_x = torch.linspace(*x_range, num_data).unsqueeze_(1)
test_y = w*test_x + torch.normal(0, 0.3, size=test_x.size())
return train_x, train_y, test_x, test_y
train_x, train_y, test_x, test_y = get_data(x_range=(-1, 1))
# 2.创建模型
class MLP(nn.Module):
def __init__(self, neural_num, d_prob=0.5):
super(MLP, self).__init__()
self.linears = nn.Sequential(
nn.Linear(1, neural_num),
nn.ReLU(inplace=True),
# 从第二层开始添加Dropout
nn.Dropout(d_prob),
nn.Linear(neural_num, neural_num),
nn.ReLU(inplace=True),
nn.Dropout(d_prob),
nn.Linear(neural_num, neural_num),
nn.ReLU(inplace=True),
nn.Dropout(d_prob),
nn.Linear(neural_num, 1),
)
def forward(self, x):
return self.linears(x)
# 创建两个模型,一个不添加Dropout,另一个添加Dropout
net_prob_0 = MLP(neural_num=n_hidden, d_prob=0.)
net_prob_05 = MLP(neural_num=n_hidden, d_prob=0.5)
# 3.创建优化器
optim_normal = torch.optim.SGD(net_prob_0.parameters(), lr=lr_init, momentum=0.9)
optim_reglar = torch.optim.SGD(net_prob_05.parameters(), lr=lr_init, momentum=0.9)
# 4.创建损失函数
loss_func = torch.nn.MSELoss()
# 5.开始训练
writer = SummaryWriter(comment='_test_tensorboard', filename_suffix="12345678")
for epoch in range(max_iter):
pred_normal, pred_wdecay = net_prob_0(train_x), net_prob_05(train_x)
loss_normal, loss_wdecay = loss_func(pred_normal, train_y), loss_func(pred_wdecay, train_y)
loss_normal.backward()
loss_wdecay.backward()
optim_normal.step()
optim_reglar.step()
optim_normal.zero_grad()
optim_reglar.zero_grad()
if (epoch+1) % disp_interval == 0:
# 将模型设置为测试状态,因为测试时不会使用dropout
net_prob_0.eval()
net_prob_05.eval()
# 可视化
for name, layer in net_prob_0.named_parameters():
writer.add_histogram(name + '_grad_normal', layer.grad, epoch)
writer.add_histogram(name + '_data_normal', layer, epoch)
for name, layer in net_prob_05.named_parameters():
writer.add_histogram(name + '_grad_regularization', layer.grad, epoch)
writer.add_histogram(name + '_data_regularization', layer, epoch)
test_pred_prob_0, test_pred_prob_05 = net_prob_0(test_x), net_prob_05(test_x)
# 绘图
plt.scatter(train_x.data.numpy(), train_y.data.numpy(), c='blue', s=50, alpha=0.3, label='train')
plt.scatter(test_x.data.numpy(), test_y.data.numpy(), c='red', s=50, alpha=0.3, label='test')
plt.plot(test_x.data.numpy(), test_pred_prob_0.data.numpy(), 'r-', lw=3, label='d_prob_0')
plt.plot(test_x.data.numpy(), test_pred_prob_05.data.numpy(), 'b--', lw=3, label='d_prob_05')
plt.text(-0.25, -1.5, 'd_prob_0 loss={:.8f}'.format(loss_normal.item()), fontdict={'size': 15, 'color': 'red'})
plt.text(-0.25, -2, 'd_prob_05 loss={:.6f}'.format(loss_wdecay.item()), fontdict={'size': 15, 'color': 'red'})
plt.ylim((-2.5, 2.5))
plt.legend(loc='upper left')
plt.title("Epoch: {}".format(epoch+1))
plt.show()
plt.close()
# 将模型设置回训练状态,即添加dropout
net_prob_0.train()
net_prob_05.train()
plt绘制图:
可以看出当设置Dropout后的拟合曲线更平滑,而没有Dropout的曲线发生了过拟合
启动tensorboard客户端,查看权重变换过程:tensorboard --logdir=./
6.3.Batch Normalization
Batch Normalization:批标准化,batch方向做归一化
批:一批数据,通常为mini-batch
标准化: 0均值, 1方差
计算方式:
输入: x的一个mini-batch:![]()
可学习的参数:![]()
输出:![]()
计算过程:
最终的结果:![]() 这一步称为affine transform
这一步称为affine transform
其中![]() 为缩放因子,是可学习参数,使得模型更灵活,可以由模型判断数据是否需要标准化或者标准化程度。如:
为缩放因子,是可学习参数,使得模型更灵活,可以由模型判断数据是否需要标准化或者标准化程度。如:![]() ,
,![]() 时,
时,![]()
PyTorch的Batch Normalization:
PyTorch要实现Batch Normalization,是通过类实现的,PyTorch提供了3个类:
nn.BatchNorm1d
nn.BatchNorm2d
nn.BatchNorm3d
参数:
• num_features:一个样本特征数量(最重要)
• eps:分母修正项,即上面公式的![]()
• momentum:指数加权平均估计当前mean/var,当前mini-batch的mean/var受前一批影响
• affine:是否需要affine transform
• track_running_stats:是训练状态,还是测试状态,训练状态会计算并使用当前批的mean/var,测试状态使用指数加权平均的running_mean和running_var
主要属性:
• running_mean:均值
• running_var:方差
• weight: affine transform中的gamma
• bias: affine transform中的beta
mean/var计算公式:
running_mean = (1 - momentum) * pre_running_mean + momentum * mean_t
running_var = (1 - momentum) * pre_running_var + momentum * var_t
即当前的mean/var由上一个mini-batch的mean/var和当前批的mean/var共同决定
1d/2d/3d的区别:
1d/2d/3d是针对每个特征的维度而言
1d:
即输入大小的形状可以是batch_size×num_features和batch_size×num_features×width都可以。(输入输出相同)
输入Shape:(N, C)或者(N, C, L)
输出Shape:(N, C)或者(N,C,L)
2d:
该期望输入的大小为batch_size×num_features×height×width(输入输出相同)
输入Shape:(N, C,H, W)
输出Shape:(N, C, H, W)
3d:
该期望输入的大小为batch_size×num_features×depth×height×width(输入输出相同)
输入Shape:(N, C, D, H, W)
输出Shape:(N, C, D, H, W)
下面,分别用代码实现nn.BatchNorm1d/2d/3d
代码实现:nn.BatchNorm1d
# -*- coding: utf-8 -*-
import torch
import torch.nn as nn
import numpy as np
import random
def set_seed(seed=1):
random.seed(seed)
np.random.seed(seed)
torch.manual_seed(seed)
torch.cuda.manual_seed(seed)
set_seed(1) # 设置随机种子
flag = 1
# flag = 0
if flag:
# 设置批大小
batch_size = 3
# 设置每个样本的特征数
num_features = 5
# 设置指数加权平均系数
momentum = 0.3
# 特征的形状
features_shape = (1)
# 构建全是1的特征
feature_map = torch.ones(features_shape)
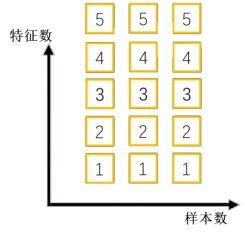
# 在特征前面增加特征数量维度,即5×1
feature_maps = torch.stack([feature_map*(i+1) for i in range(num_features)], dim=0)
# 在特征数量前面增加批大小维度,即3×5×1
feature_maps_bs = torch.stack([feature_maps for i in range(batch_size)], dim=0)
# 打印数据及其维度
print("input data:\n{} shape is {}".format(feature_maps_bs, feature_maps_bs.shape))
# 创建BatchNorm1d
bn = nn.BatchNorm1d(num_features=num_features, momentum=momentum, track_running_stats=True)
# 设置初始均值与方差,因为第一次计算时前面没有均值与方差
running_mean, running_var = 0, 1
for i in range(2):
# 利用BatchNorm1d对数据进行处理
outputs = bn(feature_maps_bs)
# 打印第几次迭代以及迭代时的均值、方差
print("\niteration:{}, running mean: {} ".format(i, bn.running_mean))
print("iteration:{}, running var:{} ".format(i, bn.running_var))
# 手动计算第二个特征的均值与方差
mean_t, var_t = 2, 0
running_mean = (1 - momentum) * running_mean + momentum * mean_t
running_var = (1 - momentum) * running_var + momentum * var_t
print("iteration:{}, 第二个特征的running mean: {} ".format(i, running_mean))
print("iteration:{}, 第二个特征的running var:{}".format(i, running_var))
| input data: tensor([[[1.], [2.], ... [5.]]]) shape is torch.Size([3, 5, 1])
iteration:0, running mean: tensor([0.3000, 0.6000, 0.9000, 1.2000, 1.5000]) iteration:0, running var:tensor([0.7000, 0.7000, 0.7000, 0.7000, 0.7000]) iteration:0, 第二个特征的running mean: 0.6 iteration:0, 第二个特征的running var:0.7
iteration:1, running mean: tensor([0.5100, 1.0200, 1.5300, 2.0400, 2.5500]) iteration:1, running var:tensor([0.4900, 0.4900, 0.4900, 0.4900, 0.4900]) iteration:1, 第二个特征的running mean: 1.02 iteration:1, 第二个特征的running var:0.48999999999999994 |
代码实现:nn.BatchNorm2d
flag = 1
# flag = 0
if flag:
batch_size = 3
num_features = 6
momentum = 0.3
# 特征维度为2×2
features_shape = (2, 2)
feature_map = torch.ones(features_shape)
feature_maps = torch.stack([feature_map*(i+1) for i in range(num_features)], dim=0)
feature_maps_bs = torch.stack([feature_maps for i in range(batch_size)], dim=0)
print("input data:\n{} shape is {}".format(feature_maps_bs, feature_maps_bs.shape))
# 创建BatchNorm2d
bn = nn.BatchNorm2d(num_features=num_features, momentum=momentum)
running_mean, running_var = 0, 1
for i in range(2):
outputs = bn(feature_maps_bs)
# 打印第几次迭代以及迭代时的均值、方差的shape
print("\niter:{}, running_mean.shape: {}".format(i, bn.running_mean.shape))
print("iter:{}, running_var.shape: {}".format(i, bn.running_var.shape))
print("iter:{}, weight.shape: {}".format(i, bn.weight.shape))
print("iter:{}, bias.shape: {}".format(i, bn.bias.shape))
| input data: tensor([[[[1., 1.], [1., 1.]],
[[2., 2.], [2., 2.]], ... [[6., 6.], [6., 6.]]]]) shape is torch.Size([3, 6, 2, 2])
iter:0, running_mean.shape: torch.Size([6]) iter:0, running_var.shape: torch.Size([6]) iter:0, weight.shape: torch.Size([6]) iter:0, bias.shape: torch.Size([6])
iter:1, running_mean.shape: torch.Size([6]) iter:1, running_var.shape: torch.Size([6]) iter:1, weight.shape: torch.Size([6]) iter:1, bias.shape: torch.Size([6]) |
代码实现:nn.BatchNorm3d
flag = 1
# flag = 0
if flag:
batch_size = 3
num_features = 4
momentum = 0.3
# 特征维度为2×2×3
features_shape = (2, 2, 3)
feature = torch.ones(features_shape)
feature_map = torch.stack([feature * (i + 1) for i in range(num_features)], dim=0)
feature_maps = torch.stack([feature_map for i in range(batch_size)], dim=0)
print("input data:\n{} shape is {}".format(feature_maps, feature_maps.shape))
# 创建BatchNorm3d
bn = nn.BatchNorm3d(num_features=num_features, momentum=momentum)
running_mean, running_var = 0, 1
for i in range(2):
outputs = bn(feature_maps)
print("\niter:{}, running_mean.shape: {}".format(i, bn.running_mean.shape))
print("iter:{}, running_var.shape: {}".format(i, bn.running_var.shape))
print("iter:{}, weight.shape: {}".format(i, bn.weight.shape))
print("iter:{}, bias.shape: {}".format(i, bn.bias.shape))
| input data: tensor([[[[[1., 1., 1.], [1., 1., 1.]],
[[1., 1., 1.], [1., 1., 1.]]], ... [[4., 4., 4.], [4., 4., 4.]]]]]) shape is torch.Size([3, 4, 2, 2, 3])
iter:0, running_mean.shape: torch.Size([4]) iter:0, running_var.shape: torch.Size([4]) iter:0, weight.shape: torch.Size([4]) iter:0, bias.shape: torch.Size([4])
iter:1, running_mean.shape: torch.Size([4]) iter:1, running_var.shape: torch.Size([4]) iter:1, weight.shape: torch.Size([4]) iter:1, bias.shape: torch.Size([4]) |
6.4.常见Normalization
常见的Normalization有:
1. Batch Normalization( BN)
2. Layer Normalization( LN)
3. Instance Normalization( IN)
4. Group Normalization( GN)
它们的共同点是计算方式相同,都是:
不同点是:均值和方差求取方式不同。
1. Layer Normalization
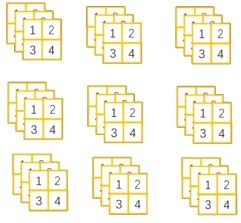
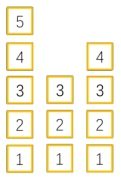
起因: BN不适用于变长的网络,如RNN
思路: channel方向做归一化,逐层计算均值和方差
注意事项:
不再有running_mean和running_var
gamma和beta为逐元素的
变长的网络如下:
nn.LayerNorm
主要参数:
• normalized_shape:该层特征形状
• eps:分母修正项
• elementwise_affine:是否需要affine transform
nn.LayerNorm(normalized_shape, eps=1e-05,
elementwise_affine=True)
代码实现:
# -*- coding: utf-8 -*-
import torch
import numpy as np
import random
import torch.nn as nn
def set_seed(seed=1):
random.seed(seed)
np.random.seed(seed)
torch.manual_seed(seed)
torch.cuda.manual_seed(seed)
set_seed(1) # 设置随机种子
flag = 1
# flag = 0
if flag:
# 批大小
batch_size = 8
# 特征数
num_features = 6
# 每个特征的shape
features_shape = (3, 4)
# 构建数据,最终为B * C * H * W
feature_map = torch.ones(features_shape)
feature_maps = torch.stack([feature_map * (i + 1) for i in range(num_features)], dim=0)
feature_maps_bs = torch.stack([feature_maps for i in range(batch_size)], dim=0)
# 输入特征为C * H * W,去掉了B
ln = nn.LayerNorm(feature_maps_bs.size()[1:], elementwise_affine=True) #False
# 或者从后向前指定维度作为特征设置,注意指定时必须从后向前匹配
# ln = nn.LayerNorm([3, 4])
output = ln(feature_maps_bs)
# 打印权重的shape、输入、输出
print("Layer Normalization")
print(ln.weight.shape)
print(feature_maps_bs[0, ...])
print(output[0, ...])
| Layer Normalization torch.Size([6, 3, 4]) tensor([[[1., 1., 1., 1.], [1., 1., 1., 1.], [1., 1., 1., 1.]], ... [[6., 6., 6., 6.], [6., 6., 6., 6.], [6., 6., 6., 6.]]]) tensor([[[-1.4638, -1.4638, -1.4638, -1.4638], [-1.4638, -1.4638, -1.4638, -1.4638], [-1.4638, -1.4638, -1.4638, -1.4638]],
[[-0.8783, -0.8783, -0.8783, -0.8783], [-0.8783, -0.8783, -0.8783, -0.8783], [-0.8783, -0.8783, -0.8783, -0.8783]], ... [[ 1.4638, 1.4638, 1.4638, 1.4638], [ 1.4638, 1.4638, 1.4638, 1.4638], [ 1.4638, 1.4638, 1.4638, 1.4638]]], grad_fn= |
注意:这里计算时是按照一层的输入特征所以值进行标准化
2. Instance Normalization
起因: BN在图像生成( Image Generation)中不适用
思路: 一个channel内做归一化,逐Instance( channel) 计算均值和方差
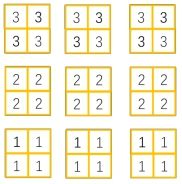
例如:对于下图,在生成图像时,每张图片的风格不同,不能对多个图像进行标准化。
Instance Normalization会在每个样本的每个通道进行标准化,如下面数据中,对其中每个田字格数据分别进行标准化
nn.InstanceNorm
主要参数:
• num_features:一个样本特征数量(最重要)
• eps:分母修正项
• momentum:指数加权平均估计当前mean/var
• affine:是否需要affine transform
• track_running_stats:是训练状态,还是测试状态
nn.InstanceNorm2d(num_features, eps=1e-05, momentum=0.1,
affine=False, track_running_stats=False)
代码实现:
flag = 1
# flag = 0
if flag:
batch_size = 3
num_features = 3
momentum = 0.3
features_shape = (2, 2)
feature_map = torch.ones(features_shape)
feature_maps = torch.stack([feature_map * (i + 1) for i in range(num_features)], dim=0)
feature_maps_bs = torch.stack([feature_maps for i in range(batch_size)], dim=0)
print("Instance Normalization")
print("input data:\n{} shape is {}".format(feature_maps_bs, feature_maps_bs.shape))
instance_n = nn.InstanceNorm2d(num_features=num_features, momentum=momentum)
outputs = instance_n(feature_maps_bs)
print(outputs)
print("\niter:{}, running_mean.shape: {}".format(i, instance_n.running_mean))
| Instance Normalization input data: tensor([[[[1., 1.], [1., 1.]], ... [[3., 3.], [3., 3.]]]]) shape is torch.Size([3, 3, 2, 2]) tensor([[[[0., 0.], [0., 0.]],
[[0., 0.], [0., 0.]], ... [[0., 0.], [0., 0.]]]]) |
由于主通道计算,也就是标准化时是按照一个features_shape的大小进行标准化,由于每个features_shape中的数据都是相同的,因此最终输出都是0。
3. Group Normalization
起因:小batch样本中, BN估计的值不准
思路:将channel方向分group,然后每个group内做归一化
注意事项:
不再有running_mean和running_var
gamma和beta为逐通道( channel)的
应用场景:大模型(小batch size)任务
细节:
Group Normalization介于Instance Normalization和Layer Normalization之间,其首先将channel分为许多组(group),对每一组做归一化,BN会受到batchsize大小的影响。如果batchsize太小,算出的均值和方差就会不准确,如果太大,显存又可能不够用。GN算的是channel方向每个group的均值和方差,和batchsize没关系,自然就不受batchsize大小的约束。随着batchsize的减小,GN的表现基本不受影响,而BN的性能却越来越差。
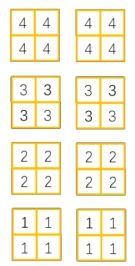
如下面数据中,Group Normalization对每个样本特征进行分组,如分为两组,然后再按组进行标准化
nn.GroupNorm
主要参数:
• num_groups:分组数,通常设置为2,4,8,16...
• num_channels:通道数(特征数)
• eps:分母修正项
• affine:是否需要affine transform
nn.GroupNorm(num_groups, num_channels,
eps=1e-05, affine=True)
代码实现:
flag = 1
# flag = 0
if flag:
batch_size = 2
num_features = 4
# 分组数,注意分组数要能被num_features整除
num_groups = 2 # 3
features_shape = (2, 2)
feature_map = torch.ones(features_shape)
feature_maps = torch.stack([feature_map * (i + 1) for i in range(num_features)], dim=0)
feature_maps_bs = torch.stack([feature_maps * (i + 1) for i in range(batch_size)], dim=0)
gn = nn.GroupNorm(num_groups, num_features)
outputs = gn(feature_maps_bs)
print("Group Normalization")
# 打印权重,由于gamma和beta为逐通道( channel)的,所以大小与num_features数量一致
print(gn.weight.shape)
print(feature_maps_bs[0])
print(outputs[0])
| Group Normalization torch.Size([4]) tensor([[[1., 1.], [1., 1.]],
[[2., 2.], [2., 2.]],
[[3., 3.], [3., 3.]],
[[4., 4.], [4., 4.]]]) tensor([[[-1.0000, -1.0000], [-1.0000, -1.0000]],
[[ 1.0000, 1.0000], [ 1.0000, 1.0000]],
[[-1.0000, -1.0000], [-1.0000, -1.0000]],
[[ 1.0000, 1.0000], [ 1.0000, 1.0000]]], grad_fn= |
这里分为两个组,计算均值与方差是按照分组后的数据进行计算的。
小结:四种Normalization的工作方式如下图:
BatchNorm:batch方向做归一化,算N*H*W的均值
LayerNorm:channel方向做归一化,算C*H*W的均值
InstanceNorm:一个channel内做归一化,算H*W的均值
GroupNorm:将channel方向分group,然后每个group内做归一化


