自动驾驶之-MATLAB环境下基于深度学习的目标检测(停车标志检测)
深度学习,一个大号的,现代的,黑箱的,信号/图像处理器,本文程序运行环境为MATLAB R2018A。
本文简要讲解如何使用深度学习(R-CNN网络)来训练一个停车标志检测器。R-CNN是一种目标检测框架,使用卷积神经网络(CNN)对图像中的区域进行分类。R-CNN 目标检测器不使用滑动窗口对每个区域进行分类,而是仅处理可能包含目标的区域,因此降低了CNN 的计算成本。为了说明如何训练 R-CNN 停车标志检测器,本文使用迁移学习方法,因此预训练的网络已经学习到了丰富的图像特征,只需要对权重进行小幅调整来微调网络。
迁移学习的优点是减少了训练所需的图像数量和训练时间。首先,使用CIFAR-10数据集对CNN进行预训练,该数据集具有50,000张训练图像。然后,仅使用41个训练图像对预训练的CNN进行微调以进行停车标志检测。如果不预先训练CNN,训练停车标志检测器将需要更多的图像。
注意:本例需要计算机视觉工具箱、图像处理工具箱、神经网络工具箱以及统计和机器学习工具箱。
下载CIFAR-10图像数据
下载CIFAR-10数据集,数据集包含 50,000 张图像。每个图像是一个 32x32 RGB的图像
加载CIFAR-10训练数据和测试数据
[trainingImages,trainingLabels,testImages,testLabels] = helperCIFAR10Data.load(cifar10Data);
size(trainingImages)

ans = 1×4

          32          32           3       50000
CIFAR-10有10个图像类别
numImageCategories = 10;
categories(trainingLabels)
ans = 10x1 cell array
{'airplane' }
{'automobile'}
{'bird' }
{'cat' }
{'deer' }
{'dog' }
{'frog' }
{'horse' }
{'ship' }
{'truck' }
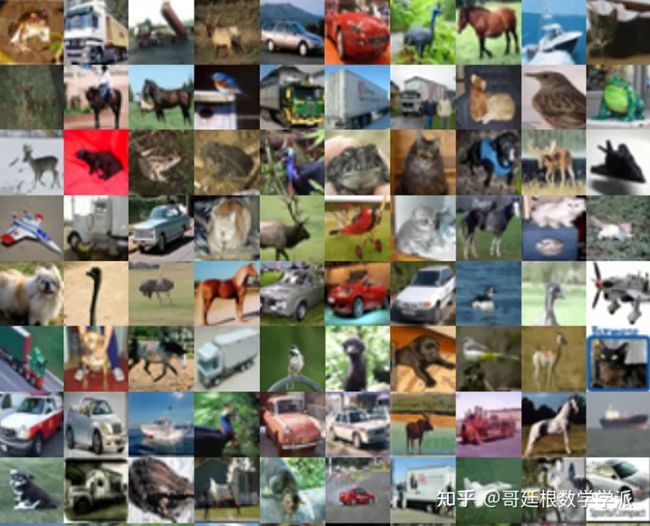
展示部分训练图片
figure
thumbnails = trainingImages(:,:,:,1:100);
montage(thumbnails)
创建卷积神经网络 (CNN)
CNN 由一系列层组成,其中每层定义一个特定的计算。神经网络工具箱提供了逐层设计 CNN 的功能,在本文中,用到了以下层:
· imageInputLayer - Image input layer
· convolutional2dLayer - 2D convolution layer for Convolutional Neural Networks
· reluLayer - Rectified linear unit (ReLU) layer
· maxPooling2dLayer - Max pooling layer
· fullyConnectedLayer - Fully connected layer
· softmaxLayer - Softmax layer
· classificationLayer - Classification output layer for a neural network
为 32x32x3的CIFAR-10图像创建输入层
[height, width, numChannels, ~] = size(trainingImages);
imageSize = [height width numChannels];
inputLayer = imageInputLayer(imageSize)
接下来定义网络的中间层。中间层由卷积、ReLU(整流线性单元)和池化层的重复块组成,这3层构成了卷积神经网络的核心构建块。卷积层定义了滤波器的权重,这些权重在网络训练过程中进行更新。ReLU层为网络添加了非线性,使网络可以近似非线性函数,将图像像素映射到图像的语义内容。池化层对数据进行下采样。在多层网络中,应谨慎使用池化层,避免在网络中过早地对数据进行下采样。
卷积层参数
filterSize = [5 5];
numFilters = 32;
middleLayers = [

%第一个卷积层有32个5x5x3大小的滤波器
convolution2dLayer(filterSize, numFilters, 'Padding', 2)
% 添加ReLU层:
reluLayer()
% 接下来是具有3x3空间池化区域的最大池化图层,这将对数据进行下采样:从32x32降维到15x15。
maxPooling2dLayer(3, 'Stride', 2)
% 重复3个核心层,完成网络的中间部分
convolution2dLayer(filterSize, numFilters, 'Padding', 2)
reluLayer()
maxPooling2dLayer(3, 'Stride',2)
convolution2dLayer(filterSize, 2 * numFilters, 'Padding', 2)
reluLayer()
maxPooling2dLayer(3, 'Stride',2)
]
middleLayers =
9x1 Layer array with layers:
1 '' Convolution 32 5x5 convolutions with stride [1 1] and padding [2 2 2 2]
2 '' ReLU ReLU
3 '' Max Pooling 3x3 max pooling with stride [2 2] and padding [0 0 0 0]
4 '' Convolution 32 5x5 convolutions with stride [1 1] and padding [2 2 2 2]
5 '' ReLU ReLU
6 '' Max Pooling 3x3 max pooling with stride [2 2] and padding [0 0 0 0]
7 '' Convolution 64 5x5 convolutions with stride [1 1] and padding [2 2 2 2]
8 '' ReLU ReLU
9 '' Max Pooling 3x3 max pooling with stride [2 2] and padding [0 0 0 0]
可通过重复这3个基本层来创建更深层次的网络。但是,应减少池化层的数量,以避免过早地对数据进行下采样,在网络早期进行下采样会丢失有用的图像信息。
CNN的最后一层通常由全连接层和softmax层组成。
finalLayers = [

%添加一个包含64个输出神经元的全连接层
fullyConnectedLayer(64)
% 添加ReLU层
reluLayer
% 添加最后一个全连接层
fullyConnectedLayer(numImageCategories)
%添加softmax 层和分类层
softmaxLayer
classificationLayer
]
finalLayers =
5x1 Layer array with layers:
1 '' Fully Connected 64 fully connected layer
2 '' ReLU ReLU
3 '' Fully Connected 10 fully connected layer
4 '' Softmax softmax
5 '' Classification Output crossentropyex
将输入层、中间层和最终层组合起来
layers = [
 inputLayer
 middleLayers
 finalLayers
 ]
layers =
15x1 Layer array with layers:
1 '' Image Input 32x32x3 images with 'zerocenter' normalization
2 '' Convolution 32 5x5 convolutions with stride [1 1] and padding [2 2 2 2]
3 '' ReLU ReLU
4 '' Max Pooling 3x3 max pooling with stride [2 2] and padding [0 0 0 0]
5 '' Convolution 32 5x5 convolutions with stride [1 1] and padding [2 2 2 2]
6 '' ReLU ReLU
7 '' Max Pooling 3x3 max pooling with stride [2 2] and padding [0 0 0 0]
8 '' Convolution 64 5x5 convolutions with stride [1 1] and padding [2 2 2 2]
9 '' ReLU ReLU
10 '' Max Pooling 3x3 max pooling with stride [2 2] and padding [0 0 0 0]
11 '' Fully Connected 64 fully connected layer
12 '' ReLU ReLU
13 '' Fully Connected 10 fully connected layer
14 '' Softmax softmax
15 '' Classification Output crossentropyex
初始化卷积层权重
layers(2).Weights = 0.0001 * randn([filterSize numChannels numFilters]);使用 CIFAR-10 数据训练 CNN
现在定义了网络架构,可以使用 CIFAR-10 训练数据对其进行训练。首先,使用 trainingOptions函数设置网络训练算法。网络训练使用随机梯度下降与动量 (SGDM)算法,初始学习率为 0.001。在训练期间,初始学习速率每 8 个 epoch 降低一次,共运行 40 个 epoch。
注意:训练算法使用 128 个图像的mini-batch,如果使用 GPU 进行训练,由于 GPU 上的内存限制,可能需要减小mini-batch大小。
设置网络训练参数
opts = trainingOptions('sgdm', ...
 'Momentum', 0.9, ...
 'InitialLearnRate', 0.001, ...
 'LearnRateSchedule', 'piecewise', ...
 'LearnRateDropFactor', 0.1, ...
 'LearnRateDropPeriod', 8, ...
 'L2Regularization', 0.004, ...
 'MaxEpochs', 40, ...
 'MiniBatchSize', 128, ...
 'Verbose', true);
使用 trainNetwork函数训练网络
cifar10Net = trainNetwork(trainingImages, trainingLabels, layers, opts);验证 CIFAR-10 网络
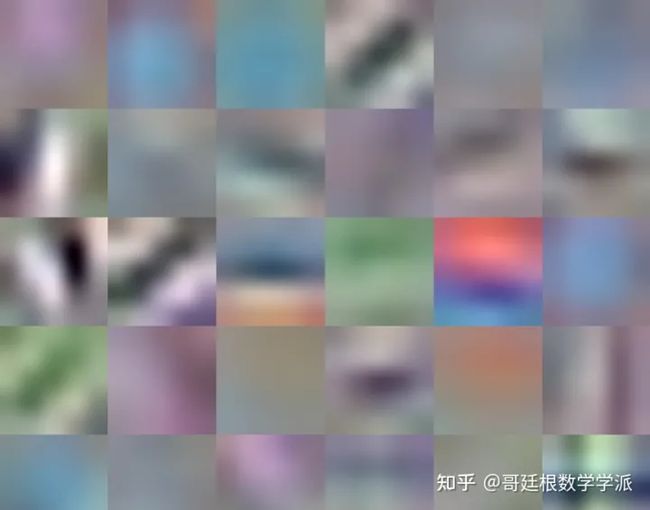
在网络训练完成后,进行验证以确保训练成功。首先,可视化第一个卷积层的滤波器权重
第一层权重应具有一些明确定义的结构,如果权重看起来仍然是随机的,则表明网络可能需要额外的训练。如上图所示,第一层滤波器已从 CIFAR-10 训练数据中学习到边缘特征。现在使用 CIFAR-10 测试数据来测试网络的分类精度。
YTest = classify(cifar10Net, testImages);计算准确率
accuracy = sum(YTest == testLabels)/numel(testLabels)accuracy = 0.7456
加载训练数据
现在网络在CIFAR-10分类任务中运行良好,可以使用迁移学习方法来微调网络以进行停车标志检测。
首先加载停车标志的ground truth数据。
关于ground truth,ground truth是摄影、测量与遥感学领域常用词汇,其解释就是字面意思:地面真值,地面实况;延伸到图像处理、机器学习等其他领域一般表示真实值,正确答案(或正确测量数据)。它是一个正确的基准值,一般用来进行误差估算和效果评价。
加载ground truth数据
data = load('stopSignsAndCars.mat', 'stopSignsAndCars');
stopSignsAndCars = data.stopSignsAndCars;
更新图像文件的路径
visiondata = fullfile(toolboxdir('vision'),'visiondata');
stopSignsAndCars.imageFilename = fullfile(visiondata, stopSignsAndCars.imageFilename);
summary(stopSignsAndCars)
Variables:
imageFilename: 41x1 cell array of character vectors
stopSign: 41x1 cell
carRear: 41x1 cell
carFront: 41x1 cell
训练数据包含在一个表中,该表包含停车标志、车前和后方的图像文件名和 ROI 标签。每个 ROI 标签都是图像中感兴趣目标周围的边界框。为了训练停车标志检测器,只需要停车标志ROI标签,必须移除汽车前部和后部的 ROI 标签:
仅保留图像文件名和停车标志ROI标签
stopSigns = stopSignsAndCars(:, {'imageFilename','stopSign'});显示一个训练图像和ground truth边界框
I = imread(stopSigns.imageFilename{1});
I = insertObjectAnnotation(I,'Rectangle',stopSigns.stopSign{1},'stop sign','LineWidth',8);
figure
imshow(I)
注意:此数据集中只有 41 个训练图像,仅使用41张图像从头开始训练R-CNN目标检测器是不切实际的,由于停车标志检测器是通过微调在较大数据集上预训练的网络(CIFAR-10 具有 50000 个训练图像)来训练的,因此使用小得多的数据集是较为可行的。
训练R-CNN 停车标志检测器
最后,使用 trainRCNNObjectDetector 函数训练 R-CNN 目标检测器,输入是ground truth表,包含标记的停车标志图像、预训练的 CIFAR-10 网络和训练参数,训练函数会自动将CIFAR-10 网络(10 类)修改为可将图像分类为 2 类的网络:停车标志和背景。
设置训练参数
 options = trainingOptions('sgdm', ...
 'MiniBatchSize', 128, ...
 'InitialLearnRate', 1e-3, ...
 'LearnRateSchedule', 'piecewise', ...
 'LearnRateDropFactor', 0.1, ...
 'LearnRateDropPeriod', 100, ...
 'MaxEpochs', 100, ...
 'Verbose', true);
训练R-CNN目标检测器
 rcnn = trainRCNNObjectDetector(stopSigns, cifar10Net, options, ...
 'NegativeOverlapRange', [0 0.3], 'PositiveOverlapRange',[0.5 1])
测试R-CNN停车标志检测器
读取测试图像
testImage = imread('stopSignTest.jpg');检测停车标志
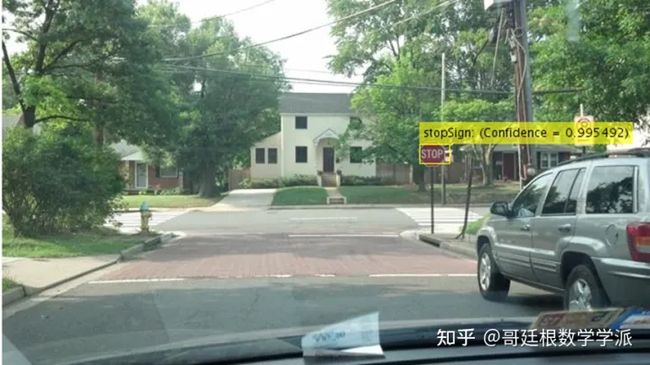
[bboxes,score,label] = detect(rcnn,testImage,'MiniBatchSize',128)detect 函数返目标边界框、检测分数和类别标签,分数范围介于 0 和 1 之间,表示检测的置信度
显示检测结果
[score, idx] = max(score);
bbox = bboxes(idx, :);
annotation = sprintf('%s: (Confidence = %f)', label(idx), score);
outputImage = insertObjectAnnotation(testImage, 'rectangle', bbox, annotation);
figure
imshow(outputImage)
R-CNN检测器中使用的网络也可用于处理整个测试图像
经过训练的网络存储在 R-CNN 检测器中
rcnn.Networkans =
SeriesNetwork with properties:
Layers: [15x1 nnet.cnn.layer.Layer]
从softmax层中提取激活值
featureMap = activations(rcnn.Network, testImage, 'softmax');softmax激活值存储在3-D数组中
size(featureMap)ans = 1×3
43 78 2
第3个维度对应于目标类别
rcnn.ClassNamesans = 2x1 cell array
{'stopSign' }
{'Background'}
停车标志特征图存储在第一个通道中
stopSignMap = featureMap(:, :, 1);由于网络中的下采样操作,激活输出的大小小于输入图像,要生成更好的可视化结果,将 stopSignMap 的大小调整为输入图像的大小。
调整stopSignMap大小便于可视化
[height, width, ~] = size(testImage);
stopSignMap = imresize(stopSignMap, [height, width]);
最后可视化特征图
figure
imshow(featureMapOnImage)
测试图像中的停车标志与网络激活中的最大峰值对应,这有助于验证 R-CNN 检测器中使用的 CNN 是否学会了识别停车标志。如果有其他峰值,表明训练需要额外的数据来帮助防止误报
代码
正在为您运送作品详情


