ROS学习初探之自建小车模型并进行仿真(三)
在gazebo环境中,用电脑键盘控制小车
在上一节,我们配置好了xacro文件,那么这一节我们实现小车在gazebo环境中通过键盘控制节点动起来。
一、配置各个文件
修改CMakeLists.txt文件
下面是我修改的由SolidWorks导出的tianbot_mini_description功能包的CMakeLists.txt文件:
cmake_minimum_required(VERSION 2.8.3)

project(tianbot_mini_description)

find_package(catkin REQUIRED COMPONENTS
  urdf
  xacro
  gazebo_plugins
  gazebo_ros
  gazebo_ros_control
  roscpp
  rospy
  controller_manager
  message_generation
  std_msgs
)


catkin_package(
  CATKIN_DEPENDS urdf xacro
)

include_directories(
  ${catkin_INCLUDE_DIRS}
)
修改package.xml文件
下面是我修改的由SolidWorks导出的tianbot_mini_description功能包的package.xml文件,这里配置好各个话题的依赖:
  tianbot_mini_description
  1.0.0

    URDF Description package for tianbot_mini_description
    This package contains configuration data, 3D models and launch files
for tianbot_mini_description robot

  TODO

  BSD
  catkin
  roslaunch
  robot_state_publisher
  rviz
  joint_state_publisher
  gazebo
urdf
  xacro
  urdf
  xacro
  urdf
  xacro
gazebo_plugins
  gazebo_ros
  gazebo_ros_control
  roscpp
  rospy
  gazebo_plugins
  gazebo_ros
  gazebo_ros_control
  roscpp
  rospy
  gazebo_plugins
  gazebo_ros
  gazebo_ros_control
  roscpp
  rospy
修改yaml文件
打开tianbot_mini_description/config/joint_names_tianbot_mini_description.yaml文件,修改为以下所示:
controller_joint_names: ['', 'left_wheel_joint', 'right_wheel_joint', 'caster_wheel_joint', 'casterball_joint', ]
controllers: {
   base_controller: {
       type: diff_controller,
       base_frame_id: base_footprint,
       ticks_meter: 4100,
       Kp: 12,
       Kd: 12,
       Ki: 0,
       Ko: 50,
       accel_limit: 1.0
    }
}
加入激光雷达插件
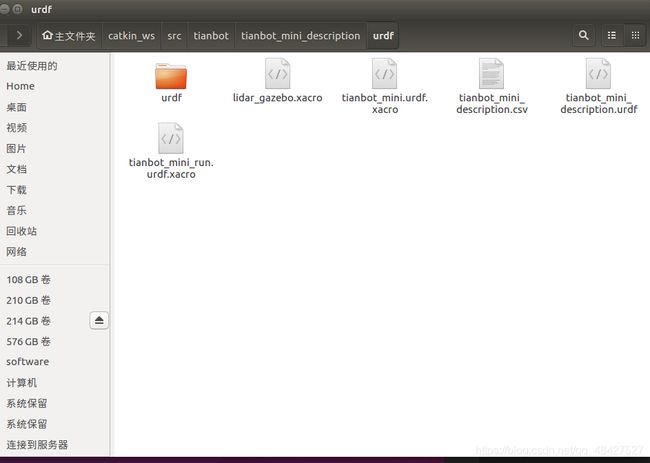
在tianbot_mini_description/urdf文件夹中新建lidar_gazebo.xacro文件

                0 0 0 0 0 0
                false
                5.5


                        360
                        1
                        -3
                        3


                      0.10
                      6.0
                      0.01


                      gaussian
                      0.0
                      0.01


                    /scan
                    lidar_Link
接着再创建tianbot_mini_run.urdf.xacro文件,内容如下:
这里相当于把小车和雷达结合在一起了,这样只需要在launch文件中调用这个xacro文件,就相当于调用激光雷达小车了。
配置launch文件
完成上述工作后,我们打开tianbot_mini_description/launch文件夹,创建tianbotmini_laser_gazebo.launch文件,我们先看看自动生成的gazebo.launch文件:
基于gazebo.launch文件以及古月老师的资料,我们在tianbotmini_laser_gazebo.launch文件编写代码:
保存后,我们可以在gazebo中打开我们的小车了,打开终端,输入:
roslaunch tianbot_mini_description tianbotmini_laser_gazebo.launch
 如上图,打开的的是一个gazebo的空环境,我们可以放一些障碍物进去
 打开一个新终端,打开rviz
rosrun rviz rviz
在rviz中设置"Fixed Frame"为"base_footprint",先添加一个RobotModel插件,然后添加一个LaserSCan类型的插件,修改插件订阅的话题为"/scan",就可以看到界面中的激光数据了。

二、键盘控制
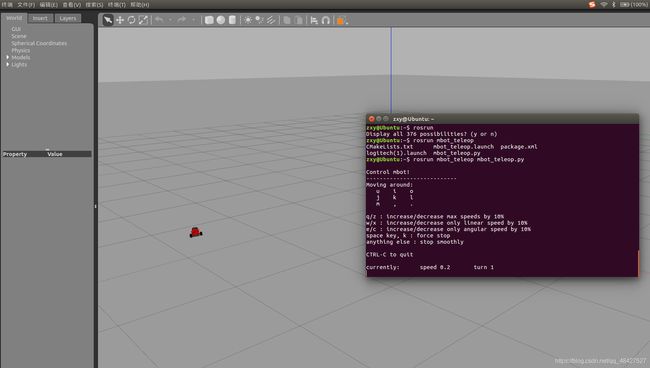
这里我直接当了掉包侠,因为我看到古月老师的mbot_teleop功能包里面,py文件里控制程序发布的话题与我机器人的话题一致,所以我改都不用改,直接
roslaunch mbot_teleop mbot_teleop.launch
也可以
rosrun mbot_teleop mbot_teleop.py
就能通过键盘控制节点控制小车运动了。
 我们可以看一看古月老师的mbot_teleop.py文件:
#!/usr/bin/env python
# -*- coding: utf-8 -*-

import rospy
from geometry_msgs.msg import Twist
import sys, select, termios, tty

msg = """
Control mbot!
---------------------------
Moving around:
   u    i    o
   j    k    l
   m    ,    .

q/z : increase/decrease max speeds by 10%
w/x : increase/decrease only linear speed by 10%
e/c : increase/decrease only angular speed by 10%
space key, k : force stop
anything else : stop smoothly

CTRL-C to quit
"""

moveBindings = {
        'i':(1,0),
        'o':(1,-1),
        'j':(0,1),
        'l':(0,-1),
        'u':(1,1),
        ',':(-1,0),
        '.':(-1,1),
        'm':(-1,-1),
           }

speedBindings={
        'q':(1.1,1.1),
        'z':(.9,.9),
        'w':(1.1,1),
        'x':(.9,1),
        'e':(1,1.1),
        'c':(1,.9),
          }

def getKey():
    tty.setraw(sys.stdin.fileno())
    rlist, _, _ = select.select([sys.stdin], [], [], 0.1)
    if rlist:
        key = sys.stdin.read(1)
    else:
        key = ''

    termios.tcsetattr(sys.stdin, termios.TCSADRAIN, settings)
    return key

speed = .2
turn = 1

def vels(speed,turn):
    return "currently:\tspeed %s\tturn %s " % (speed,turn)

if __name__=="__main__":
    settings = termios.tcgetattr(sys.stdin)

    rospy.init_node('mbot_teleop')
    pub = rospy.Publisher('/cmd_vel', Twist, queue_size=5)

    x = 0
    th = 0
    status = 0
    count = 0
    acc = 0.1
    target_speed = 0
    target_turn = 0
    control_speed = 0
    control_turn = 0
    try:
        print msg
        print vels(speed,turn)
        while(1):
            key = getKey()
            # 运动控制方向键(1:正方向,-1负方向)
            if key in moveBindings.keys():
                x = moveBindings[key][0]
                th = moveBindings[key][1]
                count = 0
            # 速度修改键
            elif key in speedBindings.keys():
                speed = speed * speedBindings[key][0]  # 线速度增加0.1倍
                turn = turn * speedBindings[key][1]    # 角速度增加0.1倍
                count = 0

                print vels(speed,turn)
                if (status == 14):
                    print msg
                status = (status + 1) % 15
            # 停止键
            elif key == ' ' or key == 'k' :
                x = 0
                th = 0
                control_speed = 0
                control_turn = 0
            else:
                count = count + 1
                if count > 4:
                    x = 0
                    th = 0
                if (key == '\x03'):
                    break

            # 目标速度=速度值*方向值
            target_speed = speed * x
            target_turn = turn * th

            # 速度限位,防止速度增减过快
            if target_speed > control_speed:
                control_speed = min( target_speed, control_speed + 0.02 )
            elif target_speed < control_speed:
                control_speed = max( target_speed, control_speed - 0.02 )
            else:
                control_speed = target_speed

            if target_turn > control_turn:
                control_turn = min( target_turn, control_turn + 0.1 )
            elif target_turn < control_turn:
                control_turn = max( target_turn, control_turn - 0.1 )
            else:
                control_turn = target_turn

            # 创建并发布twist消息
            twist = Twist()
            twist.linear.x = control_speed;
            twist.linear.y = 0;
            twist.linear.z = 0
            twist.angular.x = 0;
            twist.angular.y = 0;
            twist.angular.z = control_turn
            pub.publish(twist)

    except:
        print e

    finally:
        twist = Twist()
        twist.linear.x = 0; twist.linear.y = 0; twist.linear.z = 0
        twist.angular.x = 0; twist.angular.y = 0; twist.angular.z = 0
        pub.publish(twist)

    termios.tcsetattr(sys.stdin, termios.TCSADRAIN, settings)
三、小结
本小节我们通过键盘控制节点控制控制gazebo环境中的小车。下一节博主说一说怎样进行gazebo环境的搭建。其实我感觉最重要的工作就是配置好xacro文件,剩下的包,可以参考调用古月老师的mbot功能包,然后再稍作修改就可以啦。剩下的内容还有gmapping,小车的自动探索导航等,最后应该还有一个教大家如何对模型表面进行贴纸的教程,各位敬请期待。

参考资料
1.古月老师的<