Unity脚本(一)
视频教程:https://www.bilibili.com/video/BV12s411g7gU/?p=112
目录
脚本
特性
控制台Console
脚本生命周期
Assembly-CSharp.dll
调试
Component
CompareTag
脚本
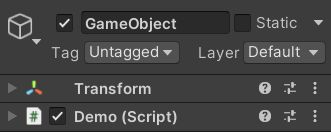
脚本是附加在游戏物体上用于定义游戏对象行为指令的代码,需要继承自MonoBehaviour类
编译过程
源代码(CLS)-->中间语言-->(Mono Runtime)-->机器码
脚本与对象
脚本:在Project中创建的cs文件,是一个类
对象:当脚本挂载至某一游戏对象上时,该组件可被视作该类(脚本)的实例化对象
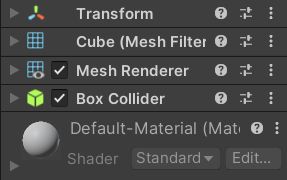
游戏对象挂载的各种组件均是该类(脚本)的引用
特性
在脚本中编写的字段与在编译器中显示的关系
using System.Collections;
using System.Collections.Generic;
using UnityEngine;

public class Demo : MonoBehaviour
{
    [SerializeField]
    private int a;
    [HideInInspector]
    private int b;
    [Range(0, 100)]
    public float c;
}
[SerializeField] 序列化字段作用:在编辑器中显示私有变量
[Hidelnlnspector]∶在编译器中隐藏字段
[Range]∶限定取值范围
控制台Console
Clear:清除所有信息
1.Clear on Play:播放时清空消息
2.Clear on Build:在构建项目时清空控制台
3.Clear on Recompile:在编译时清空控制台
Collapse:折叠相同消息
Error Pause:如果异常暂停执行
接下来从左至右依次消息开关、警告开关、错误开关
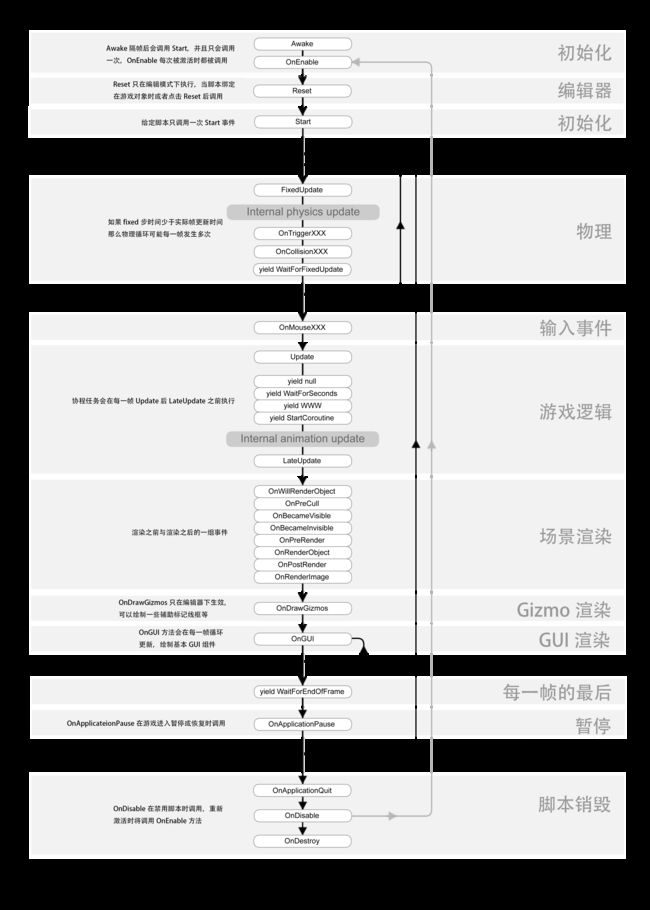
脚本生命周期
Awake 唤醒: 当物体载入时立即调用1次;常用于在游戏开始前进行初始化,可以判断当满足某种条件执行此脚本this.enable=true
ps:脚本生命周期是一个子线程,这个线程专门调用游戏对象被创建时的方法,所以Awake()和脚本对象的启用无关
OnEnable 启用:每当脚本对象启用时调用
Start 开始:物体载入且脚本对象启用时被调用1次。常用于数据或游戏逻辑初始化,执行时机晚于Awake(先所有的Awake后Start)
ps:无需在unity脚本中使用属性和构造函数,因为属性在组件中不可见,而构造函数的初始化工作由Awake和Start代替,且构造函数中无法调用Unity相关API
using System.Collections;
using System.Collections.Generic;
using UnityEngine;

public class Demo : MonoBehaviour
{
    public Demo(){
        Debug.Log("构造函数");
        print(Time.time);
    }
}
执行结果如下,构造函数被执行两次,且在输出Time.time时报错
而对于静态构造函数,静态构造函数在该类第一次被访问时调用,任何使用该类的操作都会引发静态构造函数的执行。静态构造函数是线程安全的,并且是单例的。当用在泛型类中时,静态构造函数对于泛型的每个实例化都调用一次
物理阶段
FixedUpdate 固定更新:脚本启用后,固定时间间隔被调用,适用于对游戏对象做物理操作,例如移动等
ps:设置更新频率:Edit-->Project Setting-->Time-->Fixed Timestep,默认为0.02s
OnCollisionXXX 碰撞:当满足碰撞条件时调用
OnTriggerXXX 触发:当满足触发条件时调用。
输入事件
OnMouseEnter 鼠标移入:鼠标移入到当前Collider时调用
OnMouseOver鼠标经过:鼠标经过当前Collider 时调用
OnMouseExit 鼠标离开:鼠标离开当前Collider 时调用
OnMouseDown 鼠标按下:鼠标按下当前Collider 时调用
OnMouseUp 鼠标抬起:鼠标在当前Collider上抬起时调用
游戏逻辑
Update 更新:脚本启用后,每次渲染场景时调用,频率与设备性能及渲染量有关
LateUpdate 延迟更新:在Update 函数被调用后执行,适用于跟随逻辑
场景渲染
OnBecameVisible 当可见:当Mesh Renderer在任何相机上可见时调用
OnBecameInvisible 当不可见:当Mesh Renderer在任何相机上都不可见时调用
结束阶段
OnApplicationQuit 当程序结束:应用程序退出时被调用
OnDisable 当不可用:对象变为不可用或附属游戏对象非激活状态时此函数被调用
OnDestroy 当销毁:当脚本销毁或附属的游戏对象被销毁时被调用
编写脚本Lifecycle,分别将其挂载至Main Camera和Directional Light
using System.Collections;
using System.Collections.Generic;
using UnityEngine;

public class Lifecycle : MonoBehaviour
{
    //创建游戏对象-->立即执行
    void Awake()
    {
        Debug.Log("Awake--" + Time.time + "--" + this.name);
    }

    //创建游戏对象-->脚本启用-->执行
    void Start()
    {
        Debug.Log("Start--" + Time.time + "--" + this.name);
    }

    //每隔0.02s执行
    //物理相关,不受到渲染影响
    void FixedUpdate()
    {
        Debug.Log(Time.time);
    }

    void OnMouseDown()
    {

    }

    //渲染帧执行,执行间隔不固定
    //游戏逻辑
    void Update()
    {

    }
}
两个游戏对象的Awake()先于Start()执行,同时可以发现FixedUpdate每隔0.02s被调用一次
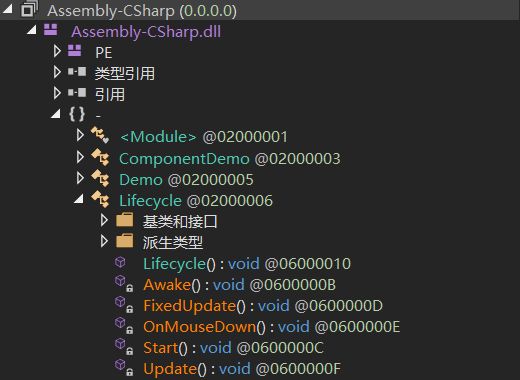
Assembly-CSharp.dll
Assembly-CSharp.dll位于:项目名称\Library\ScriptAssemblies
使用dnSpy打开即可查看项目中创建的所有脚本
dnSpy下载:https://github.com/dnSpy/dnSpy/releases
Debug.Log与print
Debug是一个密闭的类,而print是MonoBehaviour的一个成员;使用print必须要继承 MonoBehaviour类,而 Debug不用
public static void print(object message)
{
     Debug. Log(message);
}
参考博客:https://blog.csdn.net/qq_42351033/article/details/83990499
调试
编写测试脚本_Debug并将其挂载至某一游戏对象上
using System.Collections;
using System.Collections.Generic;
using UnityEngine;

public class _Debug : MonoBehaviour
{
    public float t;
    void Update()
    {
        t= Time.time;
    }
}
运行场景并暂停
![]()
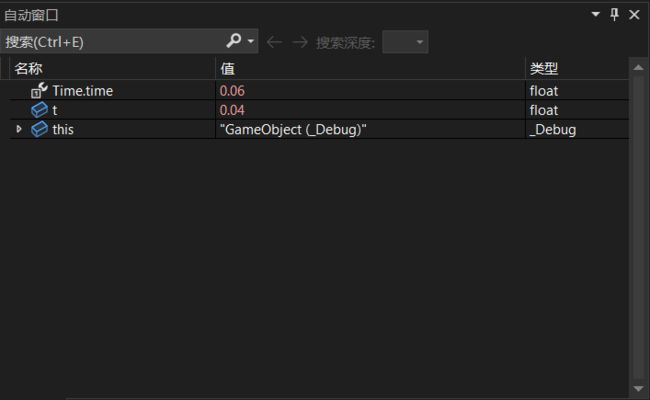
双击脚本进入VS并点击上方的附加到Unity
回到unity点击逐帧执行后弹回VS,即可发现下方的自动窗口显现相关数据
点击上方的继续弹回unity并点击逐帧执行,再次弹回VS发现脚本的数据发生改变
Component
挂载的组件均继承自Component
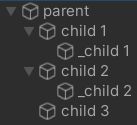
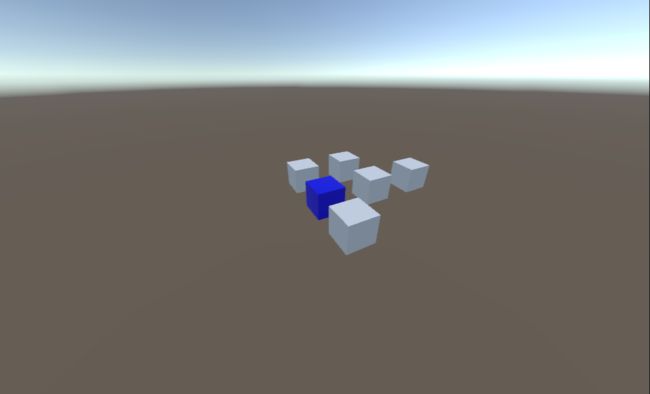
创建一个命名为parent作为的父物体,然后为其创建三个子物体分别命名为child 1、child 2、child 3,之后分别为child 1和child 2创建子物体并分别命名为_child 1和_child 2
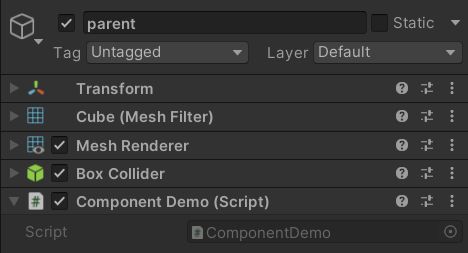
编写如下脚本并挂载至parent
using System.Collections;
using System.Collections.Generic;
using UnityEngine;

public class ComponentDemo : MonoBehaviour
{
    void OnGUI()
    {
        if (GUILayout.Button("transform"))
        {
            this.transform.position = new Vector3(0, 0, 10);
        }
        if (GUILayout.Button("toRed"))
        {
            this.GetComponent().material.color = Color.red;
        }
        if (GUILayout.Button("getAllComponents"))
        {
            foreach (var item in this.GetComponents())
            {
                Debug.Log(item);
            }
        }
        if (GUILayout.Button("getAllComponentsInChildren"))
        {
            foreach (var item in this.GetComponentsInChildren())
            {
                Debug.Log(this.name + "--" + item); ;
                item.material.color = Color.red;
            }
        }
        if (GUILayout.Button("getComponentInChildren"))
        {
            this.GetComponentInChildren().material.color = Color.red;
        }
    }

    void Reset()
    {
        this.GetComponent().material.color = Color.blue;
    }
}
Component.GetCompoment
Component.GetComponents
Component.GetCompomentInChildren
Component.GetComponentsInChildren
参考博客:https://blog.csdn.net/kaixindragon/article/details/44776451
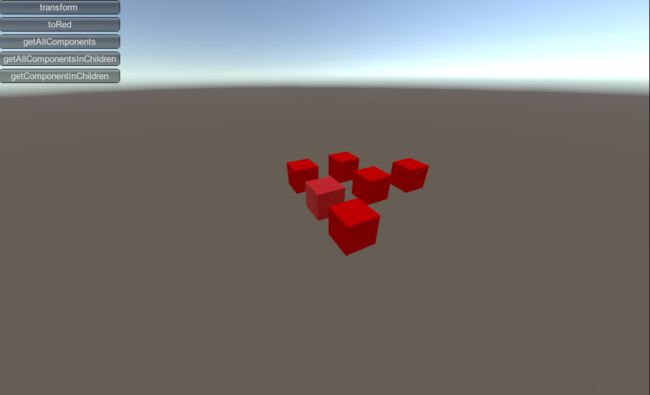
运行后左上角出现四个按钮
transform按钮:将父物体parent及其植物体移动至(0,0,10)
toRed按钮:改变父物体parent材质的颜色
getAllComponents按钮:获取挂载在父物体parent上的所有组件
getAllComponentsInChildren按钮:获取挂载在父物体parent及其子物体上的所有MeshRenderer组件并将改变它们的材质颜色
getComponentInChildren按钮:从父物体parent开始,进行深度优先遍历,找到MeshRenderer组件并将其材质颜色更改为红色(因父物体上挂载了MeshRenderer,故只有父物体parent改变了颜色)
Reset:unity 提供的一个重置功能的函数,该方法只能在编辑模式下使用,若已经开始运行,则该方法是不会被调用的(所以Debug.log之类的常用测试方法方法在Reset函数里面调用是无效的)
转自博客:http://t.csdn.cn/pWsLK
Reset后父物体parent的材质如期变蓝
CompareTag
官方文档:https://docs.unity.cn/cn/2019.4/ScriptReference/GameObject.CompareTag.html
public bool CompareTag (string tag)
检测游戏对象是否使用tag进行了标记
using UnityEngine;
using System.Collections;

public class ExampleClass : MonoBehaviour
{
    void OnTriggerEnter(Collider other)
    {
        if (other.gameObject.CompareTag("Player"))
        {
            Destroy(other.gameObject);
        }
    }
}