Three.js实战项目 智慧城市(三)
概述
如有不明白的可以加QQ:2781128388
实景版源码连接: https://mbd.pub/o/bread/Y5uUmZ9v
科技版源码连接: https://mbd.pub/o/bread/Y5uck5Zr
我们接着上一篇文章接着向下做,此时我们已经成功创建了场景,加载模型和天空盒,现在我们来创建车流
效果
智慧城市项目录制视频
科技风版本:
智慧城市二期视频
创建车流的驾驶路线
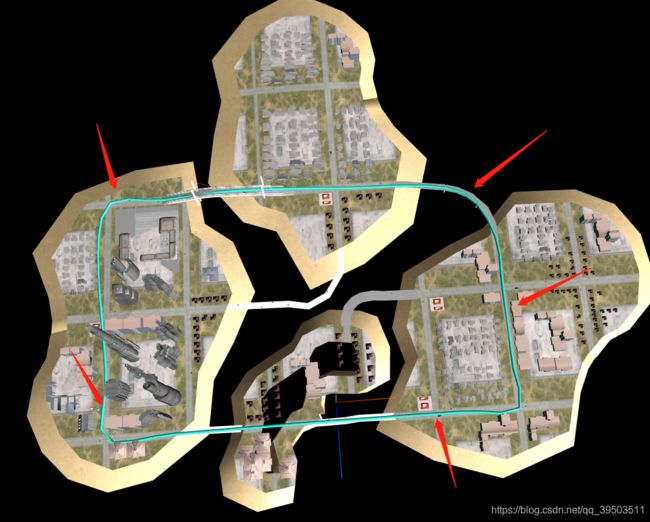
想要创建车流的驾驶路线,首先我们肯定是获取生成路线的点,那这个点怎么生成呢,在实际的开发中这些数据都由建模师来提供就好了,现在我们没有建模师怎么办呢,我们可以通过射线点击来获取模型上的具体坐标点
- 首先我们在ZThree中创建射线的方法
initRaycaster() {
    this.raycaster = new THREE.Raycaster();

    // 绑定点击事件
    this.el.addEventListener("click", evt => {
      let mouse = {
        x: (evt.clientX / window.innerWidth) * 2 - 1,
        y: -(evt.clientY / window.innerHeight) * 2 + 1
      };

      let activeObj = this.fireRaycaster(mouse);
      console.log([activeObj.point.x, activeObj.point.y, activeObj.point.z]);
      //鼠标的变换
      document.body.style.cursor = "pointer";
    });
  }

  fireRaycaster(pointer) {
    // 使用一个新的原点和方向来更新射线
    this.raycaster.setFromCamera(pointer, this.camera);

    let intersects = this.raycaster.intersectObjects(this.scene.children, true);
    //
    if (intersects.length > 0) {
      let selectedObject = intersects[0];
      return selectedObject;
    } else {
      return false;
    }
  }
- 在vue文件中调用此方法
app.initRaycaster();
此时我们点击模型的时候打开控制台就可以看到坐标了

3. 生成曲线
我们将需要的坐标给保存起来,这样我们的一条道路的坐标就可以全部得到,然后我们用过CatmullRomCurve3来生成一条平滑的三维样条曲线
CatmullRomCurve3( points : Array, closed : Boolean, curveType : String, tension : Float )
points – Vector3点数组
closed – 该曲线是否闭合,默认值为false。
curveType – 曲线的类型,默认值为centripetal。
tension – 曲线的张力,默认为0.5。
这是我在模型中获取的道路点,通过点生成的平滑曲线
let curve = new THREE.CatmullRomCurve3(
        [
          new THREE.Vector3(
            247.8136410285273,
            5.226696613573893,
            27.264257040936556
          ),
          new THREE.Vector3(
            172.9267671003173,
            4.922106216119488,
            26.327727484357652
          ),
          new THREE.Vector3(
            88.41242991088691,
            4.256100177764893,
            25.715480175216925
          ),
          new THREE.Vector3(
            -47.703025517324576,
            5.736959934234619,
            25.243020231588545
          ),
          new THREE.Vector3(
            -221.53915292275474,
            4.256100177764893,
            25.980170088048915
          ),
          new THREE.Vector3(
            -312.9081012460704,
            4.626928713862071,
            25.910103357675936
          ),
          new THREE.Vector3(
            -311.9914494856142,
            6.238986910862394,
            -49.63249156259799
          ),
          new THREE.Vector3(
            -312.2489741424233,
            4.256100177764921,
            -309.92463851836413
          ),
          new THREE.Vector3(
            -235.05618309986227,
            4.714111212150186,
            -311.682041340453
          ),
          new THREE.Vector3(
            -146.89815937161939,
            20.742294930662467,
            -311.6983047677284
          ),
          new THREE.Vector3(
            20.366678829227858,
            6.08636532987444,
            -310.78167600348024
          ),
          new THREE.Vector3(
            210.92743497132244,
            4.302199840545654,
            -288.5599691395312
          ),
          new THREE.Vector3(
            247.65887097794243,
            4.302199840545654,
            -222.19703393500717
          ),
          new THREE.Vector3(
            247.675102861609,
            6.27562080612347,
            -142.1290306730999
          ),
          new THREE.Vector3(
            246.56862703653854,
            7.08092538765743,
            -32.716486811368306
          ),
        ],
        true
      );
- 通过曲线生成管道
此时我们先在ZThree中创建一个管道方法
// 创建管道
  loaderTube(curve) {
    let tubeGeometry = new THREE.TubeGeometry(curve, 64, 2, 50, false);
    let tubeMaterial = new THREE.MeshPhongMaterial({
      color: "rgb(45,245,216)",
      transparent: false,
      opacity: 1,
    });
    let tube = new THREE.Mesh(tubeGeometry, tubeMaterial);
    return tube;
  }
- 创建管道
let tube = app.loaderTube(curve);
scene.add(tube);

可以看到我们已经成功的创建了一条绿色的管道线
6. 加载小车模型,小车模型的格式是glb,所以我们在添加一个glb函数的方法
// 加载glb模型
  loaderGlbModel(path, glbName) {
    return new Promise(resolve => {
      if (!this.gltfLoader) {
        this.gltfLoader = new GLTFLoader();
        let dracoLoader = new DRACOLoader();
        dracoLoader.setDecoderPath('draco/');
        this.gltfLoader.setDRACOLoader(dracoLoader)
      }
      this.gltfLoader.setPath(path).load(glbName + ".glb", function (glb) {
        resolve(glb.scene)
      })
    })
  }
加载小车模型
// 定义两个变量,分别为小车的组和小车的轮子数组
let carWheel = [];
let carGroup = new THREE.Group();

car = await app.loaderGlbModel("model/car3/", "car");
      // 改变玻璃的材质,使其透明
      car.getObjectByName("glass").material = new THREE.MeshStandardMaterial({
        color: "white",
        envMap: skyTexture,
        metalness: 1,
        roughness: 0,
        opacity: 0.2,
        transparent: true,
        premultipliedAlpha: true,
        name: "clear",
      });
      car.rotateY(Math.PI);
      carWheel.push(
        car.getObjectByName("wheel_fl"),
        car.getObjectByName("wheel_fr"),
        car.getObjectByName("wheel_rl"),
        car.getObjectByName("wheel_rr")
      );
      carGroup.position.set(
        247.8136410285273,
        5.226696613573893,
        27.264257040936556
      );

      carGroup.lookAt(172.9267671003173, 4.922106216119488, 26.327727484357652);

      carGroup.add(car);
此时我们应该看到的是小车已经加载成功

在render中调用车辆移动
// 车辆移动
        if (this.isCarMove) {
          if (progress > 1.0) {
            progress = 0;
          }
          // 车轮移动
          carWheel.forEach((e) => e.rotateX(-0.1));
          progress += speed;
          if (curve && car) {
            let point = curve.getPoint(progress);
            let point2 = curve.getPoint(progress + speed);
            if (point && point.x) {
              carGroup.position.set(point.x, point.y, point.z);
              carGroup.lookAt(point2.x, point2.y, point2.z);
            }
          }
        }
- 添加一个按钮button来控制车辆移动
setCarMove() {
      let _this = this;
      _this.isCarMove = !_this.isCarMove;
      if (_this.isCarMove) {
        app.flyTo({
          position: [432, 105, -21],
          duration: 2000
        });
      }
    },
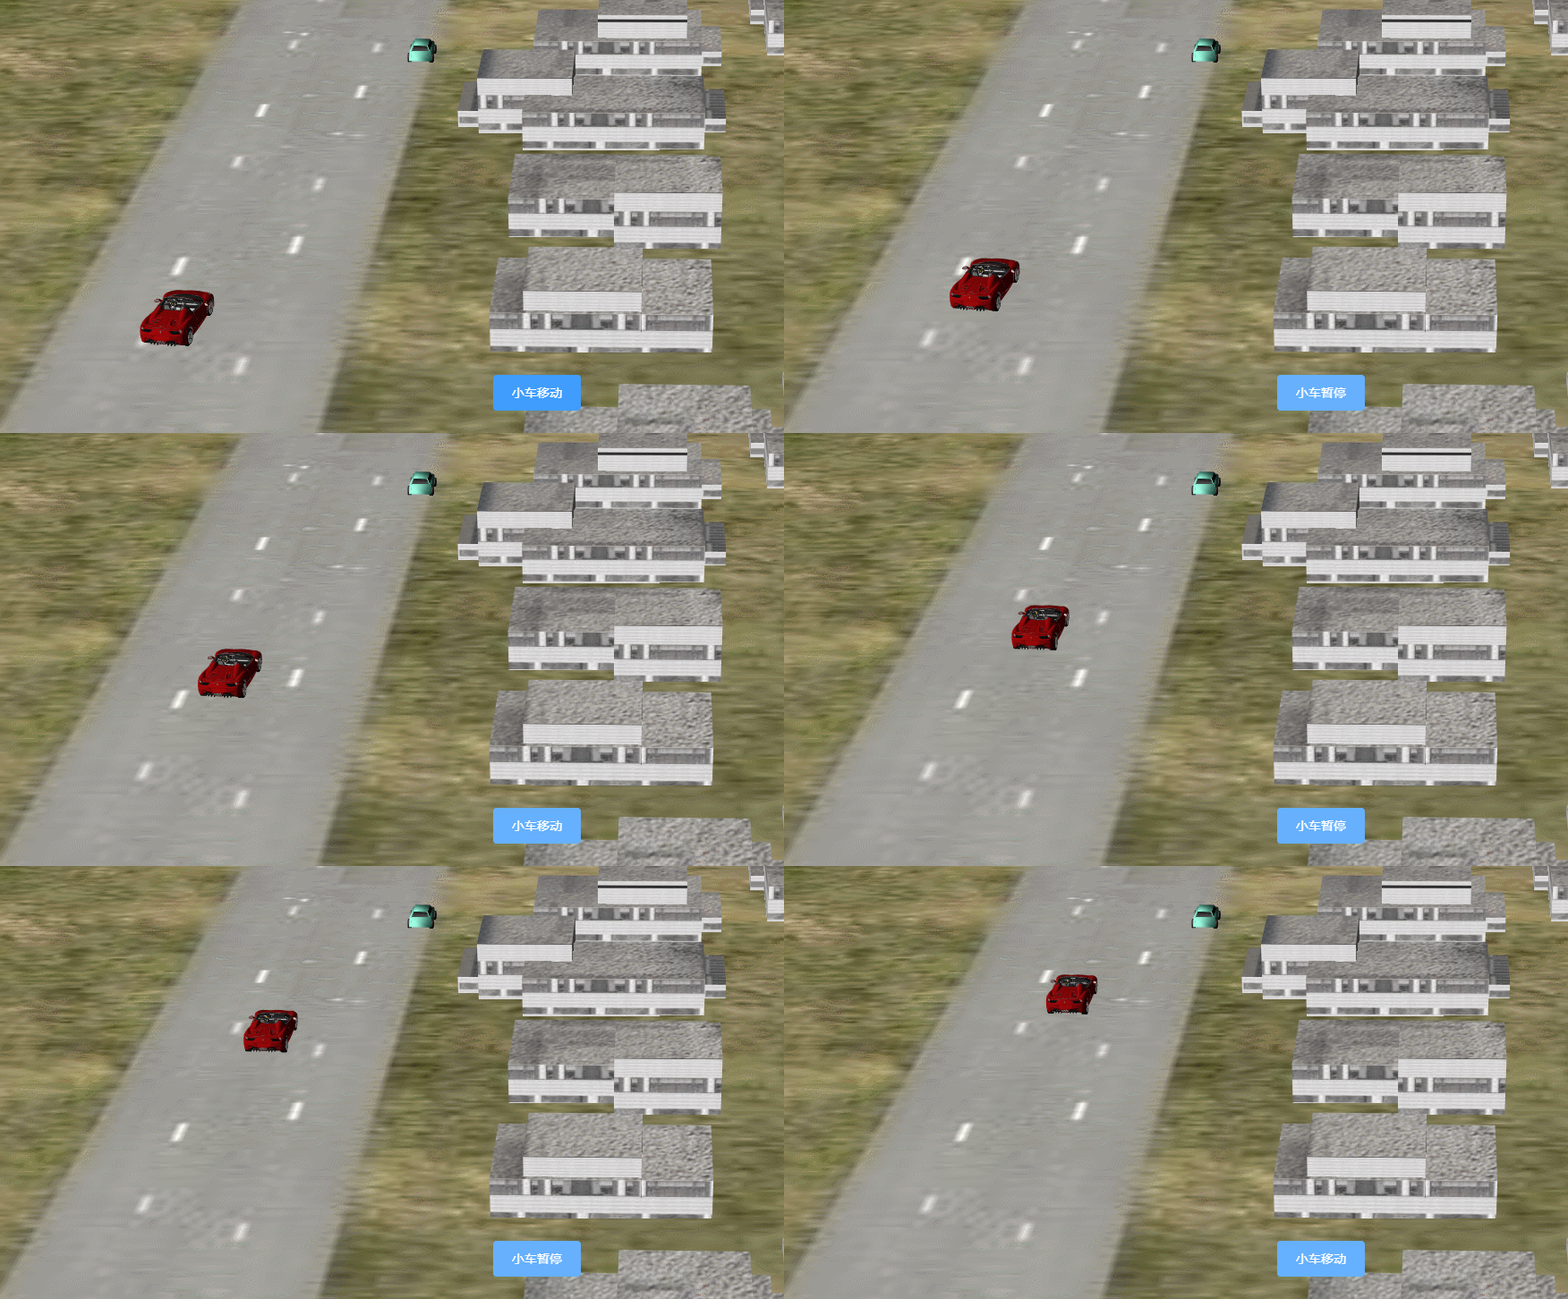
ok, 此时我们来看下最后的效果

可以看到,我们在点击移动的时候,小车就会按照我们指定的路线进行移动,最后我们在添加一个相机的飞行效果,让我们在点击移动的时候相机飞行到能够看到小车的位置,这里使用Tween来做一个补间动画就可以了
setCarMove() {
      let _this = this;
      _this.isCarMove = !_this.isCarMove;
      if (_this.isCarMove) {
        app.flyTo({
          position: [432, 105, -21],
          duration: 2000
        });
      }
    }
看看最后的效果:
ok, 到这儿我们的小车移动动画就完成了,接下来我们来添加一些文本标签来让我们的场景更丰富一点
智慧城市(四): 地址