全文检索-Elasticsearch-进阶检索
文章目录
- 前言
- 一、SearchAPI
-
- 1.1 URL 后接参数检索
- 1.2 URL 加请求体检索
- 二、Query DSL
-
- 2.1 基本语法格式
- 2.2 匹配查询 match
- 2.3 短语匹配 match_phase
- 2.4 多字段匹配 multi_match
- 2.5 复合查询 bool
- 2.6 过滤 filter
- 2.7 查询 term
- 2.8 聚合 aggregations
- 三、Mapping
-
- 3.1 介绍
- 3.2 新版本改变
- 3.3 查询索引的映射
- 3.4 创建映射
- 3.5 添加新的字段映射
- 3.6 更新映射
- 3.7 数据迁移
- 四、分词
-
- 4.1 安装 ik 分词器
- 4.2 测试分词器
- 4.3 自定义词库
- 五、附录-安装 nginx
-
- 5.1 安装步骤
- 5.2 创建分析文本
前言
本文记录谷粒商城高级篇的 Elasticsearch 进阶检索部分,续上之前记录的 Elasticsearch入门篇。
一、SearchAPI
ES 支持两种基本方式检索 :
- 一个是通过使用 REST request URI 发送搜索参数(uri + 检索参数)
- 另一个是通过使用 REST request body 来发送它们(uri + 请求体)
1.1 URL 后接参数检索
GET bank/_search  检索 bank 下所有信息,包括 type 和 docs

GET bank/_search?q=*&sort=account_number:asc 请求参数方式检索
响应结果解释:
took - Elasticsearch 执行搜索的时间(毫秒)
time_out - 告诉我们搜索是否超时
_shards - 告诉我们多少个分片被搜索了,以及统计了成功/失败的搜索分片
hits - 搜索结果
hits.total - 搜索结果
hits.hits - 实际的搜索结果数组(默认为前 10 的文档)
sort - 结果的排序 key(键)(没有则按 score 排序)
score 和 max_score - 相关性得分和最高得分(全文检索用)
1.2 URL 加请求体检索
请求体中写查询条件,语法:
GET bank/_search
{
  "query": {
    "match_all": {}
  },
  "sort": [
    {
      "account_number": "asc"
    },
    {
      "balance": "desc"
    }
  ]
}
示例:查询出所有,先按照 accout_number 升序排序,再按照 balance 降序排序
二、Query DSL
2.1 基本语法格式
Elasticsearch 提供了一个可以执行查询的 Json 风格的 DSL(domain-specific language 领域特定语言)。这个被称为 Query DSL。该查询语言非常全面,并且刚开始的时候感觉有点复杂,真正学好它的方法是从一些基础的示例开始的。
GET bank/_search
{
  "query": {
    "match_all": {}
  },
  "sort": [
 {
      "balance": {
        "order": "desc"
 }
 }
  ],
  "from": 10,
  "size": 10,
  "_source": ["balance", "firstname"]
}
示例:查询所有记录,按照 balance 降序排序,只返回第 11 条记录到第 20 条记录,只显示 balance 和 firstname 字段。
query 定义如何查询,
match_all 查询类型【代表查询所有的所有】,es 中可以在 query 中组合非常多的查
询类型完成复杂查询
除了 query 参数之外,我们也可以传递其它的参数以改变查询结果。如 sort,size
from + size 限定,完成分页功能
sort 排序,多字段排序,会在前序字段相等时后续字段内部排序,否则以前序为准
_source 返回部分字段
2.2 匹配查询 match
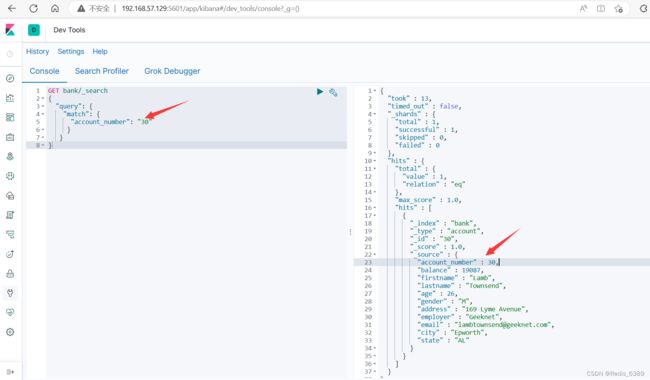
1.基本类型 ( 非字符串 ) ,精确匹配
GET bank/_search
{
  "query": {
    "match": {
      "account_number": "30"
     }
   }
}
2.字符串,全文检索
GET bank/_search
{
  "query": {
    "match": {
      "address": "mill road"
    }
  }
}
全文检索按照评分进行排序,会对检索条件进行分词匹配。
查询 address 中包含 mill 或者 road 或者 mill road 的所有记录,并给出相关性得分。
2.3 短语匹配 match_phase
将需要匹配的值当成一个整体单词 ( 不分词 ) 进行检索
GET bank/_search
{
  "query": {
    "match_phrase": {
      "address": "mill road"
    }
  }
}
2.4 多字段匹配 multi_match
GET bank/_search
{
  "query": {
    "multi_match": {
      "query": "mill land",
      "fields": [
        "state",
        "address"
      ]
    }
  }
}
multi_match 中的 query 也会进行分词。
查询 state 包含 mill 或 land 或者 address 包含 mill 或 land 的记录。
2.5 复合查询 bool
复合语句可以合并任何其他查询语句,包括复合语句。复合语句之间可以相互嵌套,可以表达复杂的逻辑。
搭配使用 must,must_not,should
must: 必须达到 must 指定的条件。 ( 影响相关性得分 )
must_not: 必须不满足 must_not 的条件。 ( 不影响相关性得分 )
should: 如果满足 should 条件,则可以提高得分。如果不满足,也可以查询出记录。 ( 影响相关性得分 )
示例:查询出地址包含 mill,且性别为 M,年龄不等于 28 的记录,且优先展示 firstname 包含 Winnie 的记录。
GET bank/_search
{
  "query": {
    "bool": {
      "must": [
        {
          "match": {
            "address": "mill"
          }
        },
        {
          "match": {
            "gender": "M"
          }
        }
      ],
      "must_not": [
        {
          "match": {
            "age": "28"
          }
        }
      ],
      "should": [
        {
          "match": {
            "firstname": "Winnie"
          }
        }
      ]
    }
  }
}
2.6 过滤 filter
不影响相关性得分,查询出满足 filter 条件的记录。
在 bool 中使用。
GET bank/_search
{
  "query": {
    "bool": {
      "filter": {
        "range": {
          "age": {
            "gte": 18,
            "lte": 30
          }
        }
      }
    }
  }
}
2.7 查询 term
匹配某个属性的值。
全文检索字段用 match,其他非 text 字段匹配用 term
keyword:文本精确匹配 ( 全部匹配 )
match_phase:文本短语匹配
规范:非 text 字段精确匹配使用 term
GET bank/_search
{
  "query": {
    "term": {
      "age": "20"
    }
  }
}
2.8 聚合 aggregations
聚合提供了从数据中分组和提取数据的能力。最简单的聚合方法大致等于 SQL GROUP
BY 和 SQL 聚合函数。在 Elasticsearch 中,您有执行搜索返回 hits(命中结果),并且同时返回聚合结果,把一个响应中的所有 hits(命中结果)分隔开的能力。这是非常强大且有效的,您可以执行查询和多个聚合,并且在一次使用中得到各自的(任何一个的)返回结果,使用一次简洁和简化的 API 来避免网络往返。
# 聚合语法
"aggregations" : {
    "<聚合名称 1>" : {
        "<聚合类型>" : {
            <聚合体内容>
        }
        [,"元数据" : {  [<meta_data_body>] }]?
        [,"aggregations" : { [<sub_aggregation>]+ }]?
    }
    [,"聚合名称 2>" : { ... }]*
}
示例 1:搜索 address 中包含 mill 的所有人的年龄分布 ( 前 10 条 ) 以及平均年龄,以及平均薪资
GET bank/_search
{
  "query": {
    "match": {
      "address": "mill"
    }
  },
  "aggs": {
    "aggAge": {
      "terms": {
        "field": "age",
        "size": 10
      }
    },
    "ageAvg": {
      "avg": {
        "field": "age"
      }
    },
    "balanceAvg": {
      "avg": {
        "field": "balance"
      }
   }
  }
}
如果不想返回 hits 结果,可以在最后面设置 size:0
GET bank/_search
{
  "query": {
    "match": {
      "address": "mill"
    }
  },
  "aggs": {
    "ageAggr": {
      "terms": {
        "field": "age",
        "size": 10
      }
    }
  },
  "size": 0
}
示例 2:按照年龄聚合,并且请求这些年龄段的这些人的平均薪资
GET bank/_search
{
  "query": {
    "match_all": {}
  },
  "aggs": {
    "age_avg": {
      "terms": {
        "field": "age",
        "size": 1000
      },
      "aggs": {
        "banlances_avg": {
          "avg": {
            "field": "balance"
          }
        }
      }
    }
  },
  "size": 1000
}
示例 3:查出所有年龄分布,并且这些年龄段中 M 的平均薪资和 F 的平均薪资以及这个年龄段的总体平均薪资
GET bank/_search
{
  "query": {
    "match_all": {}
  },
  "aggs": {
    "age_agg": {
      "terms": {
        "field": "age",
        "size": 100
      },
      "aggs": {
        "gender_agg": {
          "terms": {
            "field": "gender.keyword",
            "size": 100
          },
          "aggs": {
            "balance_avg": {
              "avg": {
                "field": "balance"
              }
            }
          }
        },
        "balance_avg": {
          "avg": {
            "field": "balance"
          }
        }
      }
    }
  },
  "size": 1000
}
三、Mapping
3.1 介绍
Mapping 是用来定义一个文档 (document) ,以及它所包含的属性 (field) 是如何存储和索引的。
- 定义哪些字符串属性应该被看做全文本属性 (full text fields)
- 定义哪些属性包含数字,日期或地理位置
- 定义文档中的所有属性是否都能被索引 (_all 配置)
- 日期的格式
- 自定义映射规则来执行动态添加属性
3.2 新版本改变
ES7 去 tpye 概念
关系型数据库中两个数据库表示是独立的,即使他们里面有相同名称的列也不影响使用,但 ES 中不是这样的。elasticsearch 是基于 Lucence 开发的搜索引擎,而 ES 中不同 type 下名称相同的 field 最终在 Lucence 中的处理方式是一样的。
- 为了区分不同 type 下的同一名称的字段,Lucence 需要处理冲突,导致检索效率下降
- 去掉type就是为了提高ES处理数据的效率。
ES7.x 版本:URL 中的 type 参数为可选。
- URL中的type参数为可选。比如,索引一个文档不再要求提供文档类型。
ES8.x 版本:不支持 URL 中的 type 参数
- 不再支持URL中的type参数。
解决:将索引从多类型迁移到单类型,每种类型文档一个独立索引
所有类型可以参考文档:https://www.elastic.co/guide/en/elasticsearch/reference/7.17/mapping-types.html
3.3 查询索引的映射
GET my-index/_mapping
{
  "my-index" : {
    "mappings" : {
      "properties" : {
        "age" : {
          "type" : "integer"
        },
        "email" : {
          "type" : "keyword"
        },
        "name" : {
          "type" : "text"
        }
      }
    }
  }
}
3.4 创建映射
PUT /my-index
{
  "mappings": {
    "properties": {
      "age": {
        "type": "integer"
      },
      "email": {
        "type": "keyword"
      },
      "name": {
        "type": "text"
      }
    }
  }
}
#返回结果
{
  "acknowledged" : true,
  "shards_acknowledged" : true,
  "index" : "my-index"
}
3.5 添加新的字段映射
PUT /my-index/_mapping
{
  "properties": {
    "employee-id": {
      "type": "keyword",
      "index": false
    }
  }
}
# index控制属性值是否被索引,默认是true。false的话就是不被索引,作为冗余存储
查看添加新字段的变化
{
  "my-index" : {
    "mappings" : {
      "properties" : {
        "age" : {
          "type" : "integer"
        },
        "email" : {
          "type" : "keyword"
        },
        "employee-id" : {
          "type" : "keyword",
          "index" : false
        },
        "name" : {
          "type" : "text"
        }
      }
    }
  }
}
3.6 更新映射
对于已经存在的映射字段,我们不能更新。更新必须创建新的索引进行数据迁移。
3.7 数据迁移
先创建出 newbank 的正确映射,然后使用如下方式进行数据迁移
#创建新的索引
PUT /newbank
{
  "mappings": {
    "properties": {
      "account_number": {
        "type": "long"
      },
      "address": {
        "type": "text"
      },
      "age": {
        "type": "integer"
      },
      "balance": {
        "type": "long"
      },
      "city": {
        "type": "keyword"
      },
      "email": {
        "type": "keyword"
      },
      "employer": {
        "type": "keyword"
      },
      "firstname": {
        "type": "text"
      },
      "gender": {
        "type": "keyword"
      },
      "lastname": {
        "type": "text",
        "fields": {
          "keyword": {
            "type": "keyword",
            "ignore_above": 256
          }
        }
      },
      "state": {
        "type": "keyword"
      }
    }
  }
}
#返回结果
{
  "acknowledged" : true,
  "shards_acknowledged" : true,
  "index" : "newbank"
}
POST _reindex
{
  "source": {
    "index": "bank",
    "type": "account"
  },
  "dest": {
    "index": "newbank"
  }
}
返回结果
#! Deprecation: [types removal] Specifying types in reindex requests is deprecated.
{
  "took" : 7617,
  "timed_out" : false,
  "total" : 1000,
  "updated" : 0,
  "created" : 1000,
  "deleted" : 0,
  "batches" : 1,
  "version_conflicts" : 0,
  "noops" : 0,
  "retries" : {
    "bulk" : 0,
    "search" : 0
  },
  "throttled_millis" : 0,
  "requests_per_second" : -1.0,
  "throttled_until_millis" : 0,
  "failures" : [ ]
}
四、分词
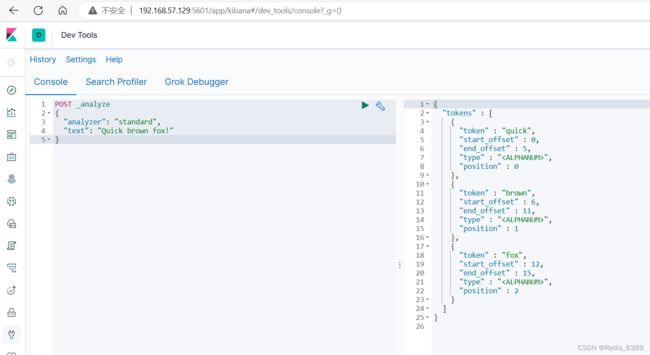
一个 tokenizer(分词器)接收一个字符流,将之分割为独立的 tokens(词元,通常是独立的单词),然后输出 tokens 流。
例如 whitespace tokenizer 遇到空白字符时分割文本,它会将文本 “Quick brown fox!” 分割为 Quick,brown,fox!。
该 tokenizer(分词器)还负责记录各个 term(词条)的顺序或 position 位置(用于 phrase 短语和 word proximity 词近邻查询),以及 term(词条)所代表的原始 word(单词)的 start(起始)和 end(结束)的 character offsets(字符偏移量)(用于高亮显示搜索的内容)。
Elasticsearch 提供了很多内置的分词器,可以用来构建 custom analyzers(自定义分词器)。
4.1 安装 ik 分词器
注意:不能用默认 elasticsearch-plugin install xxx.zip 进行自动安装
1.进入elasticsearch 插件挂载
cd /mydata/elasticsearch/plugins
2.创建 ik 目录
mkdir ik
3.进入 ik 目录
cd ik
4.下载 ik 分词器
wget https://github.com/medcl/elasticsearch-analysis-ik/releases/download/v7.4.2/elasticsearch-analysis-ik-7.4.2.zip
5.下载成功
[root@localhost ik]# wget https://github.com/medcl/elasticsearch-analysis-ik/releases/download/v7.4.2/elasticsearch-analysis-ik-7.4.2.zip
--2023-05-09 16:49:36--  https://github.com/medcl/elasticsearch-analysis-ik/releases/download/v7.4.2/elasticsearch-analysis-ik-7.4.2.zip
正在解析主机 github.com (github.com)... 20.205.243.166
正在连接 github.com (github.com)|20.205.243.166|:443... 已连接。
已发出 HTTP 请求,正在等待回应... 302 Found
位置:https://objects.githubusercontent.com/github-production-release-asset-2e65be/2993595/19827980-fef3-11e9-8cda-384bc0d9396c?X-Amz-Algorithm=AWS4-HMAC-SHA256&X-Amz-Credential=AKIAIWNJYAX4CSVEH53A%2F20230509%2Fus-east-1%2Fs3%2Faws4_request&X-Amz-Date=20230509T084937Z&X-Amz-Expires=300&X-Amz-Signature=dede12056de2e09b1386e24e2db04835a7283f829d4e35f4ce0d268b9fa36780&X-Amz-SignedHeaders=host&actor_id=0&key_id=0&repo_id=2993595&response-content-disposition=attachment%3B%20filename%3Delasticsearch-analysis-ik-7.4.2.zip&response-content-type=application%2Foctet-stream [跟随至新的 URL]
--2023-05-09 16:49:37--  https://objects.githubusercontent.com/github-production-release-asset-2e65be/2993595/19827980-fef3-11e9-8cda-384bc0d9396c?X-Amz-Algorithm=AWS4-HMAC-SHA256&X-Amz-Credential=AKIAIWNJYAX4CSVEH53A%2F20230509%2Fus-east-1%2Fs3%2Faws4_request&X-Amz-Date=20230509T084937Z&X-Amz-Expires=300&X-Amz-Signature=dede12056de2e09b1386e24e2db04835a7283f829d4e35f4ce0d268b9fa36780&X-Amz-SignedHeaders=host&actor_id=0&key_id=0&repo_id=2993595&response-content-disposition=attachment%3B%20filename%3Delasticsearch-analysis-ik-7.4.2.zip&response-content-type=application%2Foctet-stream
正在解析主机 objects.githubusercontent.com (objects.githubusercontent.com)... 185.199.109.133, 185.199.108.133, 185.199.110.133, ...
正在连接 objects.githubusercontent.com (objects.githubusercontent.com)|185.199.109.133|:443... 已连接。
已发出 HTTP 请求,正在等待回应... 200 OK
长度:4504487 (4.3M) [application/octet-stream]
正在保存至: “elasticsearch-analysis-ik-7.4.2.zip”

100%[=========================================================================================================================================================================>] 4,504,487   1.44MB/s 用时 3.0s

2023-05-09 16:49:41 (1.44 MB/s) - 已保存 “elasticsearch-analysis-ik-7.4.2.zip” [4504487/4504487])
6.下载成功后解压到 ik 目录
unzip elasticsearch-analysis-ik-7.4.2.zip
7.修改 ik 目录读写权限
chmod -R 777 ik/
8.进入 docker 的 bash 控制台
docker exec -it elasticsearch /bin/bash
9.进入 elasticsearch 的 bin 执行如下命令
[root@21fddd211b43 bin]# elasticsearch-plugin list
ik
出现 ik 表明安装完成
4.2 测试分词器
1.Kibana 使用 ik_smart 检索
4.3 自定义词库
ik 分词器没办法识别新的词汇和网络用语,所以需要我们自己自定义词库来达到扩展词库的目的。
1.修改配置文件
ik 分词器的配置文件在容器中的路径:
/usr/share/elasticsearch/plugins/ik/config/IKAnalyzer.cfg.xml。
修改这个文件可以通过修改映射文件,文件路径:
/mydata/elasticsearch/plugins/ik/config/IKAnalyzer.cfg.xml
编辑配置文件:
vim /mydata/elasticsearch/plugins/ik/config/IKAnalyzer.cfg.xml
DOCTYPE properties SYSTEM "http://java.sun.com/dtd/properties.dtd">
<properties>
<comment>IK Analyzer 扩展配置comment>

<entry key="ext_dict">entry>

<entry key="ext_stopwords">entry>

<entry key="remote_ext_dict">http://192.168.57.129/es/fenci.txtentry>


properties>
修改配置 remote_ext_dict 的属性值,指定一个 远程网站文件的路径,比如 http://www.xxx.com/ikwords.text。
这里我们可以自己搭建一套 nginx 环境,然后把 ikwords.text 放到 nginx 根目录。
修改 IKAnalyzer.cfg.xml 后重启 elasticsearch
docker restart elasticsearch
访问 Kibana 如下图
五、附录-安装 nginx
5.1 安装步骤
1.在 /mydata 目录下创建 nginx 目录
mkdir nginx
2.进入 nginx 目录安装 nginx
[root@localhost mydata]# docker run -p 80:80 --name nginx -d nginx:1.10
Unable to find image 'nginx:1.10' locally
1.10: Pulling from library/nginx
6d827a3ef358: Pull complete
1e3e18a64ea9: Pull complete
556c62bb43ac: Pull complete
Digest: sha256:6202beb06ea61f44179e02ca965e8e13b961d12640101fca213efbfd145d7575
Status: Downloaded newer image for nginx:1.10
4026fb105bd2a0905512b553bcea6452eacb55b2c4499ceef4a148c6023f60c9
3.将容器内的配置文件拷贝到 nginx 目录别忘了后面的点
docker container cp nginx:/etc/nginx .
4.修改文件名称
mv nginx conf
5.把这个 conf 移动到 /mydata/nginx 下
mv conf/ nginx
6.终止原容器
docker stop nginx
7.执行命令删除原容器
docker rm nginx
8.创建新的 nginx
docker run -p 80:80 --name nginx \
-v /mydata/nginx/html:/usr/share/nginx/html \
-v /mydata/nginx/logs:/var/log/nginx \
-v /mydata/nginx/conf:/etc/nginx \
-d nginx:1.10
9.给 nginx 的 html 下面放的所有资源可以直接访问
vi index.html
10.编写 html
<h1>Gulimallh1>
11.安装成功,访问效果如下图
5.2 创建分析文本
1.html 目录下创建 es 目录,在 es 目录下创建文本
mkdir es
cd es
vi fenci.txt
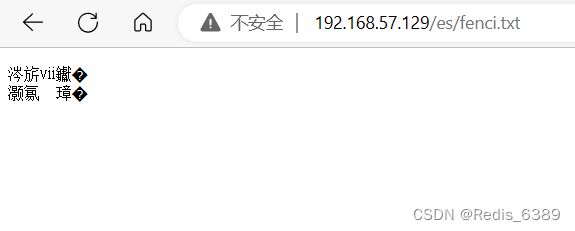
尚硅谷
乔碧萝
编写文本,esc 后 shift + : wq 保存退出。访问如下图


