【复现】vid2vid_zero复现过程记录
问题及解决方法总结。
code:GitHub - baaivision/vid2vid-zero: Zero-Shot Video Editing Using Off-The-Shelf Image Diffusion Models
1.AttributeError: 'UNet2DConditionModel' object has no attribute 'encoder'
据说是预训练模型结构不匹配,偷懒把animatediff用的sd-v1-5搬过来果然不行。。老实下载sd-v1-4去了
网址:https://huggingface.co/CompVis/stable-diffusion-v1-4/tree/main
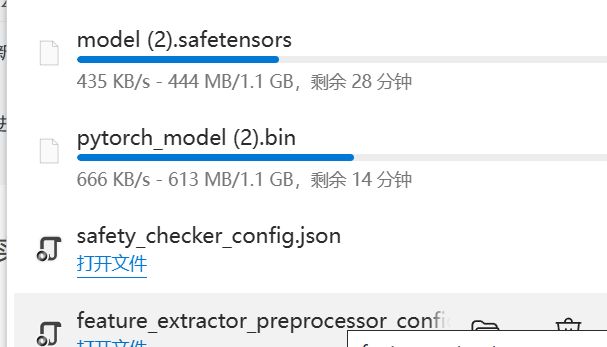
漫长的下载 x N
2.HFValidationError
File "/opt/conda/envs/vid2vid/lib/python3.10/site-packages/huggingface_hub/utils/_validators.py", line 158, in validate_repo_id
    raise HFValidationError(
huggingface_hub.utils._validators.HFValidationError: Repo id must be in the form 'repo_name' or 'namespace/repo_name': '/data/vid2vid-zero/checkpoints/stable-diffusion-v1-4'. Use `repo_type` argument if needed.
本来以为是文件路径写的不对,但检查了好几遍可以排除这个原因,查找报错的文件:
File "/opt/conda/envs/vid2vid/lib/python3.10/site-packages/huggingface_hub/utils/_validators.py", line 158, in validate_repo_id找到validators.py 文件 line 158:
    if repo_id.count("/") > 1:
        raise HFValidationError(
            "Repo id must be in the form 'repo_name' or 'namespace/repo_name':"
            f" '{repo_id}'. Use `repo_type` argument if needed."
        )
就是说Path to off-the-shelf model输入里的“/”大于1个就会报错
而且每次点start,控制台都会运行:
https://huggingface.co/xxxxxx是输入的Path to off-the-shelf model,比如这里就是
https://huggingface.co//data/vid2vid-zero/checkpoints/stable-diffusion-v1-4可以看到是个错误的路径,代码里就要求输入能链接到Hugging Face Hub上的模型的格式,比如示例里给的输入是CompVis/stable-diffusion-v1-4,就会链接到在线模型:
https://huggingface.co/CompVis/stable-diffusion-v1-4必须要改代码,让程序先查找本地模型,而不是直接去Hugging Face Hub在线用模型(因为会ConnectTimeoutError)
瞎改一通,runner.py里的download_base_model方法:
def download_base_model(self, base_model_id: str, token=None) -> str:
        # 设置模型文件的路径
        model_dir = self.checkpoint_dir / base_model_id
        org_name = base_model_id.split('/')[0]
        org_dir = self.checkpoint_dir / org_name

        # 如果模型文件不存在,则创建一个空目录
        if not model_dir.exists():
            org_dir.mkdir(exist_ok=True)

        # 打印模型在Hugging Face Hub上的链接
        print(f'https://huggingface.co/{base_model_id}')

        print(token)
        print(org_dir)

        # 如果没有提供token,则使用Git Large File Storage (LFS)克隆模型
        if token == None:
            subprocess.run(shlex.split(f'git lfs install'), cwd=org_dir)
            subprocess.run(shlex.split(
                f'git lfs clone https://huggingface.co/{base_model_id}'),
                            cwd=org_dir)
            return model_dir.as_posix()

        # 否则,使用Hugging Face Hub下载模型快照到临时路径,并返回临时路径
        else:
            temp_path = huggingface_hub.snapshot_download(base_model_id, use_auth_token=token)
            print(temp_path, org_dir)
            # 移动临时路径中的模型文件到目标路径
            # subprocess.run(shlex.split(f'mv {temp_path} {model_dir.as_posix()}'))
            # return model_dir.as_posix()
            return temp_path
改为:
class Runner:
    def __init__(self, hf_token: str | None = None):
        self.hf_token = hf_token

        self.checkpoint_dir = pathlib.Path('checkpoints')
        self.checkpoint_dir.mkdir(exist_ok=True)

    def download_base_model(self, base_model_id: str, token=None) -> str:
        model_dir = self.checkpoint_dir / base_model_id
        org_name = base_model_id.split('/')[0]
        org_dir = self.checkpoint_dir / org_name
        if not model_dir.exists():
            org_dir.mkdir(exist_ok=True)

        # 加载本地模型文件的代码
        local_model_path = '/data/vid2vid-zero/checkpoints/stable-diffusion-v1-4'
        return local_model_path
app.py也要改一点
这个问题姑且是解决了
3. FileNotFoundError: [Errno 2] No such file or directory: '...'
不出意外,出现了新的意外
video path for gradio: /data/vid2vid-zero/gradio_demo/outputs/A_car_is_moving_on_the_road./test.mp4
Running completed!
Traceback (most recent call last):
  File "/opt/conda/envs/vid2vid/lib/python3.10/site-packages/gradio/queueing.py", line 407, in call_prediction
    output = await route_utils.call_process_api(
  File "/opt/conda/envs/vid2vid/lib/python3.10/site-packages/gradio/route_utils.py", line 226, in call_process_api
    output = await app.get_blocks().process_api(
  File "/opt/conda/envs/vid2vid/lib/python3.10/site-packages/gradio/blocks.py", line 1559, in process_api
    data = self.postprocess_data(fn_index, result["prediction"], state)
  File "/opt/conda/envs/vid2vid/lib/python3.10/site-packages/gradio/blocks.py", line 1447, in postprocess_data
    prediction_value = block.postprocess(prediction_value)
  File "/opt/conda/envs/vid2vid/lib/python3.10/site-packages/gradio/components/video.py", line 273, in postprocess
    processed_files = (self._format_video(y), None)
  File "/opt/conda/envs/vid2vid/lib/python3.10/site-packages/gradio/components/video.py", line 350, in _format_video
    video = self.make_temp_copy_if_needed(video)
  File "/opt/conda/envs/vid2vid/lib/python3.10/site-packages/gradio/components/base.py", line 233, in make_temp_copy_if_needed
    temp_dir = self.hash_file(file_path)
  File "/opt/conda/envs/vid2vid/lib/python3.10/site-packages/gradio/components/base.py", line 197, in hash_file
    with open(file_path, "rb") as f:
FileNotFoundError: [Errno 2] No such file or directory: '/data/vid2vid-zero/gradio_demo/outputs/A_car_is_moving_on_the_road./test.mp4'
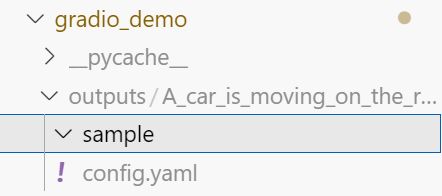
输出的路径确实没有test.mp4文件,为什么呢,都Running completed了。。
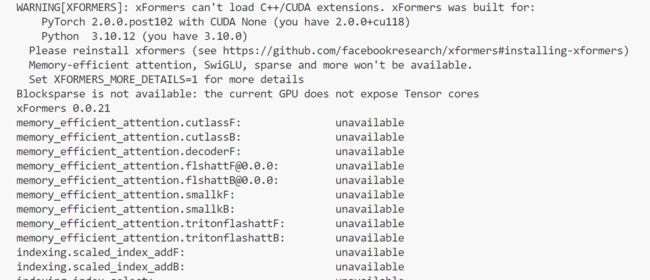
4. 缺少xformers
尝试1:官网下载GitHub - facebookresearch/xformers: Hackable and optimized Transformers building blocks, supporting a composable construction.
conda install xformers -c xformers失败:默认下载最新版xformers=0.0.23,Requires PyTorch 2.1.1,而我的配置:
环境:pytorch==1.12.1 torchvision==0.13.1 torchaudio==0.12.1 cudatoolkit=11.6报了一堆不兼容的错
尝试2:参考教程Linux安装xFormers教程-CSDN博客
其实还有一个问题是支持xformer的GPU最低算力是(7,0),但我的GPU是(6,1),不知道有啥问题,不过暂时还没报错,先不管了
5.OSError: Unable to load weights from checkpoint file
OSError: Unable to load weights from checkpoint file for '/data/vid2vid-zero/checkpoints/stable-diffusion-v1-4/unet/diffusion_pytorch_model.bin' at '/data/vid2vid-zero/checkpoints/stable-diffusion-v1-4/unet/diffusion_pytorch_model.bin'. If you tried to load a PyTorch model from a TF 2.0 checkpoint, please set from_tf=True.原因:找不到文件,或者文件损坏
看了一下发现是copy到一半和服务器断联了,所以bin文件只上传了一半,删掉再重新上传
6. AttributeError: 'NoneType' object has no attribute 'eval'
Traceback (most recent call last):
  File "/data/vid2vid-zero/test_vid2vid_zero.py", line 269, in
    main(**OmegaConf.load(args.config))
  File "/data/vid2vid-zero/test_vid2vid_zero.py", line 200, in main
    unet.eval()
AttributeError: 'NoneType' object has no attribute 'eval'
Traceback (most recent call last):
  File "/opt/conda/envs/vid2vid/bin/accelerate", line 8, in
    sys.exit(main())
  File "/opt/conda/envs/vid2vid/lib/python3.10/site-packages/accelerate/commands/accelerate_cli.py", line 47, in main
    args.func(args)
  File "/opt/conda/envs/vid2vid/lib/python3.10/site-packages/accelerate/commands/launch.py", line 994, in launch_command
    simple_launcher(args)
  File "/opt/conda/envs/vid2vid/lib/python3.10/site-packages/accelerate/commands/launch.py", line 636, in simple_launcher
    raise subprocess.CalledProcessError(returncode=process.returncode, cmd=cmd)
subprocess.CalledProcessError: Command '['/opt/conda/envs/vid2vid/bin/python3.1', 'test_vid2vid_zero.py', '--config', 'configs/car-moving.yaml']' returned non-zero exit status 1.
调试了一下,发现unet的type输出为None
参考[报错]深析AttributeError: ‘NoneType‘ object has no attribute ‘xxx‘(持更)-CSDN博客
的方法试了下,文件路径没错的,不是这个原因
但是上面加载模型时明明加载到unet了
调试发现经过这几行后,unet的type就出现了变化,前面是有类型的,经过后就变成了None
    # Prepare everything with our `accelerator`.
    unet, input_dataloader = accelerator.prepare(
        unet, input_dataloader,
    )
应该是准备过程中的错误
要检查加速器的配置和环境设置是否正确,您可以执行以下步骤:
确认加速器的类型:确定您正在使用的是哪种加速器,例如
torch.cuda(GPU 加速)或torch.distributed(分布式训练)等。检查设备可用性:对于 GPU 加速,请确保系统中至少有一个可用的 GPU,并且已经正确安装了相应的 GPU 驱动程序。可以使用
torch.cuda.is_available()来检查 GPU 是否可用。检查设备数量:如果使用多个 GPU 进行训练(分布式训练),请确保指定了正确的设备数量,并且每个进程都能够访问到相应的 GPU。
检查混合精度训练设置:如果启用了混合精度训练,确保计算设备支持相应的混合精度运算(如 NVIDIA 的 Tensor Cores)。可以使用
accelerator.can_use_fp16()来检查设备是否支持半精度浮点运算。检查梯度累积设置:如果使用梯度累积进行训练,请确保梯度累积步数设置正确,并且不会导致内存溢出或计算资源不足。
检查分布式训练设置:如果进行分布式训练,请确保正确设置了进程的数量、通信方式和相关的环境变量,以便进程能够相互通信和协调。
检查其他加速器相关的设置:根据您使用的具体加速器类型,还可能需要检查其他相关的配置和环境设置,例如分布式文件系统的配置、分布式数据并行处理等。
排除GPU不可用原因
加速器库(
accelerate)检测到您的系统内核版本为 4.15.0,并给出了建议的最低内核版本为 5.5.0 或更高。这个警告信息表明,当前的内核版本可能不符合
accelerate库的最低要求。虽然该库仍然可以工作,但在某些情况下可能会导致进程卡住或遇到其他问题。考虑升级您的操作系统或内核版本到建议的最低版本(5.5.0 或更高)。
找到问题了,accelerate不可用,尝试更新内核
安装了新版本的内核,但没有权限重启系统使新内核生效(用的云服务器)
让老师那边帮忙升级一下
等待ing
使用加速库(例如
accelerate)对UNet模型和输入数据加载器进行准备的操作。accelerator.prepare()方法可以根据加速库的特定要求对模型和数据加载器进行适配,以提高计算性能。
等不及了,注释掉这块直接跑
是真慢啊,用accelerator不到俩小时就能生成
6. RuntimeError: [enforce fail at alloc_cpu.cpp:66]
Traceback (most recent call last):
  File "/data/vid2vid-zero/test_vid2vid_zero.py", line 276, in
    main(**OmegaConf.load(args.config))
  File "/data/vid2vid-zero/test_vid2vid_zero.py", line 254, in main
    sample = validation_pipeline(prompts, generator=generator, latents=ddim_inv_latent,
  File "/opt/conda/envs/vid2vid/lib/python3.10/site-packages/torch/autograd/grad_mode.py", line 27, in decorate_context
    return func(*args, **kwargs)
  File "/data/vid2vid-zero/vid2vid_zero/pipelines/pipeline_vid2vid_zero.py", line 515, in __call__
    noise_pred = self.unet(latent_model_input, t, encoder_hidden_states=text_embeddings_input).sample.to(dtype=latents_dtype)
  File "/opt/conda/envs/vid2vid/lib/python3.10/site-packages/torch/nn/modules/module.py", line 1130, in _call_impl
    return forward_call(*input, **kwargs)
  File "/data/vid2vid-zero/vid2vid_zero/models/unet_2d_condition.py", line 414, in forward
    sample, res_samples = downsample_block(
  File "/opt/conda/envs/vid2vid/lib/python3.10/site-packages/torch/nn/modules/module.py", line 1130, in _call_impl
    return forward_call(*input, **kwargs)
  File "/data/vid2vid-zero/vid2vid_zero/models/unet_2d_blocks.py", line 324, in forward
    hidden_states = attn(hidden_states, encoder_hidden_states=encoder_hidden_states, normal_infer=normal_infer).sample
  File "/opt/conda/envs/vid2vid/lib/python3.10/site-packages/torch/nn/modules/module.py", line 1130, in _call_impl
    return forward_call(*input, **kwargs)
  File "/data/vid2vid-zero/vid2vid_zero/models/attention_2d.py", line 136, in forward
    hidden_states = block(
  File "/opt/conda/envs/vid2vid/lib/python3.10/site-packages/torch/nn/modules/module.py", line 1130, in _call_impl
    return forward_call(*input, **kwargs)
  File "/data/vid2vid-zero/vid2vid_zero/models/attention_2d.py", line 266, in forward
    hidden_states = self.attn1(
  File "/opt/conda/envs/vid2vid/lib/python3.10/site-packages/torch/nn/modules/module.py", line 1130, in _call_impl
    return forward_call(*input, **kwargs)
  File "/data/vid2vid-zero/vid2vid_zero/models/attention_2d.py", line 429, in forward
    return self.forward_dense_attn(
  File "/data/vid2vid-zero/vid2vid_zero/models/attention_2d.py", line 409, in forward_dense_attn
    hidden_states = self._attention(query, key, value, attention_mask)
  File "/opt/conda/envs/vid2vid/lib/python3.10/site-packages/diffusers/models/attention.py", line 668, in _attention
    attention_probs = attention_scores.softmax(dim=-1)
RuntimeError: [enforce fail at alloc_cpu.cpp:66] . DefaultCPUAllocator: can't allocate memory: you tried to allocate 137438953472 bytes. Error code 12 (Cannot allocate memory)
unet.eval()函数用于将UNet模型设置为评估模式(evaluation mode)。在评估模式下,模型的行为会有所变化,主要包括以下几个方面:
Batch Normalization和Dropout层的行为:在评估模式下,Batch Normalization和Dropout层通常会固定参数,并且不会进行随机采样。这使得模型在每次前向传播时产生相同的输出,保证了结果的可重现性。
梯度计算的关闭:评估模式下,默认情况下,PyTorch会自动关闭梯度计算,即不会对模型的参数进行更新。这是因为在评估模式下,我们通常只关心模型的输出,而不需要进行反向传播和梯度更新。
Dropout的关闭:在评估模式下,Dropout层的操作通常会被关闭,以避免模型的输出在每次前向传播时都有所不同。这样可以确保在测试或推理阶段,模型的输出结果具有一致性。
加载模型的代码:
 unet = UNet2DConditionModel.from_pretrained(
        pretrained_model_path, subfolder="unet", use_sc_attn=use_sc_attn,
        use_st_attn=use_st_attn, st_attn_idx=st_attn_idx)
'''use_sc_attn 控制是否使用 self-conditioned attention(自注意力)机制。如果设置为 True,模型将使用 self-conditioned attention;如果设置为 False,则不使用。self-conditioned attention 允许模型在生成每个像素时参考输入序列的其他部分。
use_st_attn 控制是否使用 spatio-temporal attention(时空注意力)机制。如果设置为 True,模型将使用 spatio-temporal attention;如果设置为 False,则不使用。spatio-temporal attention 允许模型在生成视频帧时考虑时间和空间上的相关性。
st_attn_idx 是一个整数值,用于指定 spatio-temporal attention 的位置索引。它决定了在哪个层级应用 spatio-temporal attention 机制。通过调整这个值,可以选择在网络的哪个位置使用 spatio-temporal attention。'''
7.NotImplementedError: No operator found for `memory_efficient_attention_forward`
NotImplementedError: No operator found for `memory_efficient_attention_forward` with inputs:
     query       : shape=(64, 4096, 1, 40) (torch.float32)
     key         : shape=(64, 4096, 1, 40) (torch.float32)
     value       : shape=(64, 4096, 1, 40) (torch.float32)
     attn_bias   :
     p           : 0.0
`decoderF` is not supported because:
    device=cpu (supported: {'cuda'})
    attn_bias type is
`[email protected]` is not supported because:
    device=cpu (supported: {'cuda'})
    dtype=torch.float32 (supported: {torch.bfloat16, torch.float16})
`tritonflashattF` is not supported because:
    device=cpu (supported: {'cuda'})
    dtype=torch.float32 (supported: {torch.bfloat16, torch.float16})
    operator wasn't built - see `python -m xformers.info` for more info
    triton is not available
    Only work on pre-MLIR triton for now
`cutlassF` is not supported because:
    device=cpu (supported: {'cuda'})
`smallkF` is not supported because:
    max(query.shape[-1] != value.shape[-1]) > 32
    device=cpu (supported: {'cuda'})
    unsupported embed per head: 40
Traceback (most recent call last):
  File "/opt/conda/envs/vid2vid/bin/accelerate", line 8, in
    sys.exit(main())
  File "/opt/conda/envs/vid2vid/lib/python3.10/site-packages/accelerate/commands/accelerate_cli.py", line 47, in main
    args.func(args)
  File "/opt/conda/envs/vid2vid/lib/python3.10/site-packages/accelerate/commands/launch.py", line 994, in launch_command
    simple_launcher(args)
  File "/opt/conda/envs/vid2vid/lib/python3.10/site-packages/accelerate/commands/launch.py", line 636, in simple_launcher
    raise subprocess.CalledProcessError(returncode=process.returncode, cmd=cmd)
subprocess.CalledProcessError: Command '['/opt/conda/envs/vid2vid/bin/python3.1', 'test_vid2vid_zero.py', '--config', 'configs/car-moving.yaml']' returned non-zero exit status 1.
参考:stable diffusion webui安装和运行中出现的bug及解决方式-CSDN博客
原因: xformers版本问题,0.0.18版本适用于pytorch2.0,webui现在默认的版本是1.13.1,所以不兼容。可以用python -m xformers.info来查看xformers的适配情况。
解决: 降低xformers版本,pip install xformers==0.0.16
还是xformer的问题。。哭辽
但是xformers 0.0.16对应的pytorch版本是1.13.1,vid2vid要求是pytorch1.12.1,也没说明建议使用哪版xformer,只好不用xformer了
把yaml里的enable_xformers_memory_efficient_attention:设置为False
跑起来了,不用xformer果然很慢,20分钟10%,咱也不知道正常的速度是怎样,影不影响生成效果
又报错了,果然还是因为没加载到unet
突然发现animatediff和vid2vid的代码都是建立在tune-a-video的基础上的,之后可以去看下它的代码
参考:解决huggingface中模型无法自动下载或者下载过慢的问题_pytorch_COHREZ-华为云开发者联盟


