Android app换肤原理及其简单实现
Android一键式换肤原理
一.换肤原理
- 下载皮肤资源包 (Apk,lib)到本地目录中
- 主APP中使用动态加载技术动态加载皮肤资源包的资源对象(真正的资源管理者AssetManager)
- 获取所有需要换肤的控件以及控件的textColor,background,src属性 (xml加载监听)
- 根据需要换肤控件的资源ID去资源包中匹配对应的资源ID,然后进行替换
二.加载皮肤资源包
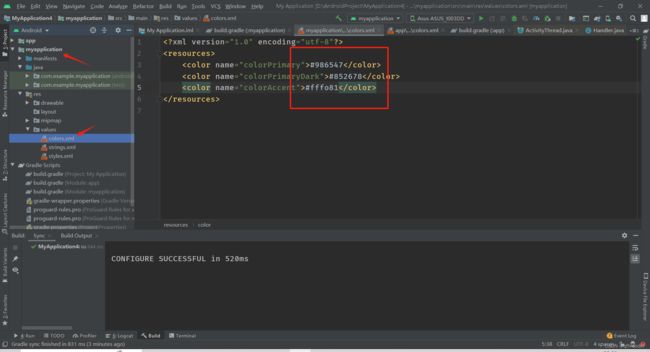
新建资源包
一般没有activity
修改皮肤包下面的颜色,方便演示,名字要一样,
主模块是这三种颜色
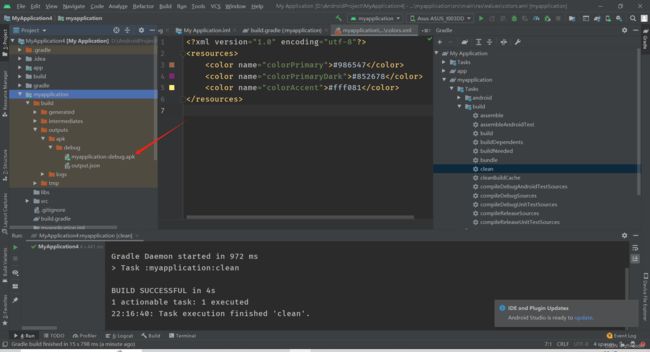
生成apk资源包,build一下
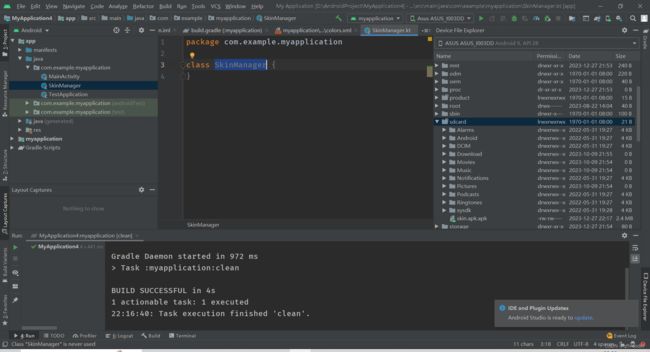
放到本地设备sd卡根目录上
写一个资源包管理类
代码
@file:Suppress("JAVA_CLASS_ON_COMPANION", "RECEIVER_NULLABILITY_MISMATCH_BASED_ON_JAVA_ANNOTATIONS")

package com.example.myapplication

import android.content.Context
import android.content.pm.PackageManager
import android.content.res.AssetManager
import android.content.res.Resources
import java.lang.Exception

//单例模式
object SkinManager {
    private var context: Context? = null
    private var skinPackageName: String? = null
    fun loadSkinApk(context: Context, path: String) {
        this.context = context
        val packageManager = context.packageManager
        val packageArchiveInfo =
            packageManager.getPackageArchiveInfo(path, PackageManager.GET_ACTIVITIES)
        skinPackageName = packageArchiveInfo.packageName
        val assetManager = AssetManager::class.java.newInstance()
        try {
            val method =
                assetManager.javaClass.getDeclaredMethod("addAssetPath", String.javaClass)
            method.invoke(assetManager, path)
            val resources = Resources(
                assetManager,
                context.resources.displayMetrics,
                context.resources.configuration
            )

        } catch (e: Exception) {

        }
    }
}
三.解析皮肤包资源
@file:Suppress("JAVA_CLASS_ON_COMPANION", "RECEIVER_NULLABILITY_MISMATCH_BASED_ON_JAVA_ANNOTATIONS")

package com.example.myapplication

import android.content.Context
import android.content.pm.PackageManager
import android.content.res.AssetManager
import android.content.res.Resources
import android.graphics.drawable.Drawable
import androidx.core.content.ContextCompat
import java.lang.Exception

//单例模式
object SkinManager {
    private lateinit var context: Context
    private var skinPackageName: String? = null
    private var resources: Resources? = null
    fun loadSkinApk(context: Context, path: String) {
        this.context = context
        val packageManager = context.packageManager
        val packageArchiveInfo =
            packageManager.getPackageArchiveInfo(path, PackageManager.GET_ACTIVITIES)
        skinPackageName = packageArchiveInfo.packageName
        val assetManager = AssetManager::class.java.newInstance()
        try {
            val method =
                assetManager.javaClass.getDeclaredMethod("addAssetPath", String.javaClass)
            method.invoke(assetManager, path)
            resources = Resources(
                assetManager,
                context.resources.displayMetrics,
                context.resources.configuration
            )

        } catch (e: Exception) {

        }
    }

    /**去资源包的资源对象中欢取颜色资源
     * @param id 当前应用中的资源ID
     * @return 当前应用中的资源id所匹配的在皮肤资源中的ID
     */
    fun getColor(id: Int): Int? {
        if (resources == null) {
            return id
        }
        //获取到传进来的id在资源中的类型,color,drawable,mipmap
        val resourceTypeName = context.resources?.getResourceTypeName(id)
        //获取到传进来id在资源中的名字,colorPrimary
        val resourceEntryName = context.resources?.getResourceEntryName(id)
        val identifier =
            resources?.getIdentifier(resourceEntryName, resourceTypeName, skinPackageName)
        if (identifier == 0) {
            return id
        }
        return identifier?.let { resources?.getColor(it) }
    }

    fun getDrawable(id: Int): Drawable? {
        if (resources == null) {
            return ContextCompat.getDrawable(context, id)
        }
        //获取到传进来的id在资源中的类型,color,drawable,mipmap
        val resourceTypeName = context?.resources?.getResourceTypeName(id)
        //获取到传进来id在资源中的名字,colorPrimary
        val resourceEntryName = context?.resources?.getResourceEntryName(id)
        val identifier =
            resources?.getIdentifier(resourceEntryName, resourceTypeName, skinPackageName)
        if (identifier == 0) {
            return ContextCompat.getDrawable(context, id)
        }
        return identifier?.let { resources?.getDrawable(it) }
    }
}
四.xml布局加载监听
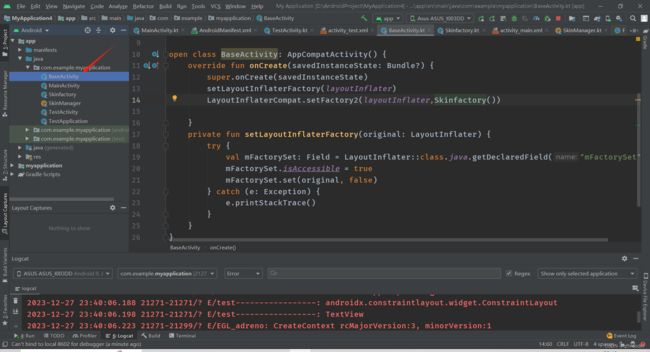
新建基类
BaseActivity
package com.example.myapplication

import android.os.Bundle
import android.view.LayoutInflater
import androidx.appcompat.app.AppCompatActivity
import androidx.core.view.LayoutInflaterCompat
import java.lang.reflect.Field


open class BaseActivity: AppCompatActivity() {
    override fun onCreate(savedInstanceState: Bundle?) {
        super.onCreate(savedInstanceState)
        setLayoutInflaterFactory(layoutInflater)
        LayoutInflaterCompat.setFactory2(layoutInflater,Skinfactory())

    }
    private fun setLayoutInflaterFactory(original: LayoutInflater) {
        try {
            val mFactorySet: Field = LayoutInflater::class.java.getDeclaredField("mFactorySet")
            mFactorySet.isAccessible = true
            mFactorySet.set(original, false)
        } catch (e: Exception) {
            e.printStackTrace()
        }
    }
}
新建工厂类
Skinfactory
package com.example.myapplication

import android.annotation.SuppressLint
import android.content.Context
import android.util.AttributeSet
import android.util.Log
import android.view.LayoutInflater
import android.view.View
import kotlin.math.log

class Skinfactory :LayoutInflater.Factory2{
    override fun onCreateView(
        parent: View?,
        name: String,
        context: Context,
        attrs: AttributeSet
    ): View? {
        Log.e("test-----------------", name)
        return null
    }

    @SuppressLint("LongLogTag")
    override fun onCreateView(name: String, context: Context, attrs: AttributeSet): View? {
        Log.e("test=====================", name)
        return null
    }
}
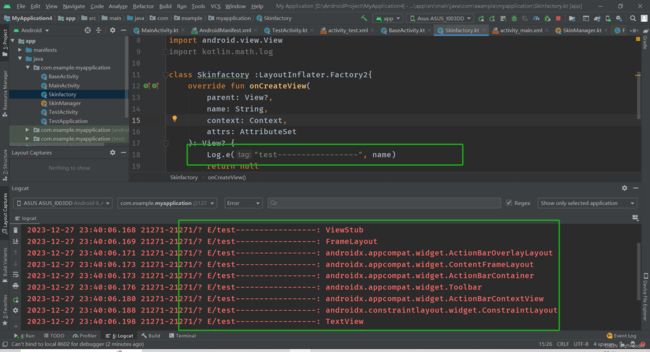
运行发现onCreateView中的name打印的都是我们布局中的view的名字
五.换肤属性封装
创建view
封装两个类,一个是view,一个是属性
package com.example.myapplication

import android.annotation.SuppressLint
import android.content.Context
import android.util.AttributeSet
import android.util.Log
import android.view.LayoutInflater
import android.view.View
import kotlin.math.log

class Skinfactory : LayoutInflater.Factory2 {
    private var viewList = arrayListOf<SkinView>()
    private val stringArray = arrayOf("android.widget", "android.view", "android.webkit")
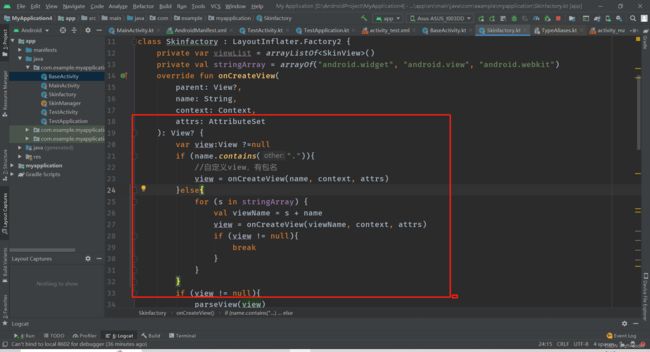
    override fun onCreateView(
        parent: View?,
        name: String,
        context: Context,
        attrs: AttributeSet
    ): View? {
        var view:View ?=null
        if (name.contains(".")){
            //自定义view,有包名
            view = onCreateView(name, context, attrs)
        }else{
            for (s in stringArray) {
                val viewName = s + name
                view = onCreateView(viewName, context, attrs)
                if (view != null){
                    break
                }
            }
        }
        if (view != null){
            parseView(view)
        }
        return view
    }

    /**判断这个控件是不是符合我们的换肤的标准,如果符合就收集
     * @param view
     */
    private fun parseView(view: View) {

    }

    @SuppressLint("LongLogTag")
    override fun onCreateView(name: String, context: Context, attrs: AttributeSet): View? {
        Log.e("test=====================", name)
        return null
    }

    class SkinView {
        var skinItems: List<SkinItem>? = null
        var view: View? = null
    }

    //每条属性的封装对象
    class SkinItem {
        //属性的名字,textColor,background
        var name: String? = null

        //属性的值的类型,color,drawable,mipmap
        var typeName: String? = null

        //属性的值的名字,colorPrimary
        var entryName: String? = null

        //属性值在R文件中的资源ID
        var resId = 0

        constructor(name: String?, typeName: String?, entryName: String?, resId: Int) {
            this.name = name
            this.typeName = typeName
            this.entryName = entryName
            this.resId = resId
        }
    }
}
六.皮肤资源匹配实现资源替换
package com.example.myapplication

import android.annotation.SuppressLint
import android.content.Context
import android.os.Build
import android.text.TextUtils
import android.util.AttributeSet
import android.util.Log
import android.view.LayoutInflater
import android.view.View
import android.widget.Button
import android.widget.TextView
import androidx.annotation.IntegerRes
import java.lang.reflect.Constructor
import kotlin.math.log

@Suppress("UNCHECKED_CAST")
class Skinfactory : LayoutInflater.Factory2 {
    private var viewList = arrayListOf<SkinView>()
    private val stringArray = arrayOf("android.widget", "android.view", "android.webkit")
    override fun onCreateView(
        parent: View?,
        name: String,
        context: Context,
        attrs: AttributeSet
    ): View? {
        var view: View? = null
        if (name.contains(".")) {
            //自定义view,有包名
            view = onCreateView(name, context, attrs)
        } else {
            for (s in stringArray) {
                val viewName = s + name
                view = onCreateView(viewName, context, attrs)
                if (view != null) {
                    break
                }
            }
        }
        if (view != null) {
            parseView(view, attrs)
        }
        return view
    }

    /**判断这个控件是不是符合我们的换肤的标准,如果符合就收集
     * @param view
     */
    private fun parseView(view: View, attrs: AttributeSet) {
        var skinItems = arrayListOf<SkinItem>()
        for (i in 0 until attrs.attributeCount) {
            //获取到这条属性的名字
            val attributeName = attrs.getAttributeName(i)
            if (attributeName.contains("background") || attributeName.contains("textColor")) {
                //获取到资源的ID @8917317
                val attributeValue = attrs.getAttributeValue(i)
                val resId: Int = attributeValue.substring(1).toInt()
                //获取属性的名字,以及属性值的类型
                val resourceEntryName = view.resources.getResourceEntryName(resId)
                val resourceTypeName = view.resources.getResourceTypeName(resId)
                val skinItem = SkinItem(attributeName, resourceTypeName, resourceEntryName, resId)
                skinItems.add(skinItem)


            }
        }
        if (skinItems.size > 0) {
            val skinView = SkinView(skinItems, view)
            viewList.add(skinView)
        }
    }

    @SuppressLint("LongLogTag")
    override fun onCreateView(name: String, context: Context, attrs: AttributeSet): View? {
        var view: View?=null
        val aClass: Class<*> = context.classLoader.loadClass(name)
        val constructor: Constructor<out View>  =
            aClass.getConstructor(Context::class.java, AttributeSet::class.java) as Constructor<out View>
        constructor.newInstance(context, attrs)
        return view
    }

    class SkinView {
        var skinItems: List<SkinItem>? = null
        var view: View? = null

        constructor(skinItems: List<SkinItem>?, view: View?) {
            this.skinItems = skinItems
            this.view = view
        }

        fun apply() {
            skinItems?.forEach { skinItem ->
                if (TextUtils.equals(skinItem.name, "background")) {
                    if (TextUtils.equals(skinItem.typeName, "color")) {
                        SkinManager.getColor(skinItem.resId)?.let { view?.setBackgroundColor(it) }
                    } else if (TextUtils.equals(skinItem.typeName, "drawable")) {
//                        if (Build.VERSION.SDK_INT >= Build.VERSION_CODES.JELLY_BEAN){
                        view?.background = SkinManager.getDrawable(skinItem.resId)
//                        }
                    }
                } else if (TextUtils.equals(skinItem.name, "textColor")) {
                    if (view is TextView) {
                        SkinManager.getColor(skinItem.resId)?.let {
                            (view as TextView).setTextColor(
                                it
                            )
                        }
                    } else if (view is Button) {
                        SkinManager.getColor(skinItem.resId)?.let {
                            (view as Button).setTextColor(
                                it
                            )
                        }
                    }
                }
            }
        }
    }

    //每条属性的封装对象
    class SkinItem {
        //属性的名字,textColor,background
        var name: String? = null

        //属性的值的类型,color,drawable,mipmap
        var typeName: String? = null

        //属性的值的名字,colorPrimary
        var entryName: String? = null

        //属性值在R文件中的资源ID
        var resId = 0

        constructor(name: String?, typeName: String?, entryName: String?, resId: Int) {
            this.name = name
            this.typeName = typeName
            this.entryName = entryName
            this.resId = resId
        }
    }
}

