Fragment总结
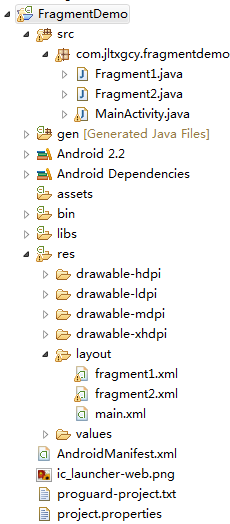
一、总体工程图:
二、main.xml
<LinearLayout xmlns:android="http://schemas.android.com/apk/res/android"

    android:layout_width="match_parent"

    android:layout_height="match_parent"

    android:baselineAligned="false"

    android:orientation="vertical" >


    <fragment

        android:id="@+id/fragment1"

        android:name="com.jltxgcy.fragmentdemo.Fragment1"

        android:layout_width="match_parent"

        android:layout_height="wrap_content"

        android:layout_weight="1" />


   <LinearLayout xmlns:android="http://schemas.android.com/apk/res/android"

    android:id="@+id/main_layout"

    android:layout_width="match_parent"

    android:layout_height="wrap_content"

    android:baselineAligned="false"

    android:layout_weight="1" >


	</LinearLayout>

    <TextView

        android:id="@+id/tv_display"

        android:layout_width="match_parent"

        android:layout_height="wrap_content"/>


</LinearLayout>
三、fragment1.xml
<LinearLayout xmlns:android="http://schemas.android.com/apk/res/android"

    android:layout_width="match_parent"

    android:layout_height="match_parent"

    android:background="#00ff00" >

    <TextView

        android:id="@+id/tv_fragment1"

        android:layout_width="wrap_content"

        android:layout_height="wrap_content"

        android:text="This is fragment 1"

        android:textColor="#000000"

        android:textSize="25sp" />


</LinearLayout>
四、fragment2.xml
<LinearLayout xmlns:android="http://schemas.android.com/apk/res/android"

    android:layout_width="match_parent"

    android:layout_height="match_parent"

    android:background="#ffff00" >


    <TextView

        android:id="@+id/tv_fragment2"

        android:layout_width="wrap_content"

        android:layout_height="wrap_content"

        android:text="This is fragment 2"

        android:textColor="#000000"

        android:textSize="25sp" />


</LinearLayout>
五、MainActivity.java
package com.jltxgcy.fragmentdemo;


import android.os.Bundle;

import android.app.Activity;

import android.support.v4.app.FragmentActivity;

import android.view.Menu;


public class MainActivity extends FragmentActivity {

	public static final String TAG = "Fragment2";


    @Override

    public void onCreate(Bundle savedInstanceState) {

        super.onCreate(savedInstanceState);

        setContentView(R.layout.main);

        Fragment2 fragment2 = new Fragment2();

        getSupportFragmentManager().beginTransaction().replace(R.id.main_layout, fragment2).commit();

    }


    public void testMainActivity(){

    	Fragment1 fragment1 = (Fragment1) getSupportFragmentManager().findFragmentById(R.id.fragment1);

		fragment1.testFragment1();

    }


    public void testFindviewById(){

    	findViewById(R.id.tv_display);

    	findViewById(R.id.tv_fragment2);

    }

}
六、Fragment1.java
package com.jltxgcy.fragmentdemo;


import android.os.Bundle;

import android.support.v4.app.Fragment;

import android.util.Log;

import android.view.LayoutInflater;

import android.view.View;

import android.view.ViewGroup;


public class Fragment1 extends Fragment {


	@Override

	public View onCreateView(LayoutInflater inflater, ViewGroup container, Bundle savedInstanceState) {

		return inflater.inflate(R.layout.fragment1, container, false);

	}


	public void testFragment1(){

		Log.d("jltxgcy", "testFragment1");

	}

}
七、Fragment2.java
package com.jltxgcy.fragmentdemo;


import android.os.Bundle;

import android.support.v4.app.Fragment;

import android.view.LayoutInflater;

import android.view.View;

import android.view.ViewGroup;


public class Fragment2 extends Fragment {

	private ViewGroup mViewGroup;


	@Override

	public View onCreateView(LayoutInflater inflater, ViewGroup container, Bundle savedInstanceState) {

		mViewGroup = container;

		testFragment2();

		return inflater.inflate(R.layout.fragment2, container, false);

	}


	public void testFragment2(){

		MainActivity mainActivity = (MainActivity)getActivity();

		mainActivity.testMainActivity();

		Fragment1 fragment1 = (Fragment1) getFragmentManager().findFragmentById(R.id.fragment1);

		fragment1.testFragment1();

	}


	public void testFindviewById(){

		mViewGroup.findViewById(R.id.tv_fragment2);

		getActivity().findViewById(R.id.tv_display);

		getActivity().findViewById(R.id.tv_fragment1);

	}


}
八、上面分别介绍了动态和静态加载Fragment的过程。
Activity中获取自身控件View:findViewById(R.id.tv_display);
Activity中获取Fragment控件View:findViewById(R.id.tv_fragment2);
Activity中使用Fragment方法:
Fragment1 fragment1 = (Fragment1) getSupportFragmentManager().findFragmentById(R.id.fragment1);
fragment1.testFragment1();
Fragment中获取自身控件View:mViewGroup.findViewById(R.id.tv_fragment2);
Fragment中获取Activity控件View:getActivity().findViewById(R.id.tv_display);
Fragment中获取其他控件Fragment的View:getActivity().findViewById(R.id.tv_fragment1);
Fragment中使用Activity中的方法:
MainActivity mainActivity = (MainActivity)getActivity();
mainActivity.testMainActivity();
Fragment中使用其他Fragment中的方法:
Fragment1 fragment1 = (Fragment1) getFragmentManager().findFragmentById(R.id.fragment1);
fragment1.testFragment1();
九、程序运行最后结果为:

十、代码待后我会传到github上。