使用IBM WID建立SOA 3(Responding to the applicant)
Responding to the applicant
3.1. 定义一个业务规则( Defining the business rules for automatic approval)
1) 为业务规则添加一个具体的实现
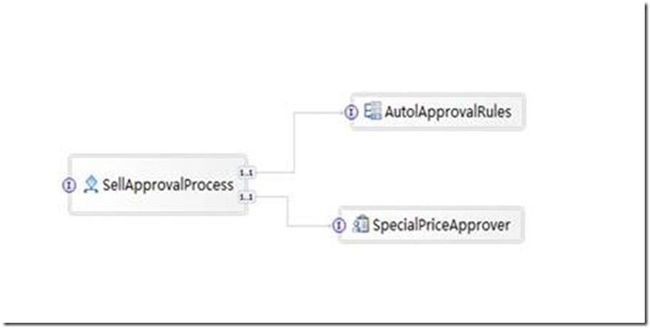
a) 切换到assembly视图
b) 右击AutolApprovalRule服务组件, 从弹出菜单中选择Generate Implementation. 将弹出一个对话框,单击确定.
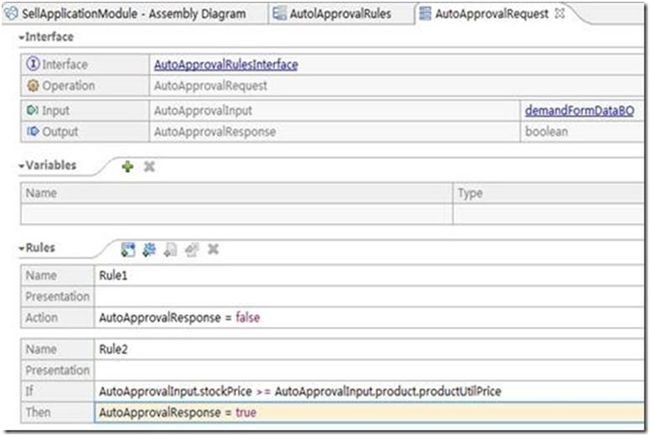
c) 在导航树中,单击AutoApprovalRequest.
d) 单击Enter Rule Logic,并选择New Request,保存默认命名,单击确定.
e) 在Rule 选项条里面,单击Add Action Rule增加一个新的规则.
f) 单击 Action并选择 AutoApprovalResponse = false.
g) 单击Add If-Then Rule 图标建立一个条件,如果采购采购产口的采购价格大于或者等于厂方报价,. AutoApprovalResponse = true
3.2 这义特价审批流程的具体实现( Defining the implementation for SpecialPrice approval)
1) 为特价审批组件服务添加一个具体的实现
a) 切换到assembly视图
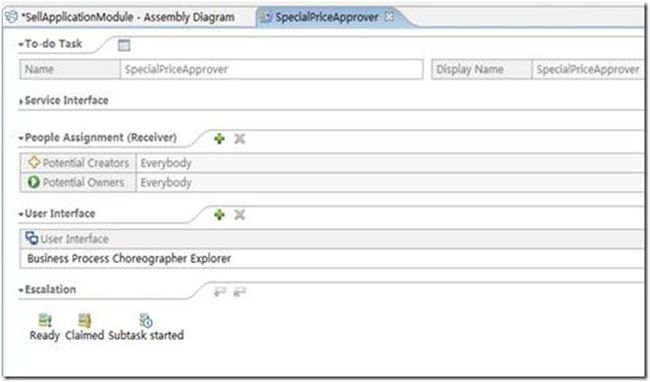
b) 右击ManualApproval服务组件, 从弹出菜单中选择Generate Implementation. 将弹出一个对话框,单击确定.
c) 在用户界面设置视图里面选择Business Process Choreographer Explorer .
d) 按Ctrl+s保存刚才实现的操作,然后返回assembly视图.在菜单栏选择Project > Clean来重构项目.然后在assembly视图里面的所有警告将会消失.
3.3 创建用户界面( Generating user interfaces)
1) 为用户创建发货申请页面.
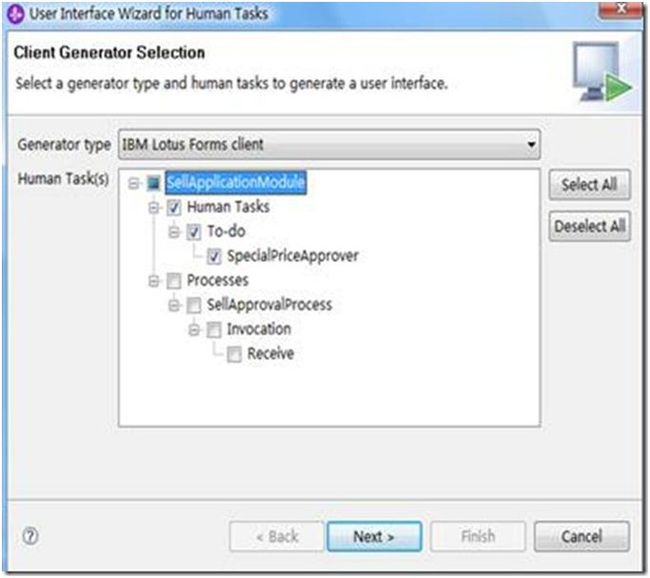
a) 在Business Integration视图里面右击SellApplicationModule项目选择Generate User Interfaces. 将弹出一个对话框.
b) 选择JSF Custom Client作为界面生成类型, 取消Processes前面的勾号, 然后单击 Next.将弹出一个JSP 客户端面管理对话框.
c) 在弹出的窗口中,输入SpecialPriceApproverUI 作为动态项目的名字,单击完成.
2) 为用户创建发货申请页面.
a) 在Business Integration视图里面右击SellApplicationModule项目选择Generate User Interfaces. 将弹出一个对话框.
b) 选择JSF Custom Client作为界面生成类型, 取消Human Tasks前面的勾号, 然后单击 Next.将弹出一个JSP 客户端面管理对话框.
c) 在弹出的窗口中,输入CustomerUI 作为动态项目的名字,单击完成
3) 形成的文件目录结构如下:
Technorati 标签: SOA,信息化,WID


