Unity3D游戏开发从零单排(七) - NetworkView的Demo
提要
今天做了一个移动设备的网络通信demo,分两个部分,一个是网络连接,一个是数据通信。
需要两台Android设备A,B。A作客户端,B作服务端。
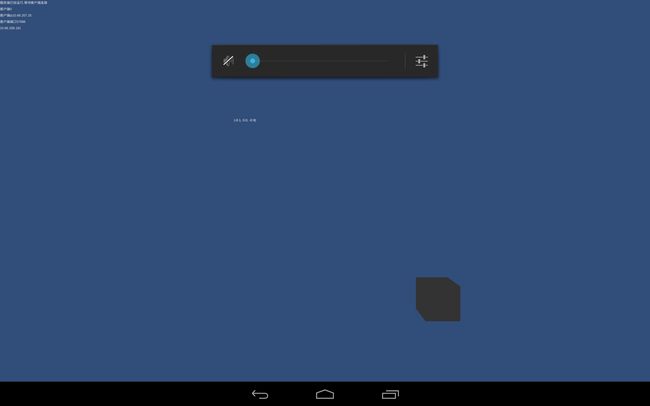
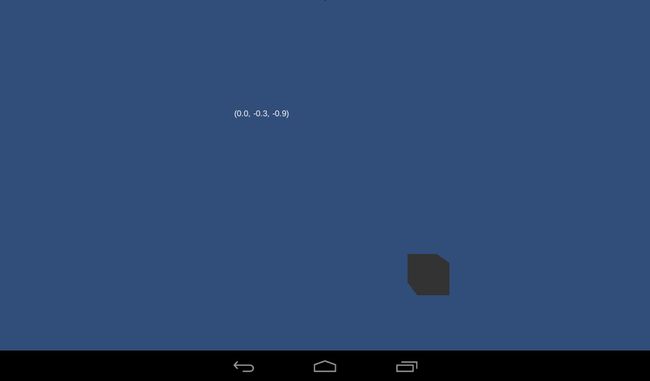
最终的效果是玩家控制设备A中的方块,B中的方块也一起动,同时在A的加速度传感器的信息在B中也实时更新。
网络连接
首先两台设备要联网,且IP在同一个网段,比如连接在同一个路由上,或者通过笔记本发出wifi信号,然后把设备连在上面。
在Unity3d中创建一个新工程,在场景中创建两个空物体,一个Client,一个Server。
在client创建一个脚本client.cs
using UnityEngine;
using System.Collections;

public class client : MonoBehaviour {

    private string IP = "10.66.208.191";
    private string clientIp;
    private string clientIpSplite;
    private Vector3 acceleration;
    public GameObject cube;
    private bool cubeInitialed = false;
    //Connet port
    private int Port = 10000;

    void Awake()
    {
        clientIp = Network.player.ipAddress;
        string[] tmpArray = clientIp.Split('.');
        clientIpSplite = tmpArray[0] + "." + tmpArray[1] + "." + tmpArray[2] + ".";
    }


    void OnGUI()
    {
        switch (Network.peerType)
        {
            case NetworkPeerType.Disconnected:
                StartConnect();
                break;
            case NetworkPeerType.Server:
                break;
            case NetworkPeerType.Client:
                OnConnect();
                break;
            case NetworkPeerType.Connecting:
                break;
        }
    }


    void StartConnect()
    {
        if (GUILayout.Button("Connect Server"))
        {
            NetworkConnectionError error = Network.Connect(IP, Port);
            Debug.Log("connect status:" + error);
        }
    }

    void OnConnect()
    {
        if(!cubeInitialed)
        {
            Network.Instantiate(cube, transform.position, transform.rotation, 0);
            cubeInitialed = true;
        }
    }
}
客户端根据当前当前的状态来执行相应的动作。StartConnect负责连接,用到了
static NetworkConnectionError Connect(string[] IPs, int remotePort)
第一个参数是Ip,第二个参数是端口。
连接上之后调用OnConnect函数初始化一个方块。注意这个方块是在客户端初始化的,属于这个客户端,创建成功之后会在其他的一桶连接的设备上都实例化一个cube出来,但是只有在这个client上NetworkView.isMine才为true。
接下来是服务端的代码。
using UnityEngine;
using System.Collections;

public class server : MonoBehaviour {
    private int serverPort;
    public GUIText status;

    void Awake()
    {
        serverPort = 10000;
    }


  //OnGUI方法,所有GUI的绘制都需要在这个方法中实现
    void OnGUI()
    {
        //Network.peerType是端类型的状态:
        //即disconnected, connecting, server 或 client四种
        switch (Network.peerType)
        {
            //禁止客户端连接运行, 服务器未初始化
            case NetworkPeerType.Disconnected:
                StartServer();
                break;
            //运行于服务器端
            case NetworkPeerType.Server:
                OnServer();
                break;
            //运行于客户端
            case NetworkPeerType.Client:
                break;
            //正在尝试连接到服务器
            case NetworkPeerType.Connecting:
                break;
        }
        GUILayout.Label(Network.player.ipAddress);
    }

    void StartServer()
    {
        //当用户点击按钮的时候为true
        if (GUILayout.Button("创建服务器"))
        {
            //初始化本机服务器端口,第一个参数就是本机接收多少连接
            NetworkConnectionError error = Network.InitializeServer(12, serverPort, false);
            Debug.Log("错误日志" + error);
        }
    }

    void OnServer()
    {
        GUILayout.Label("服务端已经运行,等待客户端连接");
        int length = Network.connections.Length;

        for(int i = 0; i < length; i++)
        {
            GUILayout.Label("客户端" + i);
            GUILayout.Label("客户端ip" + Network.connections[i].ipAddress);
            GUILayout.Label("客户端端口" + Network.connections[i].port);
        }
    }

    void OnSerializeNetworkView(BitStream stream, NetworkMessageInfo info)
{
    // Always send transform (depending on reliability of the network view)
    if (stream.isWriting)
    {
        Vector3 pos = transform.localPosition;
        Quaternion rot = transform.localRotation;
        stream.Serialize(ref pos);
        stream.Serialize(ref rot);
    }
    // When receiving, buffer the information
    else {
        // Receive latest state information
        Vector3 pos = Vector3.zero;
        Quaternion rot = Quaternion.identity;
        stream.Serialize(ref pos);
        stream.Serialize(ref rot);
    }
}
}
点击屏幕上的创建服务器之后就在设备上创建了一个服务端,监听对应的端口,当有其他设备连接上来的时间,客户端的信息就会打印出来,可以支持多个设备的连接。
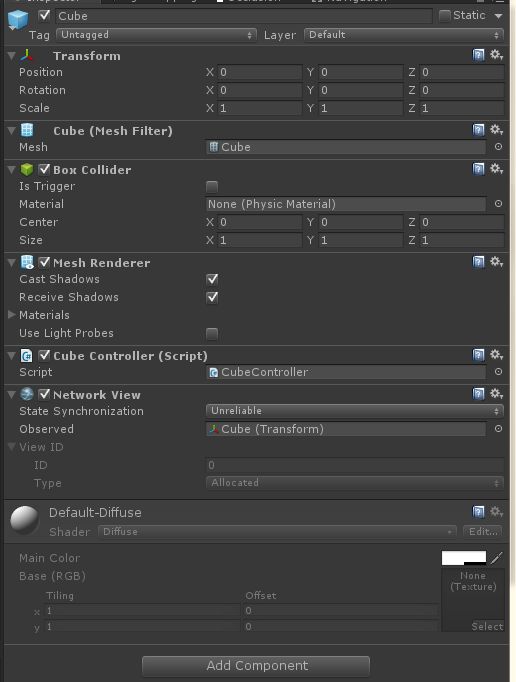
还要创建一个cube的prefab,用于动态创建。
CubeController用于控制方块的运动,NetWorkView用于数据通信。
数据通信
需要进行数据通信的GameObject都要添加一个NetworkView 组件,数据通信有两种方式,状态同步和RPC(远程过程调用)。在CubeController.cs中,两种方法都有用到。
using UnityEngine;
using System.Collections;

public class CubeController : MonoBehaviour {
    private GUIText accelText;

    void Start()
    {
        accelText = GameObject.FindGameObjectWithTag("AccelTip").GetComponent<GUIText>() as GUIText;
        accelText.text = "";
    }

    void Update()
    {
        if(Network.isClient)
        {
            Vector3 acceleration = Input.acceleration;
            accelText.text = "" + acceleration;
            networkView.RPC("UpdateAcceleration", RPCMode.Others, acceleration);
        }

        Vector3 moveDir = new Vector3(Input.GetAxis("Horizontal"), 0, Input.GetAxis("Vertical"));
        Vector3 cubescreenPos =  Camera.main.WorldToScreenPoint(transform.position);
        if (Input.GetMouseButton(0))
        {
            moveDir = new Vector3(Input.mousePosition.x - cubescreenPos.x, Input.mousePosition.y - cubescreenPos.y, 0f).normalized;
        }
        Debug.Log("moveDir: " + moveDir);
        float speed = 5;
        transform.Translate(speed * moveDir * Time.deltaTime);
    }

    void OnSerializeNetworkView(BitStream stream, NetworkMessageInfo info)
    {
        if (stream.isWriting)
        {
            Vector3 pos = transform.position;
            stream.Serialize(ref pos);
        }
        else
        {
            Vector3 receivedPosition = Vector3.zero;
            stream.Serialize(ref receivedPosition);
            transform.position = receivedPosition;
        }
    }

    [RPC]
    void UpdateAcceleration(Vector3 acceleration)
    {
        accelText.text = "" + acceleration;
    }

}
function OnSerializeNetworkView(stream : BitStream, info : NetworkMessageInfo) {}
这是在Network class中提供的一个func. 主要负责message sent / receive,他会同步被network view所关注的script中的对象,也就是当你写了一个script内含OnSerializeNetworkView(){},并且丢到observed属性中,则OnSerializeNetworkView()裡的code就会开始运作。基本上他透过BitStream物件收发网路上的资讯,使用上不需要了解封包的问题,也不需要知道如何切割封包。在这的demo中,服务端只负责接收信息,所以只执行else后面的代码,客户端发送信息,执行if后面的代码。
这里cube的state synchronization选的是Unreliable,对应的通讯协议是UDP,特点是无连接,比较快。
RPC典型的应用场景就是聊天室,使用也非常简单,首先定义一个rpc函数在(在上面加上[RPC]),然后通过NetWork.RPC来调用就可以了。这里是把客户端重力传感器的数据传了出去,在界面上更新。
参考
unity3D的網路資料傳輸 & 角色控制 - http://ppb440219.blogspot.com/2011/12/unity3d.html
网络视图 Network View - http://game.ceeger.com/Components/class-NetworkView.html
远程过程调用的细节 RPC Details - http://game.ceeger.com/Components/net-RPCDetails.html
状态同步的细节 State Synchronization Detailshttp://game.ceeger.com/Components/net-StateSynchronization.html
Unity Networking Tutorial - http://www.palladiumgames.net/tutorials/unity-networking-tutorial/


