iOS7 最佳实践:一个天气应用案例(下)
开始
你有两个选择开始本教程:您可以使用在本教程的第1部分你已完成的项目,或者你可以在这里下载第1部分已完成的项目。
在前面的教程中你创建了你的App的天气模型 – 现在你需要使用OpenWeatherMap API为你的App来获取一些数据。你将使用两个类抽象数据抓取、分析、存储:WXClient和WXManager。
WXClient的唯一责任是创建API请求,并解析它们;别人可以不用担心用数据做什么以及如何存储它。划分类的不同工作职责的设计模式被称为关注点分离。这使你的代码更容易理解,扩展和维护。
与ReactiveCocoa工作
确保你使用SimpleWeather.xcworkspace,打开WXClient.h并增加imports
|
1
2
|
@import CoreLocation;
#import <ReactiveCocoa/ReactiveCocoa/ReactiveCocoa.h>
|
|
1
|
注意:您可能之前没有见过的@import指令,它在Xcode5中被引入,是由苹果公司看作是一个现代的,更高效的替代 #import。有一个非常好的教程,涵盖了最新的Objective-C特性-[What’s New in Objective-C and Foundation in iOS 7](http://www.raywenderlich.com/49850/whats-new-in-objective-c-and-foundation-in-ios-7)。
|
在WXClient.h中添加下列四个方法到接口申明:
|
1
2
3
4
5
|
@import Foundation;
- (RACSignal *)fetchJSONFromURL:(NSURL *)url;
- (RACSignal *)fetchCurrentConditionsForLocation:(CLLocationCoordinate2D)coordinate;
- (RACSignal *)fetchHourlyForecastForLocation:(CLLocationCoordinate2D)coordinate;
- (RACSignal *)fetchDailyForecastForLocation:(CLLocationCoordinate2D)coordinate;
|
现在,似乎是一个很好的机会来介绍ReactiveCocoa!
ReactiveCocoa(RAC)是一个Objective-C的框架,用于函数式反应型编程,它提供了组合和转化数据流的API。代替专注于编写串行的代码 – 执行有序的代码队列 – 可以响应非确定性事件。
Github上提供的a great overview of the benefits:
- 对未来数据的进行组合操作的能力。
- 减少状态和可变性。
- 用声明的形式来定义行为和属性之间的关系。
- 为异步操作带来一个统一的,高层次的接口。
- 在KVO的基础上建立一个优雅的API。
例如,你可以监听username属性的变化,用这样的代码:
|
1
2
3
|
[RACAble(self.username) subscribeNext:^(NSString *newName) {
NSLog(@"%@", newName);
}];
|
subscribeNext这个block会在self.username属性变化的时候执行。新的值会传递给这个block。
您还可以合并信号并组合数据到一个组合数据中。下面的示例取自于ReactiveCocoa的Github页面:
|
1
2
3
4
5
6
7
8
|
[[RACSignal
combineLatest:@[ RACAble(self.password), RACAble(self.passwordConfirmation) ]
reduce:^(NSString *currentPassword, NSString *currentConfirmPassword) {
return [NSNumber numberWithBool:[currentConfirmPassword isEqualToString:currentPassword]];
}]
subscribeNext:^(NSNumber *passwordsMatch) {
self.createEnabled = [passwordsMatch boolValue];
}];
|
RACSignal对象捕捉当前和未来的值。信号可以被观察者链接,组合和反应。信号实际上不会执行,直到它被订阅。
这意味着调用[mySignal fetchCurrentConditionsForLocation:someLocation];不会做什么,但创建并返回一个信号。你将看到之后如何订阅和反应。
打开WXClient.m加入以下imports:
|
1
2
|
#import "WXCondition.h"
#import "WXDailyForecast.h"
|
在imports下,添加私有接口:
|
1
2
3
4
5
|
@interface WXClient ()
@property (nonatomic, strong) NSURLSession *session;
@end
|
这个接口用这个属性来管理API请求的URL session。
添加以下init放到到@implementation和@end之间:
|
1
2
3
4
5
6
7
|
- (id)init {
if (self = [super init]) {
NSURLSessionConfiguration *config = [NSURLSessionConfiguration defaultSessionConfiguration];
_session = [NSURLSession sessionWithConfiguration:config];
}
return self;
}
|
使用defaultSessionConfiguration为您创建session。
|
1
|
注意:如果你以前没有了解过NSURLSession,看看我们的[NSURLSession教程](http://www.raywenderlich.com/51127/nsurlsession-tutorial),了解更多信息。
|
构建信号
你需要一个主方法来建立一个信号从URL中取数据。你已经知道,需要三种方法来获取当前状况,逐时预报及每日预报。
不是写三个独立的方法,你可以遵守DRY(Don’t Repeat Yourself)的软件设计理念,使您的代码容易维护。
第一次看,以下的一些ReactiveCocoa部分可能看起来相当陌生。别担心,你会一块一块理解他。
增加下列方法到WXClient.m:
|
1
2
3
4
5
6
7
8
9
10
11
12
13
14
15
16
17
18
19
20
21
22
|
- (RACSignal *)fetchJSONFromURL:(NSURL *)url {
NSLog(@"Fetching: %@",url.absoluteString);
// 1
return [[RACSignal createSignal:^RACDisposable *(id<RACSubscriber> subscriber) {
// 2
NSURLSessionDataTask *dataTask = [self.session dataTaskWithURL:url completionHandler:^(NSData *data, NSURLResponse *response, NSError *error) {
// TODO: Handle retrieved data
}];
// 3
[dataTask resume];
// 4
return [RACDisposable disposableWithBlock:^{
[dataTask cancel];
}];
}] doError:^(NSError *error) {
// 5
NSLog(@"%@",error);
}];
}
|
通过一个一个注释,你会看到代码执行以下操作:
- 返回信号。请记住,这将不会执行,直到这个信号被订阅。
- fetchJSONFromURL:创建一个对象给其他方法和对象使用;这种行为有时也被称为工厂模式。 - 创建一个NSURLSessionDataTask(在iOS7中加入)从URL取数据。你会在以后添加的数据解析。
- 一旦订阅了信号,启动网络请求。
- 创建并返回RACDisposable对象,它处理当信号摧毁时的清理工作。
- 增加了一个“side effect”,以记录发生的任何错误。side effect不订阅信号,相反,他们返回被连接到方法链的信号。你只需添加一个side effect来记录错误。
|
1
|
如果你觉得需要更多一些背景知识,看看由Ash Furrow编写的[这篇文章](http://www.teehanlax.com/blog/getting-started-with-reactivecocoa/),以便更好地了解ReactiveCocoa的核心概念。
|
在-fetchJSONFromURL:中找到// TODO: Handle retrieved data ,替换为:
|
1
2
3
4
5
6
7
8
9
10
11
12
13
14
15
16
17
18
19
|
if (! error) {
NSError *jsonError = nil;
id json = [NSJSONSerialization JSONObjectWithData:data options:kNilOptions error:&jsonError];
if (! jsonError) {
// 1
[subscriber sendNext:json];
}
else {
// 2
[subscriber sendError:jsonError];
}
}
else {
// 2
[subscriber sendError:error];
}
// 3
[subscriber sendCompleted];
|
- 当JSON数据存在并且没有错误,发送给订阅者序列化后的JSON数组或字典。
- 在任一情况下如果有一个错误,通知订阅者。
- 无论该请求成功还是失败,通知订阅者请求已经完成。
-fetchJSONFromURL:方法有点长,但它使你的特定的API请求方法变得很简单。
获取当前状况
还在WXClient.m中,添加如下方法:
|
1
2
3
4
5
6
7
8
9
10
11
|
- (RACSignal *)fetchCurrentConditionsForLocation:(CLLocationCoordinate2D)coordinate {
// 1
NSString *urlString = [NSString stringWithFormat:@"http://api.openweathermap.org/data/2.5/weather?lat=%f&lon=%f&units=imperial",coordinate.latitude, coordinate.longitude];
NSURL *url = [NSURL URLWithString:urlString];
// 2
return [[self fetchJSONFromURL:url] map:^(NSDictionary *json) {
// 3
return [MTLJSONAdapter modelOfClass:[WXCondition class] fromJSONDictionary:json error:nil];
}];
}
|
- 使用
CLLocationCoordinate2D对象的经纬度数据来格式化URL。 - 用你刚刚建立的创建信号的方法。由于返回值是一个信号,你可以调用其他ReactiveCocoa的方法。 在这里,您将返回值映射到一个不同的值 – 一个NSDictionary实例。
- 使用
MTLJSONAdapter来转换JSON到WXCondition对象 – 使用MTLJSONSerializing协议创建的WXCondition。
获取逐时预报
现在添加根据坐标获取逐时预报的方法到WXClient.m:
|
1
2
3
4
5
6
7
8
9
10
11
12
13
14
15
|
- (RACSignal *)fetchHourlyForecastForLocation:(CLLocationCoordinate2D)coordinate {
NSString *urlString = [NSString stringWithFormat:@"http://api.openweathermap.org/data/2.5/forecast?lat=%f&lon=%f&units=imperial&cnt=12",coordinate.latitude, coordinate.longitude];
NSURL *url = [NSURL URLWithString:urlString];
// 1
return [[self fetchJSONFromURL:url] map:^(NSDictionary *json) {
// 2
RACSequence *list = [json[@"list"] rac_sequence];
// 3
return [<div class="list"></div> fromJSONDictionary:item error:nil];
// 5
}] array];
}];
}
|
- 再次使用
-fetchJSONFromUR方法,映射JSON。注意:重复使用该方法节省了多少代码! - 使用JSON的”list”key创建
RACSequence。RACSequences让你对列表进行ReactiveCocoa操作。 - 映射新的对象列表。调用
-map:方法,针对列表中的每个对象,返回新对象的列表。 - 再次使用
MTLJSONAdapter来转换JSON到WXCondition对象。 - 使用
RACSequence的-map方法,返回另一个RACSequence,所以用这个简便的方法来获得一个NSArray数据。
获取每日预报
最后,添加如下方法到WXClient.m:
|
1
2
3
4
5
6
7
8
9
10
11
12
13
14
|
- (RACSignal *)fetchDailyForecastForLocation:(CLLocationCoordinate2D)coordinate {
NSString *urlString = [NSString stringWithFormat:@"http://api.openweathermap.org/data/2.5/forecast/daily?lat=%f&lon=%f&units=imperial&cnt=7",coordinate.latitude, coordinate.longitude];
NSURL *url = [NSURL URLWithString:urlString];
// Use the generic fetch method and map results to convert into an array of Mantle objects
return [[self fetchJSONFromURL:url] map:^(NSDictionary *json) {
// Build a sequence from the list of raw JSON
RACSequence *list = [json[@"list"] rac_sequence];
// Use a function to map results from JSON to Mantle objects
return [<div class="list"></div> fromJSONDictionary:item error:nil];
}] array];
}];
}
|
是不是看起来很熟悉?是的,这个方法与-fetchHourlyForecastForLocation:方法非常像。除了它使用WXDailyForecast代替WXCondition,并获取每日预报。
构建并运行您的App,现在你不会看到任何新的东西,但这是一个很好机会松一口气,并确保没有任何错误或警告。
管理并存储你的数据
现在是时间来充实WXManager,这个类会把所有东西结合到一起。这个类实现您App的一些关键功能:
- 它使用单例设计模式。
- 它试图找到设备的位置。
- 找到位置后,它获取相应的气象数据。
打开WXManager.h使用以下代码来替换其内容:
|
1
2
3
4
5
6
7
8
9
10
11
12
13
14
15
16
17
18
19
20
21
22
|
@import Foundation;
@import CoreLocation;
#import <ReactiveCocoa/ReactiveCocoa/ReactiveCocoa.h>
// 1
#import "WXCondition.h"
@interface WXManager : NSObject
<CLLocationManagerDelegate>
// 2
+ (instancetype)sharedManager;
// 3
@property (nonatomic, strong, readonly) CLLocation *currentLocation;
@property (nonatomic, strong, readonly) WXCondition *currentCondition;
@property (nonatomic, strong, readonly) NSArray *hourlyForecast;
@property (nonatomic, strong, readonly) NSArray *dailyForecast;
// 4
- (void)findCurrentLocation;
@end
|
- 请注意,你没有引入
WXDailyForecast.h,你会始终使用WXCondition作为预报的类。WXDailyForecast的存在是为了帮助Mantle转换JSON到Objective-C。 - 使用
instancetype而不是WXManager,子类将返回适当的类型。 - 这些属性将存储您的数据。由于
WXManager是一个单例,这些属性可以任意访问。设置公共属性为只读,因为只有管理者能更改这些值。 - 这个方法启动或刷新整个位置和天气的查找过程。
现在打开WXManager.m并添加如下imports到文件顶部:
|
1
2
|
#import "WXClient.h"
#import <TSMessages/TSMessage.h>
|
在imports下方,粘贴如下私有接口:
|
1
2
3
4
5
6
7
8
9
10
11
12
13
14
|
@interface WXManager ()
// 1
@property (nonatomic, strong, readwrite) WXCondition *currentCondition;
@property (nonatomic, strong, readwrite) CLLocation *currentLocation;
@property (nonatomic, strong, readwrite) NSArray *hourlyForecast;
@property (nonatomic, strong, readwrite) NSArray *dailyForecast;
// 2
@property (nonatomic, strong) CLLocationManager *locationManager;
@property (nonatomic, assign) BOOL isFirstUpdate;
@property (nonatomic, strong) WXClient *client;
@end
|
- 声明你在公共接口中添加的相同的属性,但是这一次把他们定义为
可读写,因此您可以在后台更改他们。 - 为查找定位和数据抓取声明一些私有变量。
添加如下通用的单例构造器到@implementation与@endå中间:
|
1
2
3
4
5
6
7
8
9
|
+ (instancetype)sharedManager {
static id _sharedManager = nil;
static dispatch_once_t onceToken;
dispatch_once(&onceToken, ^{
_sharedManager = [[self alloc] init];
});
return _sharedManager;
}
|
然后,你需要设置你的属性和观察者。
添加如下方法到WXManager.m:
|
1
2
3
4
5
6
7
8
9
10
11
12
13
14
15
16
17
18
19
20
21
22
23
24
25
26
27
28
29
30
31
32
|
- (id)init {
if (self = [super init]) {
// 1
_locationManager = [[CLLocationManager alloc] init];
_locationManager.delegate = self;
// 2
_client = [[WXClient alloc] init];
// 3
[[[[RACObserve(self, currentLocation)
// 4
ignore:nil]
// 5
// Flatten and subscribe to all 3 signals when currentLocation updates
flattenMap:^(CLLocation *newLocation) {
return [RACSignal merge:@[
[self updateCurrentConditions],
[self updateDailyForecast],
[self updateHourlyForecast]
]];
// 6
}] deliverOn:RACScheduler.mainThreadScheduler]
// 7
subscribeError:^(NSError *error) {
[TSMessage showNotificationWithTitle:@"Error"
subtitle:@"There was a problem fetching the latest weather."
type:TSMessageNotificationTypeError];
}];
}
return self;
}
|
你正使用更多的ReactiveCocoa方法来观察和反应数值的变化。上面这些你做了:
- 创建一个位置管理器,并设置它的delegate为
self。 - 为管理器创建
WXClient对象。这里处理所有的网络请求和数据分析,这是关注点分离的最佳实践。 - 管理器使用一个返回信号的ReactiveCocoa脚本来观察自身的
currentLocation。这与KVO类似,但更为强大。 - 为了继续执行方法链,
currentLocation必须不为nil。 - flattenMap:非常类似于-map:,但不是映射每一个值,它把数据变得扁平,并返回包含三个信号中的一个对象。通过这种方式,你可以考虑将三个进程作为单个工作单元。- 将信号传递给主线程上的观察者。
- 这不是很好的做法,在你的模型中进行UI交互,但出于演示的目的,每当发生错误时,会显示一个banner。
接下来,为了显示准确的天气预报,我们需要确定设备的位置。
查找你的位置
下一步,你要添加当位置查找到,触发抓取天气数据的代码。
添加如下代码到WXManager.m的实现块中:
|
1
2
3
4
5
6
7
8
9
10
11
12
13
14
15
16
17
18
19
20
21
|
- (void)findCurrentLocation {
self.isFirstUpdate = YES;
[self.locationManager startUpdatingLocation];
}
- (void)locationManager:(CLLocationManager *)manager didUpdateLocations:(NSArray *)locations {
// 1
if (self.isFirstUpdate) {
self.isFirstUpdate = NO;
return;
}
CLLocation *location = [locations lastObject];
// 2
if (location.horizontalAccuracy > 0) {
// 3
self.currentLocation = location;
[self.locationManager stopUpdatingLocation];
}
}
|
- 忽略第一个位置更新,因为它一般是缓存值。
- 一旦你获得一定精度的位置,停止进一步的更新。
- 设置
currentLocation,将触发您之前在init中设置的RACObservable。
获取气象数据
最后,是时候添加在客户端上调用并保存数据的三个获取方法。将三个方法捆绑起来,被之前在init方法中添加的RACObservable订阅。您将返回客户端返回的,能被订阅的,相同的信号。
所有的属性设置发生在-doNext:中。
添加如下代码到WXManager.m:
|
1
2
3
4
5
6
7
8
9
10
11
12
13
14
15
16
17
|
- (RACSignal *)updateCurrentConditions {
return [[self.client fetchCurrentConditionsForLocation:self.currentLocation.coordinate] doNext:^(WXCondition *condition) {
self.currentCondition = condition;
}];
}
- (RACSignal *)updateHourlyForecast {
return [[self.client fetchHourlyForecastForLocation:self.currentLocation.coordinate] doNext:^(NSArray *conditions) {
self.hourlyForecast = conditions;
}];
}
- (RACSignal *)updateDailyForecast {
return [[self.client fetchDailyForecastForLocation:self.currentLocation.coordinate] doNext:^(NSArray *conditions) {
self.dailyForecast = conditions;
}];
}
|
它看起来像将一切都连接起来,并蓄势待发。别急!这App实际上并没有告诉管理者做任何事情。 打开WXController.m并导入这管理者到文件的顶部,如下所示:
|
1
|
#import "WXManager.h"
|
添加如下代码到-viewDidLoad:的最后:
|
1
|
[[WXManager sharedManager] findCurrentLocation];
|
这告诉管理类,开始寻找设备的当前位置。
构建并运行您的App,系统会提示您是否允许使用位置服务。你仍然不会看到任何UI的更新,但检查控制台日志,你会看到类似以下内容:
|
1
2
3
|
2013-11-05 08:38:48.886 WeatherTutorial[17097:70b] Fetching: http://api.openweathermap.org/data/2.5/weather?lat=37.785834&lon=-122.406417&units=imperial
2013-11-05 08:38:48.886 WeatherTutorial[17097:70b] Fetching: http://api.openweathermap.org/data/2.5/forecast/daily?lat=37.785834&lon=-122.406417&units=imperial&cnt=7
2013-11-05 08:38:48.886 WeatherTutorial[17097:70b] Fetching: http://api.openweathermap.org/data/2.5/forecast?lat=37.785834&lon=-122.406417&units=imperial&cnt=12
|
这些输出代表你的代码工作正常,网络请求正常执行。
连接接口
这是最后一次展示所有获取,映射和存储的数据。您将使用ReactiveCocoa来观察WXManager单例的变化和当新数据到达时更新界面。
还在WXController.m,到- viewDidLoad的底部,并添加下面的代码到[[WXManager sharedManager] findCurrentLocation];之前:
|
1
2
3
4
5
6
7
8
9
10
11
12
13
|
// 1
[[RACObserve([WXManager sharedManager], currentCondition)
// 2
deliverOn:RACScheduler.mainThreadScheduler]
subscribeNext:^(WXCondition *newCondition) {
// 3
temperatureLabel.text = [NSString stringWithFormat:@"%.0f°",newCondition.temperature.floatValue];
conditionsLabel.text = [newCondition.condition capitalizedString];
cityLabel.text = [newCondition.locationName capitalizedString];
// 4
iconView.image = [UIImage imageNamed:[newCondition imageName]];
}];
|
- 观察
WXManager单例的currentCondition。 - 传递在主线程上的任何变化,因为你正在更新UI。
- 使用气象数据更新文本标签;你为文本标签使用
newCondition的数据,而不是单例。订阅者的参数保证是最新值。 - 使用映射的图像文件名来创建一个图像,并将其设置为视图的图标。
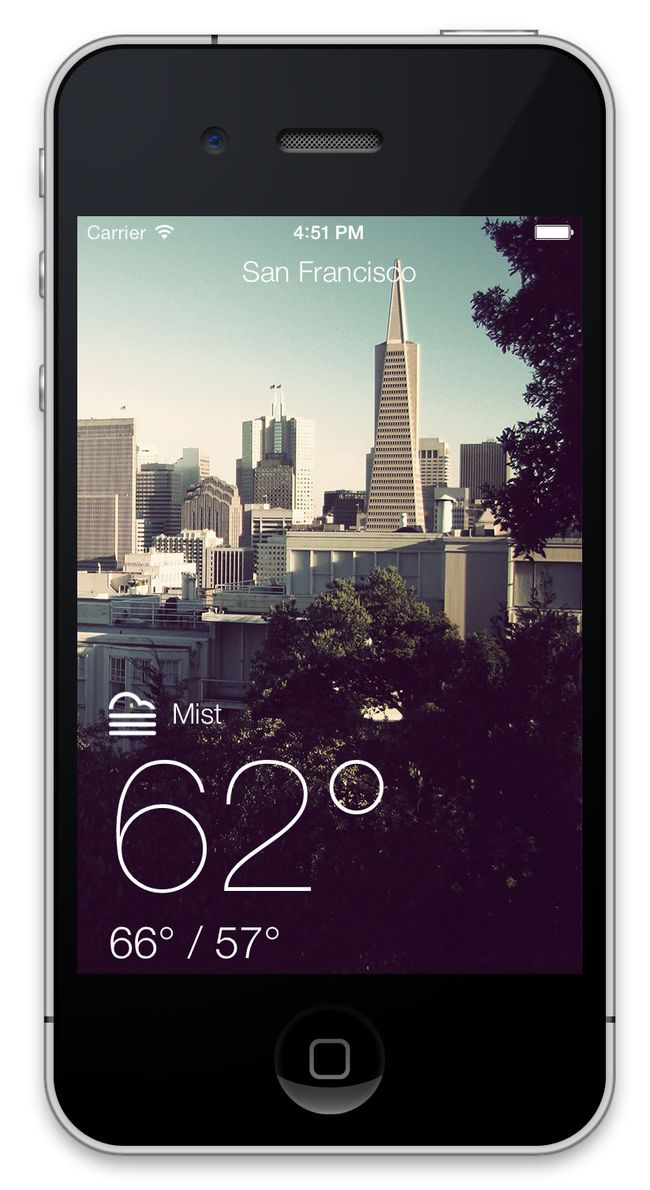
构建并运行您的App,你会看到当前温度,当前状况和表示当前状况的图标。所有的数据都是实时的。但是,如果你的位置是旧金山,它似乎总是约65度。Lucky San Franciscans! :]
ReactiveCocoa的绑定
ReactiveCocoa为iOS带来了自己的Cocoa绑定的形式。
不知道是什么绑定?简而言之,他们是一种提供了保持模型和视图的数据同步而无需编写大量”胶水代码”的手段,它们允许你建立一个视图和数据块之间的连接, “结合”它们,使得一方的变化反映到另一个中的技术。
这是一个非常强大的概念,不是吗?
|
1
|
注意:要获得更多的绑定实例代码,请查看[ReactiveCocoa Readme](https://github.com/ReactiveCocoa/ReactiveCocoa)。
|
添加如下代码到你上一步添加的代码后面:
|
1
2
3
4
5
6
7
8
9
10
11
|
// 1
RAC(hiloLabel, text) = [[RACSignal combineLatest:@[
// 2
RACObserve([WXManager sharedManager], currentCondition.tempHigh),
RACObserve([WXManager sharedManager], currentCondition.tempLow)]
// 3
reduce:^(NSNumber *hi, NSNumber *low) {
return [NSString stringWithFormat:@"%.0f° / %.0f°",hi.floatValue,low.floatValue];
}]
// 4
deliverOn:RACScheduler.mainThreadScheduler];
|
上面的代码结合高温、低温的值到hiloLabel的text属性。看看你完成了什么:
- RAC(…)宏有助于保持语法整洁。从该信号的返回值将被分配给
hiloLabel对象的text。 - 观察
currentCondition的高温和低温。合并信号,并使用两者最新的值。当任一数据变化时,信号就会触发。 - 从合并的信号中,减少数值,转换成一个单一的数据,注意参数的顺序与信号的顺序相匹配。
- 同样,因为你正在处理UI界面,所以把所有东西都传递到主线程。
构建并运行你的App。你应该看到在左下方的高/低温度label更新了:
在Table View中显示数据
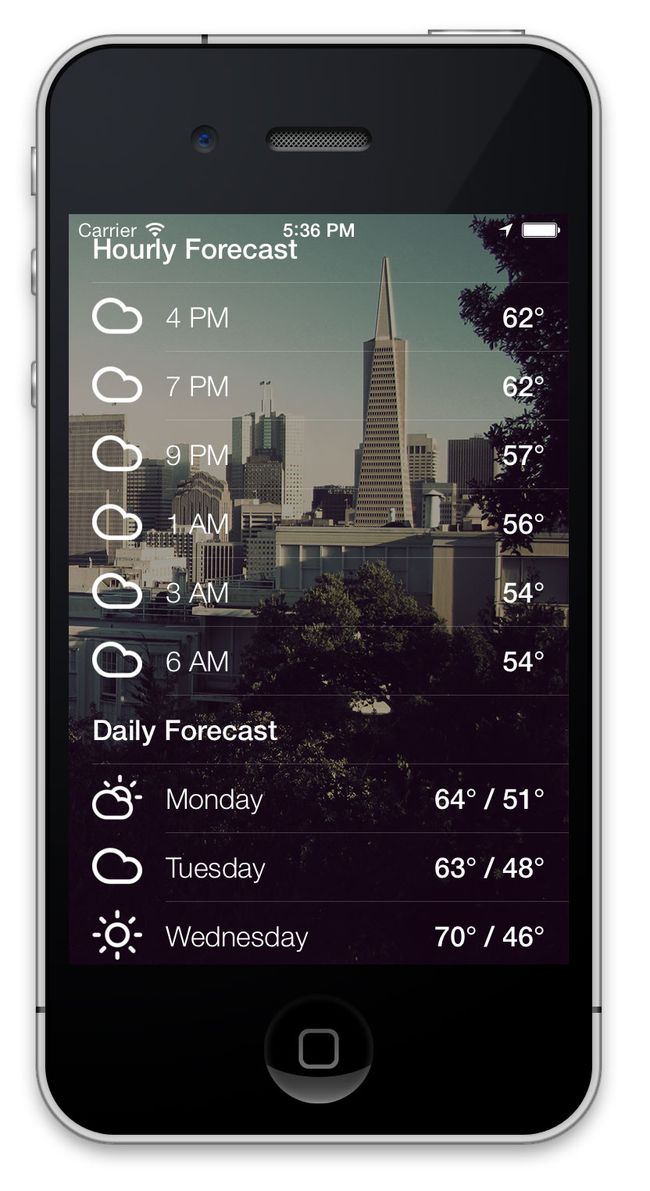
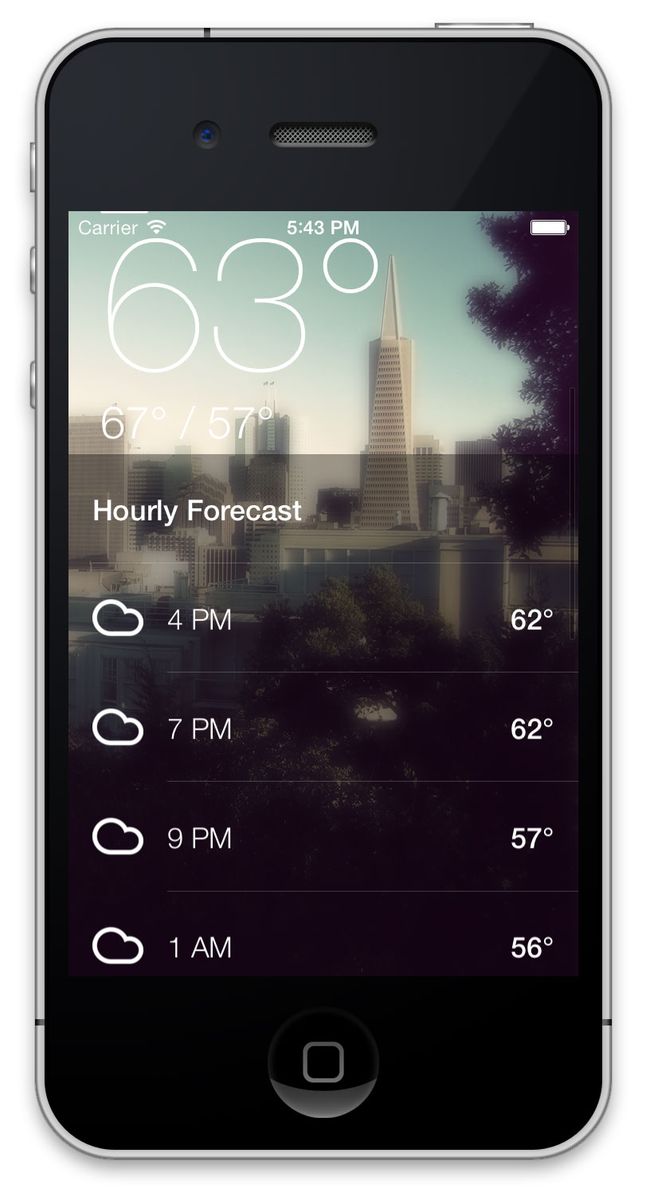
现在,你已经获取所有的数据,你可以在table view中整齐地显示出来。你会在分页的table view中显示最近6小时的每时播报和每日预报。该App会显示三个页面:一个是当前状况,一个是逐时预报,以及一个每日预报。
之前,你可以添加单元格到table view,你需要初始化和配置一些日期格式化。
到WXController.m最顶端的私有接口处,添加下列两个属性
|
1
2
|
@property (nonatomic, strong) NSDateFormatter *hourlyFormatter;
@property (nonatomic, strong) NSDateFormatter *dailyFormatter;
|
由于创建日期格式化非常昂贵,我们将在init方法中实例化他们,并使用这些变量去存储他们的引用。
还在WXController.m中,添加如下代码到@implementation中:
|
1
2
3
4
5
6
7
8
9
10
|
- (id)init {
if (self = [super init]) {
_hourlyFormatter = [[NSDateFormatter alloc] init];
_hourlyFormatter.dateFormat = @"h a";
_dailyFormatter = [[NSDateFormatter alloc] init];
_dailyFormatter.dateFormat = @"EEEE";
}
return self;
}
|
你可能想知道为什么在-init中初始化这些日期格式化,而不是在-viewDidLoad中初始化他们。好问题!
实际上-viewDidLoad可以在一个视图控制器的生命周期中多次调用。 NSDateFormatter对象的初始化是昂贵的,而将它们放置在你的-init,会确保被你的视图控制器初始化一次。
在WXController.m中,寻找tableView:numberOfRowsInSection:,并用如下代码更换TODO到return:
|
1
2
3
4
5
6
|
// 1
if (section == 0) {
return MIN([[WXManager sharedManager].hourlyForecast count], 6) + 1;
}
// 2
return MIN([[WXManager sharedManager].dailyForecast count], 6) + 1;
|
- 第一部分是对的逐时预报。使用最近6小时的预预报,并添加了一个作为页眉的单元格。
- 接下来的部分是每日预报。使用最近6天的每日预报,并添加了一个作为页眉的单元格。
|
1
|
注意:您使用表格单元格作为标题,而不是内置的、具有粘性的滚动行为的标题。这个table view设置了分页,粘性滚动行为看起来会很奇怪。
|
在WXController.m找到tableView:cellForRowAtIndexPath:,并用如下代码更换TODO:
|
1
2
3
4
5
6
7
8
9
10
11
12
13
14
15
16
17
18
19
20
21
22
|
if (indexPath.section == 0) {
// 1
if (indexPath.row == 0) {
[self configureHeaderCell:cell title:@"Hourly Forecast"];
}
else {
// 2
WXCondition *weather = [WXManager sharedManager].hourlyForecast[indexPath.row - 1];
[self configureHourlyCell:cell weather:weather];
}
}
else if (indexPath.section == 1) {
// 1
if (indexPath.row == 0) {
[self configureHeaderCell:cell title:@"Daily Forecast"];
}
else {
// 3
WXCondition *weather = [WXManager sharedManager].dailyForecast[indexPath.row - 1];
[self configureDailyCell:cell weather:weather];
}
}
|
- 每个部分的第一行是标题单元格。
- 获取每小时的天气和使用自定义配置方法配置cell。
- 获取每天的天气,并使用另一个自定义配置方法配置cell。
最后,添加如下代码到WXController.m:
|
1
2
3
4
5
6
7
8
9
10
11
12
13
14
15
16
17
18
19
20
21
22
23
24
25
26
27
28
29
|
// 1
- (void)configureHeaderCell:(UITableViewCell *)cell title:(NSString *)title {
cell.textLabel.font = [UIFont fontWithName:@"HelveticaNeue-Medium" size:18];
cell.textLabel.text = title;
cell.detailTextLabel.text = @"";
cell.imageView.image = nil;
}
// 2
- (void)configureHourlyCell:(UITableViewCell *)cell weather:(WXCondition *)weather {
cell.textLabel.font = [UIFont fontWithName:@"HelveticaNeue-Light" size:18];
cell.detailTextLabel.font = [UIFont fontWithName:@"HelveticaNeue-Medium" size:18];
cell.textLabel.text = [self.hourlyFormatter stringFromDate:weather.date];
cell.detailTextLabel.text = [NSString stringWithFormat:@"%.0f°",weather.temperature.floatValue];
cell.imageView.image = [UIImage imageNamed:[weather imageName]];
cell.imageView.contentMode = UIViewContentModeScaleAspectFit;
}
// 3
- (void)configureDailyCell:(UITableViewCell *)cell weather:(WXCondition *)weather {
cell.textLabel.font = [UIFont fontWithName:@"HelveticaNeue-Light" size:18];
cell.detailTextLabel.font = [UIFont fontWithName:@"HelveticaNeue-Medium" size:18];
cell.textLabel.text = [self.dailyFormatter stringFromDate:weather.date];
cell.detailTextLabel.text = [NSString stringWithFormat:@"%.0f° / %.0f°",
weather.tempHigh.floatValue,
weather.tempLow.floatValue];
cell.imageView.image = [UIImage imageNamed:[weather imageName]];
cell.imageView.contentMode = UIViewContentModeScaleAspectFit;
}
|
- 配置和添加文本到作为section页眉单元格。你会重用此为每日每时的预测部分。
- 格式化逐时预报的单元格。
- 格式化每日预报的单元格。
构建并运行您的App,尝试滚动你的table view,并…等一下。什么都没显示!怎么办?
如果你已经使用过的UITableView,可能你之前遇到过问题。这个table没有重新加载!
为了解决这个问题,你需要添加另一个针对每时预报和每日预报属性的ReactiveCocoa观察。
在WXController.m的-viewDidLoad中,添加下列代码到其他ReactiveCocoa观察代码中:
|
1
2
3
4
5
6
7
8
9
10
11
|
[[RACObserve([WXManager sharedManager], hourlyForecast)
deliverOn:RACScheduler.mainThreadScheduler]
subscribeNext:^(NSArray *newForecast) {
[self.tableView reloadData];
}];
[[RACObserve([WXManager sharedManager], dailyForecast)
deliverOn:RACScheduler.mainThreadScheduler]
subscribeNext:^(NSArray *newForecast) {
[self.tableView reloadData];
}];
|
构建并运行App;滚动table view,你将看到填充的所有预报数据。
给你的App添加效果
本页面为每时和每日预报不会占满整个屏幕。幸运的是,有一个非常简单的修复办法。在本教程前期,您在-viewDidLoad中获得屏幕高度。
在WXController.m中,查找table view的委托方法-tableView:heightForRowAtIndexPath:,并且替换TODO到return的代码:
|
1
2
|
NSInteger cellCount = [self tableView:tableView numberOfRowsInSection:indexPath.section];
return self.screenHeight / (CGFloat)cellCount;
|
屏幕高度由一定数量的cell所分割,所以所有cell的总高度等于屏幕的高度。
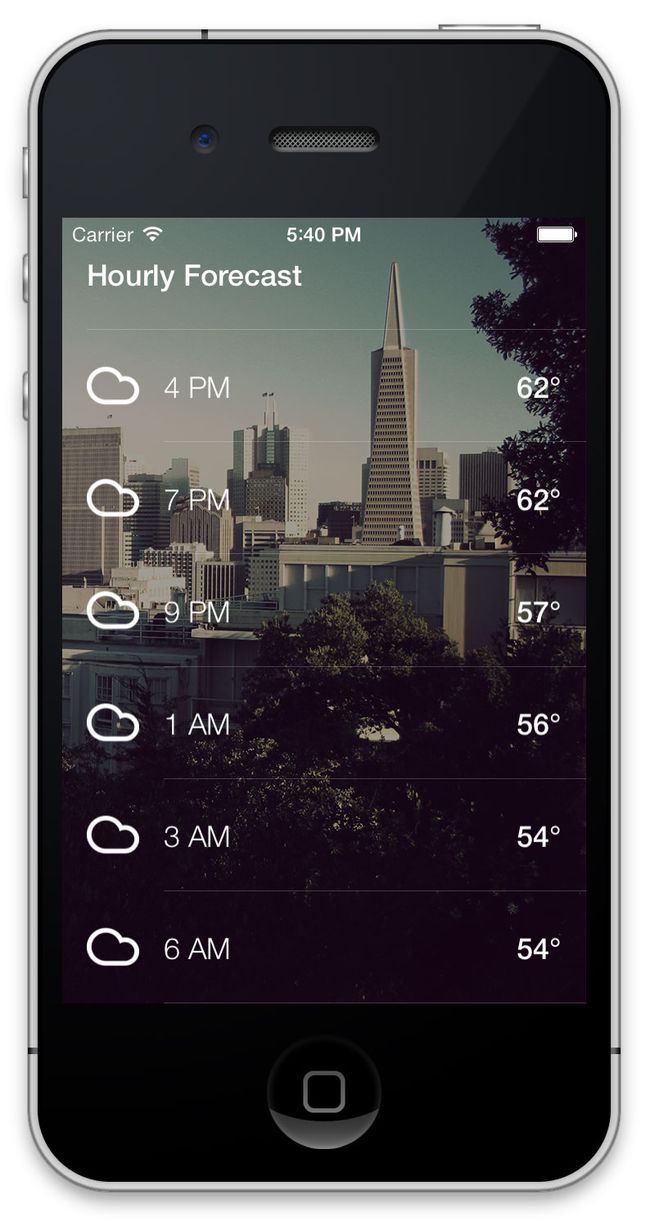
构建并运行你的App;table view填满了整个屏幕,如下所示:
最后要做的是把我在本教程的第一部分开头提到的模糊效果引入。当你滚动预报页面,模糊效果应该动态显示。
添加下列scroll delegate到WXController.m最底部:
|
1
2
3
4
5
6
7
8
9
10
11
|
#pragma mark - UIScrollViewDelegate
- (void)scrollViewDidScroll:(UIScrollView *)scrollView {
// 1
CGFloat height = scrollView.bounds.size.height;
CGFloat position = MAX(scrollView.contentOffset.y, 0.0);
// 2
CGFloat percent = MIN(position / height, 1.0);
// 3
self.blurredImageView.alpha = percent;
}
|
- 获取滚动视图的高度和内容偏移量。与0偏移量做比较,因此试图滚动table低于初始位置将不会影响模糊效果。
- 偏移量除以高度,并且最大值为1,所以alpha上限为1。
- 当你滚动的时候,把结果值赋给模糊图像的alpha属性,来更改模糊图像。
构建并运行App,滚动你的table view,并查看这令人惊异的模糊效果:
