centos7 mysql 的安装与简单配置使用(glibc版)
glibc版的mysql是已经编译好的文件,就相当于是绿色软件。所以需要一番配置就可以开始用了。
=============正题==================
我下载的版本为 mysql-5.7.11-linux-glibc2.5-x86_64.tar.gz
# tar zxvf mysql-5.7.11-linux-glibc2.5-x86_64.tar.gz
# mv mysql-5.7.11-linux-glibc2.5-x86_64 /usr/local/mysql
//添加mysql用户组
# groupadd mysql
# useradd -r -g mysql -s /bin/nologin mysql // -s /bin/nologin 表示mysql 不能作为登入用户
# cd /usr/local/mysql/
# mkdir data //创建数据库保存文件夹
# chmod 770 data
# sudo chown -R mysql . //注意最后有个点(改变所有文件)
# sudo chgrp -R mysql .
//初始化mysql
# bin/mysqld --initialize --user=mysql --basedir=/usr/local/mysql --datadir=/usr/local/mysql/data
[Note] A temporary password is generated for root@localhost: !x?df8oj6f8 //注意红色部分,一定要记下来,这是生成的root用户的密码,待会登陆需要
# bin/mysql_ssl_rsa_setup --basedir=/usr/local/mysql --datadir=/usr/local/mysql/data
# chown -R root .
# chown -R mysql data
# bin/mysqld_safe --user=mysql -basedir=/usr/local/mysql --datadir=/usr/local/mysql/data
//将mysql加入到启动服务文件夹内,就可以用 service mysql start | stop |restart 控制启动,关闭及重启mysql
# cp support-files/mysql.server /etc/init.d/mysqld
# vim /etc/my.cnf
//在文件中加入以下内容
[mysqld]
basedir=/usr/local/mysql
datadir=/usr/local/mysql/data
socket=/tmp/mysql.sock
port = 3306
[mysql.server]
user=mysql
[mysqld_safe]
err-log=/usr/local/mysql/data/mysql.log
pid-file=/usr/local/mysql/data/mysql.pid
//配置环境变量
# vim /etc/profile
//在文件的最后添加
export MYSQL_HOME="/usr/local/mysql"
export PATH="$PATH:$MYSQL_HOME/bin"
# source /etc/profile //使环境变量生效
//启动mysql服务
# service mysqld start
Starting MySQL. SUCCESS!
//登陆到root (密码为刚才生成的)
# mysql -u root -p
Enter password:
//登陆后提示如下。。。
Welcome to the MySQL monitor. Commands end with ; or \g.
Your MySQL connection id is 2
Server version: 5.7.11 MySQL Community Server (GPL)
Copyright (c) 2000, 2016, Oracle and/or its affiliates. All rights reserved.
Oracle is a registered trademark of Oracle Corporation and/or its
affiliates. Other names may be trademarks of their respective
owners.
Type 'help;' or '\h' for help. Type '\c' to clear the current input statement.
mysql>
//修改root密码
mysql> set password=password('myPassword'); //注意在mysql中语句需要以分号结束
=======至此mysql已经可以正常使用============
============用c++连接到nysql==========
安装到了这里如何来用c++连接到数据库呢
其实只需要包含/usr/local/mysql/include/mysql.h文件就好,在/usr/local/mysql/lib下有libmysqlclient.so的动态库,编译的时候链接就好。
示例(本人用的QtCreator,就用qt作示例了):
#include <iostream>
#include <mysql.h>

using namespace std;

void Test()
{
    MYSQL mysql; //need a instance to init

    //connect the database
    mysql_init(&mysql);

    if(!mysql_real_connect(&mysql,"localhost","lin","123456","test",0,nullptr,0))
    {
        cout<<"Error connecting database: "<<mysql_errno(&mysql)<<endl;
    }
    else
        cout<<"Connected...\n";
}

int main()
{
    Test();
    return 0;
}
然后在 qt的工程文件(.pro)中添加这两句
INCLUDEPATH += /usr/local/mysql/include/
LIBS += -L/usr/local/mysql/lib -lmysqlclient
如果不用qt,使用g++编译:
g++ main.cpp -I/usr/local/mysql/include -L/usr/local/mysql/lib -lmysqlclient
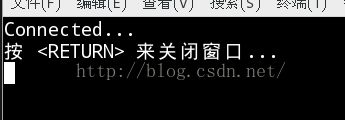
运行结果(主要是演示可以使用api进行数据库操作,具体的mysql操作方法。。。。本人也还是个菜鸟):
