前言
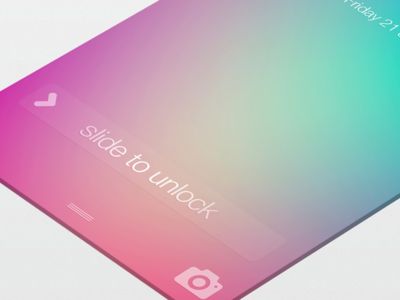
你是否注意到,“渐变设计”已经成为了一种美的体验。无论是APP的icon,还是PPT的背景,渐变色都比纯色要多一分丰富。
渐变,一位不愿意透露姓名的的设计师PigUpTree表示可以吹一下午——线性渐变、径向渐变、相近色渐变、半透明色渐变、选区和羽化、高斯模糊、扁平化配色与渐变等等。程序员小生一枚的我,拜倒树下。
本文从代码角度,谈谈实现
- 线性渐变
- 径向渐变
- 渐变动画
- Lable字体渐变
- Lable字体渐变动画
最终效果:
WHGradientHelper具体实现及效果
1. 线性渐变(Linear Gradient)
“线性渐变”按照渐变方向分成4种类型,分别是:
typedef NS_ENUM(NSInteger, WHGradientDirection) {
    WHLinearGradientDirectionLevel,                 //AC - BD
    WHLinearGradientDirectionVertical,              //AB - CD
    WHLinearGradientDirectionUpwardDiagonalLine,    //A - D
    WHLinearGradientDirectionDownDiagonalLine,      //C - B
};
//      A         B
//       _________
//      |         |
//      |         |
//       ---------
//      C         D
- CAGradientLayer是用来生成两种或更多颜色平滑渐变的。用Core Graphics复制一个CAGradientLayer并将内容绘制到一个普通图层的寄宿图也是有可能的,但是CAGradientLayer的真正好处在于绘制使用了硬件加速。
- 这些渐变色彩放在一个数组中,并赋给colors属性。这个数组成员接受CGColorRef类型的值(并不是从NSObject派生而来),所以我们要用通过bridge转换以确保编译正常。
- CAGradientLayer也有startPoint和endPoint属性,他们决定了渐变的方向。这两个参数是以单位坐标系进行的定义,所以左上角坐标是{0, 0},右下角坐标是{1, 1}。
聪明的你一下子就想到了4个方向 - 利用context,创建layer的image
PS. 当然你可以直接返回layer,然后加在view上,但这样需要自己维护layer的frame,相信我,你不会愿意的,特别是navigationBar的backimage。
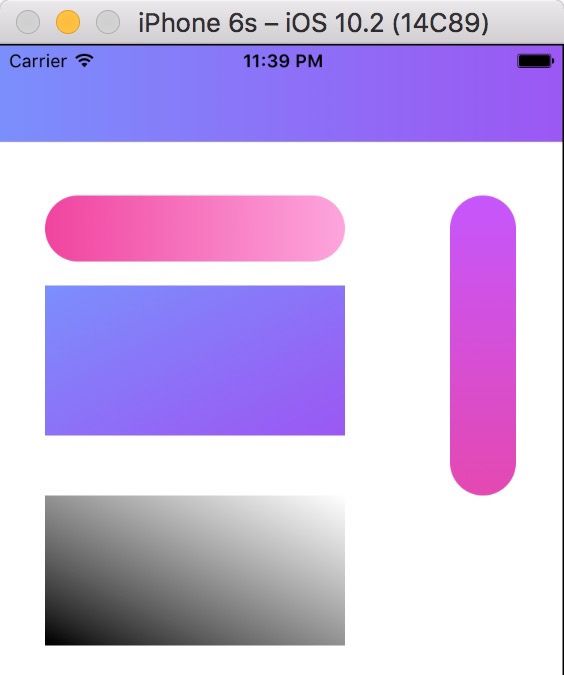
效果图:
2. 径向渐变(Radial Gradient)
主要实现方法 CGContextDrawRadialGradient::
CG_EXTERN void CGContextDrawRadialGradient(CGContextRef cg_nullable c,
    CGGradientRef cg_nullable gradient, CGPoint startCenter, CGFloat startRadius,
    CGPoint endCenter, CGFloat endRadius, CGGradientDrawingOptions options)
    CG_AVAILABLE_STARTING(__MAC_10_5, __IPHONE_2_0);
- 创建一个CGGradient对象,提供一个颜色空间,一个饱含两个或更多颜色组件的数组,一个包含两个或多个位置的数组,和两个数组中元素的个数。
- 调用CGContextDrawLinearGradient或CGContextDrawRadialGradient函数并提供一个上下文、一个CGGradient对象、绘制选项和开始结束几何图形来绘制渐变。
- 当不再需要时释放CGGradient对象。
效果图:
3. 渐变动画(ChromatoAnimation)
动画的主要思路是用CAKeyframeAnimation生成渐变帧动画,然后加在CAGradientLayer上。
CAKeyframeAnimation *chromateAnimate = [CAKeyframeAnimation animationWithKeyPath:@"colors"];

    chromateAnimate.values = @[@[(__bridge id)UIColorFronHSB(0.63, 0.69, 0.88).CGColor, (__bridge id)UIColorFronHSB(0.75, 0.69, 0.88).CGColor],
                               @[(__bridge id)UIColorFronHSB(0.73, 0.69, 0.88).CGColor, (__bridge id)UIColorFronHSB(0.85, 0.69, 0.88).CGColor],
                               @[(__bridge id)UIColorFronHSB(0.83, 0.69, 0.88).CGColor, (__bridge id)UIColorFronHSB(0.95, 0.69, 0.88).CGColor],
                               @[(__bridge id)UIColorFronHSB(0.88, 0.69, 0.88).CGColor, (__bridge id)UIColorFronHSB(1, 0.69, 0.88).CGColor],
                               @[(__bridge id)UIColorFronHSB(0.98, 0.69, 0.88).CGColor, (__bridge id)UIColorFronHSB(0.1, 0.69, 0.88).CGColor],
                               @[(__bridge id)UIColorFronHSB(1, 0.69, 0.88).CGColor, (__bridge id)UIColorFronHSB(0.12, 0.69, 0.88).CGColor],
                               @[(__bridge id)UIColorFronHSB(0.1, 0.69, 0.88).CGColor, (__bridge id)UIColorFronHSB(0.22, 0.69, 0.88).CGColor],
                               @[(__bridge id)UIColorFronHSB(0.2, 0.69, 0.88).CGColor, (__bridge id)UIColorFronHSB(0.32, 0.69, 0.88).CGColor],
                               @[(__bridge id)UIColorFronHSB(0.3, 0.69, 0.88).CGColor, (__bridge id)UIColorFronHSB(0.42, 0.69, 0.88).CGColor],
                               @[(__bridge id)UIColorFronHSB(0.4, 0.69, 0.88).CGColor, (__bridge id)UIColorFronHSB(0.52, 0.69, 0.88).CGColor],
                               @[(__bridge id)UIColorFronHSB(0.5, 0.69, 0.88).CGColor, (__bridge id)UIColorFronHSB(0.62, 0.69, 0.88).CGColor],
                               @[(__bridge id)UIColorFronHSB(0.6, 0.69, 0.88).CGColor, (__bridge id)UIColorFronHSB(0.72, 0.69, 0.88).CGColor],
                               @[(__bridge id)UIColorFronHSB(0.63, 0.69, 0.88).CGColor, (__bridge id)UIColorFronHSB(0.75, 0.69, 0.88).CGColor]];
    chromateAnimate.keyTimes = @[@0, @0.1, @0.2, @0.25, @0.35, @0.37, @0.47, @0.57, @0.67, @0.77, @0.87, @0.97, @1];
    chromateAnimate.duration = 10;
    chromateAnimate.removedOnCompletion = NO;
    chromateAnimate.repeatCount = MAXFLOAT;

    [chromatoLayer addAnimation:chromateAnimate forKey:@"chromateAnimate"];
效果图:
4. Lable字体渐变
实现思路参考了 这篇文章 :
效果图:
5. Lable字体渐变动画
在这提供两种实现方式:
- 思路都是从上面一步一步来的,聪明的你可能已经想到了,上面的3+4(渐变动画+lable渐变),就组合了lable字体渐变动画。
+(void)addGradientChromatoAnimationForLableText:(UIView *)parentView lable:(UILabel *)lable
{
    if (parentView == nil || lable == nil) {
        return;
    }

    [parentView addSubview:lable];

    CAGradientLayer *chromatoLayer = [CAGradientLayer layer];
    [chromatoLayer setColors:@[(__bridge id)UIColorFronHSB(0.63, 0.69, 0.88).CGColor, (__bridge id)UIColorFronHSB(0.75, 0.69, 0.88).CGColor]];
    [chromatoLayer setStartPoint:CGPointMake(0, 0)];
    [chromatoLayer setEndPoint:CGPointMake(1, 0)];
    chromatoLayer.locations = @[@(0.0f) ,@(1.0f)];
    [chromatoLayer setFrame:parentView.frame];

    CAKeyframeAnimation *chromateAnimate = [self createGradientChromatoKeyAnimation];

    [chromatoLayer addAnimation:chromateAnimate forKey:@"chromateAnimate"];

    [parentView.layer addSublayer:chromatoLayer];
    chromatoLayer.mask = lable.layer;
    chromatoLayer.frame = chromatoLayer.bounds;
}
- 这个实现想法很简单,但很笨。3(渐变动画)+镂空的image,就是本文开始实现的效果。在此感谢PigUpTree的镂空图片支持(厉害了)。
效果图:
WHGradientHelper头文件
#import

#define kDefaultWidth 200
#define kDefaultHeight 200

typedef NS_ENUM(NSInteger, WHGradientDirection) {
    WHLinearGradientDirectionLevel,                 //AC - BD
    WHLinearGradientDirectionVertical,              //AB - CD
    WHLinearGradientDirectionUpwardDiagonalLine,    //A - D
    WHLinearGradientDirectionDownDiagonalLine,      //C - B
};
//      A         B
//       _________
//      |         |
//      |         |
//       ---------
//      C         D

@interface WHGradientHelper : NSObject

//   Linear Gradient
+ (UIImage *)getLinearGradientImage:(UIColor *)startColor and:(UIColor *)endColor directionType:(WHGradientDirection)directionType;/* CGSizeMake(kDefaultWidth, kDefaultHeight) */
+ (UIImage *)getLinearGradientImage:(UIColor *)startColor and:(UIColor *)endColor directionType:(WHGradientDirection)directionType option:(CGSize)size;

//    Radial Gradient
+ (UIImage *)getRadialGradientImage:(UIColor *)centerColor and:(UIColor *)outColor;/* raduis = kDefaultWidth / 2 */
+ (UIImage *)getRadialGradientImage:(UIColor *)centerColor and:(UIColor *)outColor option:(CGSize)size;

//   ChromatoAnimation
+ (void)addGradientChromatoAnimation:(UIView *)view;

//   LableText LinearGradient and ChromatoAnimation
+ (void)addLinearGradientForLableText:(UIView *)parentView lable:(UILabel *)lable start:(UIColor *)startColor and:(UIColor *)endColor;  /* don't need call 'addSubview:' for lable */
+ (void)addGradientChromatoAnimationForLableText:(UIView *)parentView lable:(UILabel *)lable; /* don't need call 'addSubview:' for lable */
Github链接:
https://github.com/Balzac646729740/WHGradientHelper


